Page 1 of 6

Re: MY78 343DL Black Beauty - Exhausted

Posted: 26 Dec 2011 05:11 pm
by macplaxton
Well I thought I'd best start a thread for this car.

I recently got round to drilling some holes in some number plates. This has taken me some time, as I first had to register the car and hand over money (€200 sm2 ). Then I had to wait a while for the plates to be made up and go and fetch them. Couldn't fit them when I got them, as I was waiting for some wheels along with the number plate brackets to come back from the powder coaters...Then I needed to find some less grotty screws for said brackets. Now it's just bloody cold outside! Excuses, excuses.

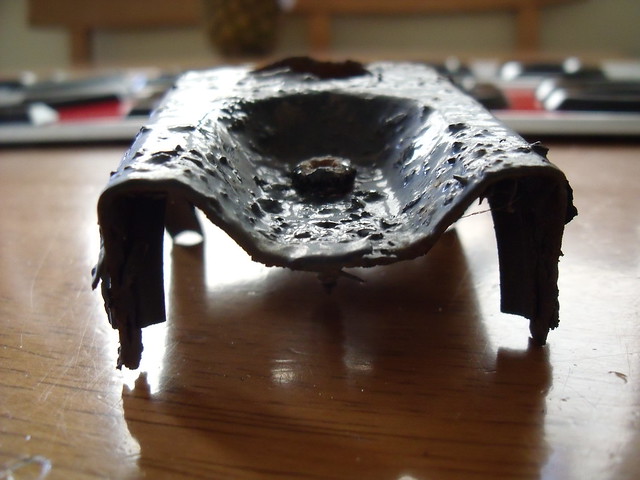
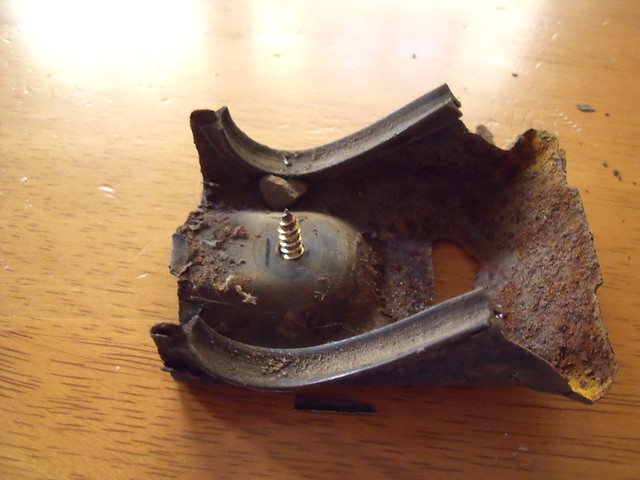
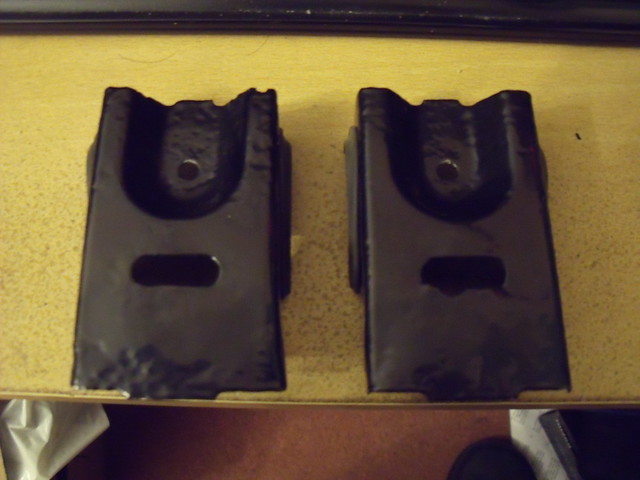
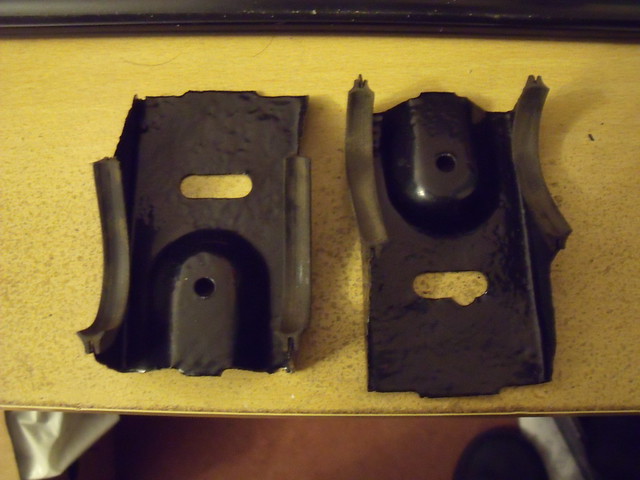
The front number plate is held on by two regular plastic number plate screws. These screws are secured in 20mm long slots to allow horizontal variation of number plate holes depending on how you drill your plate. The 2 brackets are pressed steel and have two rubber strips per side between the bracket and front valance. They are secured to the valance by two screws (4.2mm x 16mm pan-head Pozidrive self-tapping) into plastic inserts in the valance.

Image
Image
Image
Image

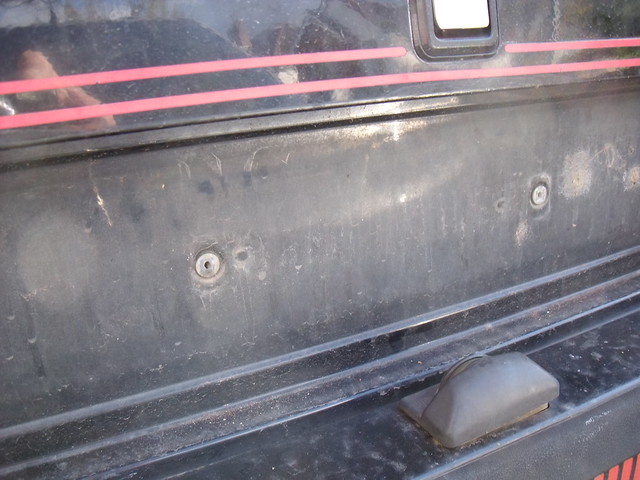
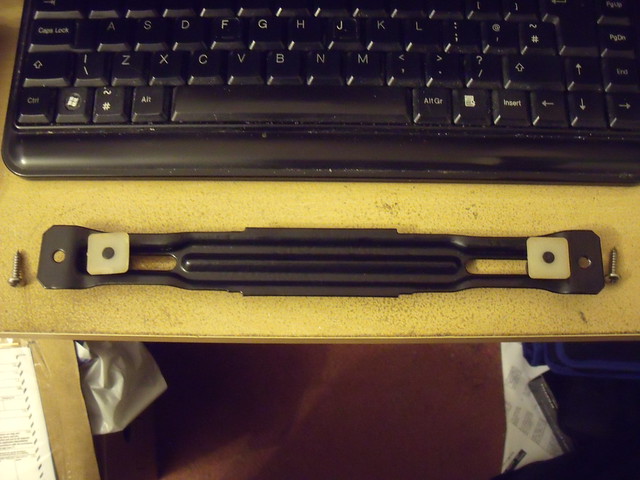
The rear number plate is held on in a similar fashion, however the plastic number plate screws this time screw into captive plastic nuts which are held in place by a slider bar which is in turn screwed into plastic inserts on the rear panel.

Image
Image
Image

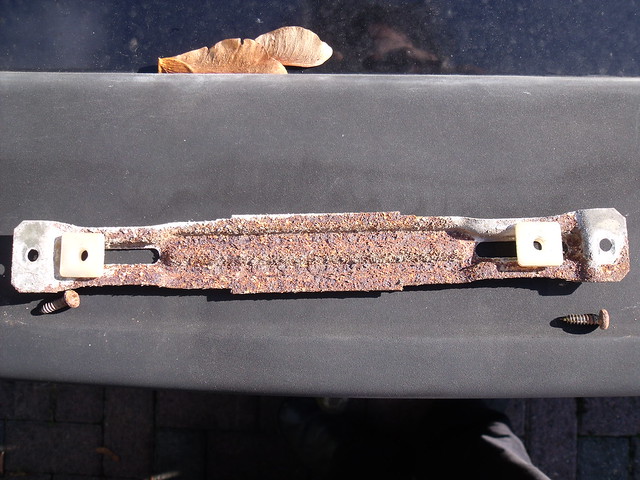
The front ones were quite rusty and bent where the plate must have taken a knock at the bottom edge, but I straightened them out as best I could. The rear bar was also surface rusty, so I just chucked them all in to get blasted and powder coated. Front ones although crappy, at least look like this now:
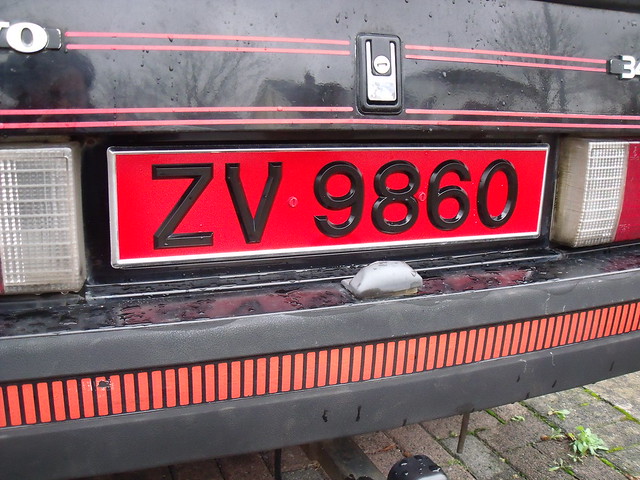
Image
Image

and the rear:

Image
Image

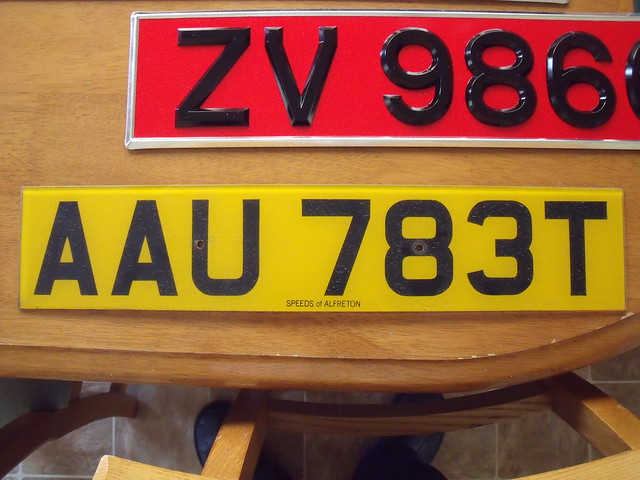
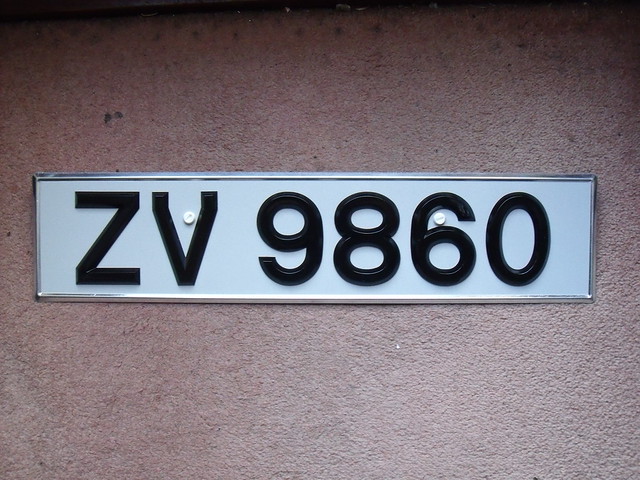
Goodbye old plates, hello new:

Image
Image

Now there was the lengthy period of careful consideration and many, many measurements. Being old-school plates with riveted-on digits, I had a take care not to plonk the holes in the wrong place and in the gaps between the digits.

The rear one was quite easy as there is a lot more horizontal movement available.

Image

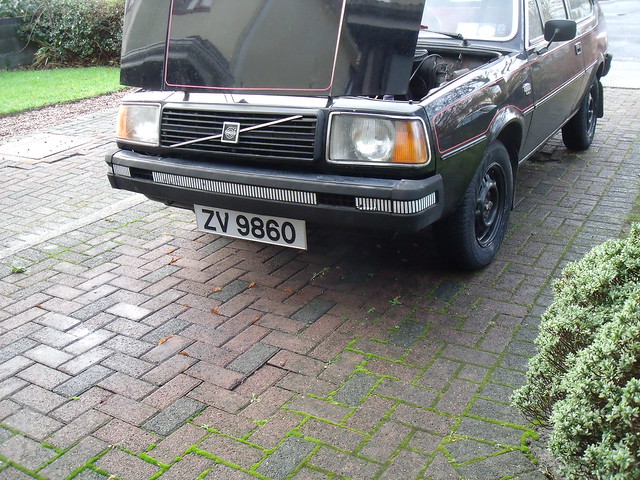
The front one was a bit more difficult with less horizontal movement and the spacing of the mounting brackets, so I had to move the plate down a bit.

Image

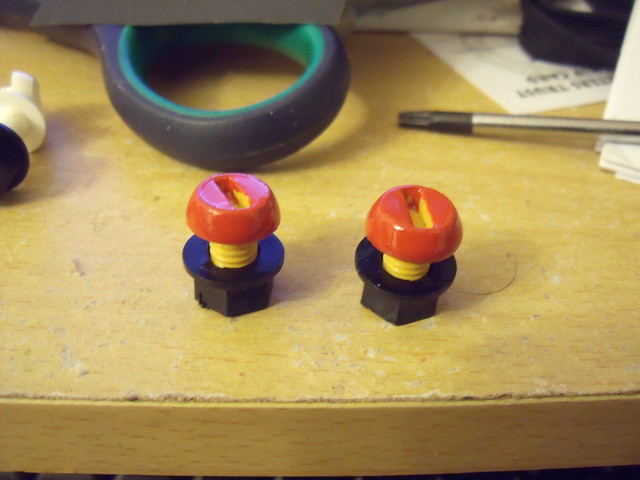
With plastic screws, you can readily obtain them in white, yellow, black and blue - but not red. So had to get some red paint out.

Image

So after all that, I now have front and rear plates attached to the car:

Image
Image

Re: MY78 343DL Black Beauty

Posted: 26 Dec 2011 05:24 pm
by MCHUDD
Hi mate.
Car is looking spot on.
Those plates are better looking than the plastic jobs we get up here.
Cheers Mark.
sm69 sm69 sm69 sm69 sm69 sm69 sm69 sm69 sm69

Re: MY78 343DL Black Beauty - Flipper

Posted: 26 Dec 2011 05:56 pm
by macplaxton
Cheers Mark, I got one of the last four number ZV plates (Dublin's 2nd allocation runs from 7201 to 17200), they had 110 left up to 9999, but then the spoilsports jumped up to 10001 at the start of December, some areas already had five number ZVs, but the whole system is crap. No proper age-related plates here :x At least my registration can be shown properly on the old style plates.

Next up was a small job involving
Image

No! NOT FLIPPER
Image

I had to replace the plate that holds the towing electrics socket and also needed a tow ball cover. Chrome is a bit too bling for me, but I wanted a flipper. Bradley Doublelock only do the chrome ones now, but in the past, they did a black one. Luckily I managed to lay my hands on a black one. 8) For those that don't know what a flipper is, it is

Image

and looks like,

Image

Even the instruction sheet font and style looks like it is straight from the 1970s.

Image

Unfortunately, it's hee-haw use to those continental folk who don't tend to have flanged tow bars.

Re: MY78 343DL Black Beauty

Posted: 26 Dec 2011 06:02 pm
by volvosneverdie
Always keep your ball covered. Thats my motto. :lol:

Re: MY78 343DL Black Beauty - winter wheels

Posted: 26 Dec 2011 06:31 pm
by macplaxton
Good advice there VND!

Still had another few wee jobs to do before I could use the car again. It had sat on the drive for two months :oops:

First was to find a 24mm socket to remove the locking wheel nuts as the key had gone walkabout long before I got the car :x

Image

I think you can still get them in that style, but they might need threads tapping in them for the old-school stainless domed covers. Modern ones have naff chrome effect plastic hex covers. Then it was trip down to Halfords (it was Sunday or something and I still get 15% off with my ex-insurer's discount card) and all I could get were some McGard 24152 lockers which are a bit tall for my liking, but I couldn't be bothered finding some regular nuts.

Image

Off came the GT alloys (and out came the spare, which is also a GT), with 5 completely different tyres. The main 4 were apparently £10 a piece fitted from the scrappy, but having driven the holiday on them, I wasn't a big fan of their qualities.

Image

And with an ex-VND set of 4 steelies (the ones I got a couple of winters ago), that were back from the powder coaters

Image

They were shod with four new tyres (ignore the rogue Pug 106 spare on the top of the pile - job on the wife's car)

Image

I now have on these:

Image

Four 175/70 13 Vredestein Snowtrac 3s which will be on until Spring. The GT wheels have gone to the powder coaters in the meantime. I'm still waiting for some cold weather though...today it's been 11C. :(

Image

Re: MY78 343DL Black Beauty - fuel filter

Posted: 26 Dec 2011 06:56 pm
by macplaxton
Having sat for 2 months, the carb had gone dry. I had fitted an in-line fuel filter to stop crap getting to the carb, but I had positioned it just before the mechanical pump. This doesn't appear to be optimal, as the pump seems unable to draw from the tank when cranking a dry system. It's fine if there is fuel in the float chamber of the carb, as it'll fire up from the fuel in there and operate the pump fast enough to continue to pull fuel through.

Even though it hadn't been on long (say 600-odd miles), it had a lot of sediment in it.

Image

So off it came and another fitted

Image

Then I primed the float chamber from a petrol can and connected everything back up. Starting then was easy. During the job, I found the battery didn't have all that much spare oomph to crank the engine over for a period. I took it inside to give it a charge, refit it when done, and made a mental note to do something about it later.

Re: MY78 343DL Black Beauty - number plates

Posted: 26 Dec 2011 08:23 pm
by MCHUDD
Hi mate.
The steelies look good. I am not a great fan of them but when
they are done up they look well.
This motor looks like its getting ready for another epic road trip :lol:
Cheers Mark.
sm69 sm69 sm69 sm69 sm69 sm69 sm69 sm69 sm69 sm69

Re: MY78 343DL Black Beauty - number plates

Posted: 27 Dec 2011 04:44 pm
by S10NPH
Hi

Good to see some more pictures, although those plate designs look very foreign to my British-trained eyes! I do like the raised numbering though. When's work going to commence on the rear quarter?

Siôn

Re: MY78 343DL Black Beauty - number plates

Posted: 27 Dec 2011 07:59 pm
by Nimminz
looking good! I can't decide which wheels i like best, the steelies or the GT alloys lol

Re: MY78 343DL Black Beauty - number plates

Posted: 27 Dec 2011 08:34 pm
by volvosneverdie
I think the steels look awesome coated personally. 8)

Re: MY78 343DL Black Beauty - number plates

Posted: 28 Dec 2011 12:20 am
by SteveP
Get some chrome beauty rings on them steelies :)

Re: MY78 343DL Black Beauty - number plates

Posted: 28 Dec 2011 09:22 am
by macplaxton
S10NPH wrote:When's work going to commence on the rear quarter?
Siôn, it'll commence sometime next year. That side of the car really wants doing first. It's a bit ropey underneath, not helped by scrapyard handling.
SteveP wrote:Get some chrome beauty rings on them steelies :)
Booo!!! But I'm trying to find something black to go in the middle and cover up the nuts and hubs.

Update in the pipeline later

Re: MY78 343DL Black Beauty - Vario swap

Posted: 28 Dec 2011 08:13 pm
by macplaxton
Update time. The transmission on this car needed swapping. The original has rust on the pulleys in the wrong places and consequently had become a belt eater - estimate of 4K miles for a pair. :shock: Out it had to come...

I went down the road yesterday around 3.30pm to where I have my stash, and after a bit of chat, it was dark (maybe 5.30pm?) and I set about doing some work on the car.

Part one was to extract a good Vario out of car one. Outside, with it blowing a hooley. Seems simple enough, but it's sitting on soft ground and minus a front strut, so I can't exactly move it to the workshop to do it. :?
After a prolonged period of time (didn't really do much clock watching) and probably around 10pm I had the thing out.

Image

This one is nice as the pulleys faces you could eat your dinner off. So clean! (as an aside, when did they get rid of those plastic fan blades on the inside of the primary halves? or are they missing?)

Some pics of the old one:
In the car:
Image

nearside primary corrosion
Image
nearside secondary corrosion
Image
offside primary corrosion
Image
offside secondary corrosion
Image

I should of got some of the replacement unit, the pulleys on that are absolutely mint.

Part two was to extract the Vario from the BB (which was also missing both parts of the plastic transmission guard). The things that hampered extraction: couple of CV joint bolts - the socket heads were a bit mashed. Managed to get them out by reversing a 8mm socket bit (the bit that goes into the bit-holder is slightly over 6mm :wink: ). The pin that goes into the selector rod at the transmission end. The pin was seized into the small metal bush that sits inside the nylon bush. Work was a bit easier indoors and on the lift.

Decided to stack some tyres up
Image

and dump the unit on the stack
Image

Part three was to get the replacement Vario back in. That was a bit tricky. Decided on using a trolley jack as it is more manoeuvrable. Got it back in again, but had a few things to contend with that ate loads of time up. The killer was trying to sort out the pin to go into the selector rod at the transmission end.

The one in the car was damaged. It was one of those with a sliding clip into a groove in the end. However the opposite end seemed to be a small washer fitted in a groove and peened over? Either way cobbling it back together was rather fruitless as the head came off it sm2 . Why didn't I use the clevis pin from the other car? Well when I took it out, I didn't lose the R-clip. But I didn't catch the pin, but it didn't fall to the floor. Then when I was doing another bit, I heard/felt it falling onto my chest. Then I could find the damn thing. After all the fruitless messing with the other pin, and several in the dark expeditions to try and find the old pin on grass. I was about to give up. Then I went for about the 7th visit outside and a smoke and found it at the back of the car! This time it was about 5.30am. Don't you just love those jobs that go waaaaay over schedule.

Last job was to adjust the length of the selector rod and everything was good on the way home. I didn't change the Roulunds belts on this transmission as there is a bit to go before they're dead.

Now I don't know why I took the "book of lies" down with me. It does give instructions on how to remove the transmission whole, but there are a few omissions.

Here's a quick run-down off the top of my head of the process:
1) Remove propshaft by sliding it back first off the front spline ad then forwards odd the rear spline.
2) Remove transmission covers inner and outer. (dropping the exhaust at the rear will give some more room)
3) Undo drive shaft coupling at the inner ends and tie back.
4) Unclip handbrake cable supports on rear Vario support bar.
5) Undo handbrake cable coupling above middle of Vario and move out of the way.
6) Remove selector rod pin from primary unit selector arm.
7) Remove selector rod pin from gear lever end and move rod forwards out of the way (or remove selector rod support bracket and take out the whole thing)
8) Remove both Vario F-R vacuum hoses from T-pipe in the middle.
9) Slacken the four outer corner mounting nuts and get rear to catch the lump with something suitable. WARNING! It's around 80kg.
10) I've probably forgot something, let me know if I have!

340pw

Edit: Forgot to add that I buggered up the two rear rubber mounts on the car. I recommend thoroughly cleaning the exposed threads first and soaking them in something like Plus Gas, rather than brute force :oops: That way the bolts won't tear out. I bust both rear ones. Fortunately, rather than going out in the heavy rain that came later on to retrieve a pair from car one, I ventured into another barn to have a quick check in boxes of DAF 66 leftovers and as luck would have it, I'd saved all four from the crashed one. Save me a lot of time/drowning. The two front ones are smaller. All four are identical to DAF 66 ones (which is no surprise really).

Re: MY78 343DL Black Beauty - Corrosion assessment

Posted: 29 Dec 2011 03:11 pm
by macplaxton
Without the MOT man's toffee hammer...

Image

...But with eyeball Mk1.

The other night wasn't the night to go prodding the hell out of the shell, but I'd did have a bit of a butchers in between swearing at the Vario. Most of it is plain old rust, with the odd bit of scrapyard handling damage thrown in. It really was very, very close to crusher when Stefan stepped in.

Starting at the offside rear of the sill outer
Image
offside rear jacking point inner
Image
Image
offside front outrigger (just behind front wheelarch)
Image
offside front sill outer
Image
Image
offside front sill inner
Image
offside middle sill outer
Image
offside transmission cooling duct/chassis leg
Image
nearside middle outer
Image
nearside middle inner
Image
nearside rear transmission cooling duct/chassis leg
Image

A shed load of work to do on this during 2012. :cry:

Re: MY78 343DL Black Beauty - Corrosion assessment

Posted: 29 Dec 2011 03:27 pm
by Chris_C
Ouch :s

I'll offer some sacrifices to the god's of Mig if I was you chap :shock: Are you going to straighten out the forklift marks on the rails too?

Those sills arn't too bad to do as long as you are methodical at least, but it'd going to be a fair chunk of time.