^ I think about a page back, theres a pic of a new spangly Propane heater.
MMMMmmmmMMmmm. Warm.
Turbo 360: More potential shell ruining lol
-
volvosneverdie
- *** V3M DONOR ***
- Posts: 9143
- Joined: 11 Nov 2008 04:22 pm
- Location: Newcastle Upon Toon

Re: Turbo 360: Door repairs
Correct. I shook the Gumtree, and a 90's style Calor gas fire fell from it, barely used, on my doorstep, very efficient and hot as hell. All for a tenner! Shame the gas is about £34 per bottle now. 
I don't always have the fire on mind, depends what I'm doing. It is handy as hell though, no doubt.
I don't always have the fire on mind, depends what I'm doing. It is handy as hell though, no doubt.
STREETO WITHDRAWL
INTO BURNOUTSsince1982
INTO BURNOUTSsince1982
Re: Turbo 360: Door repairs
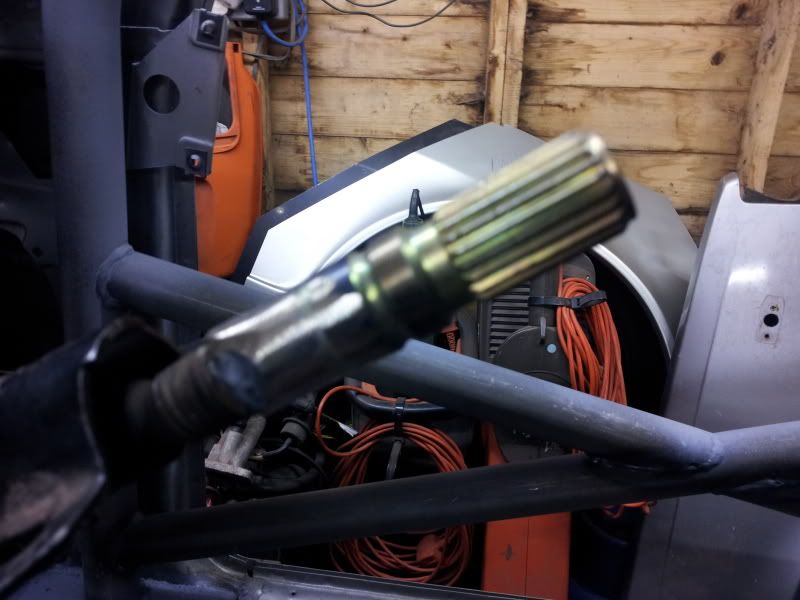
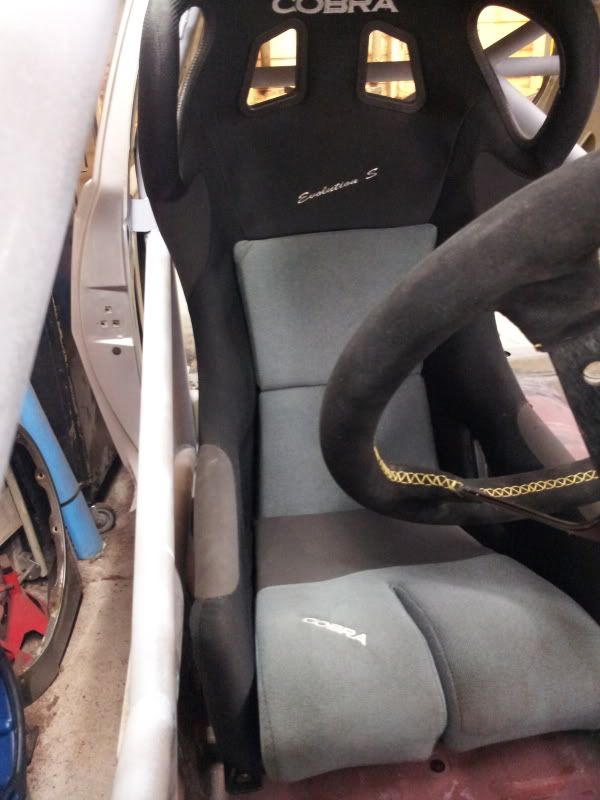
Got this
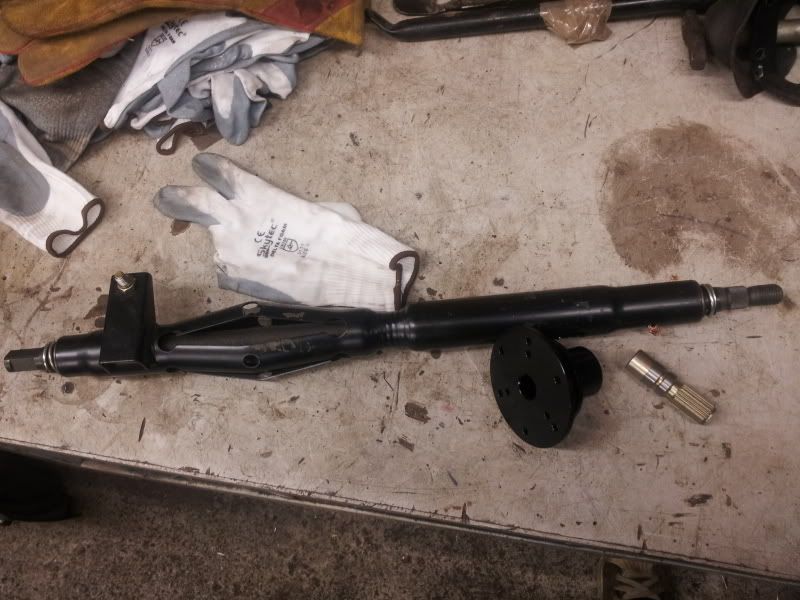
Hopefully when my father returns from work tomorrow (today :/) it shall be one with the column and I can see what's what as far as centreing my seat goes, then get the correct height magic wand etc.
Hopefully when my father returns from work tomorrow (today :/) it shall be one with the column and I can see what's what as far as centreing my seat goes, then get the correct height magic wand etc.
STREETO WITHDRAWL
INTO BURNOUTSsince1982
INTO BURNOUTSsince1982
Re: Turbo 360: 2moro brings steering and seating shennigans
Well, I wasted the day until 4 pm. I'm so knackered all of the time lately. I need to sort this out. Consequently, I am still to weld my bosses into the seat rails.
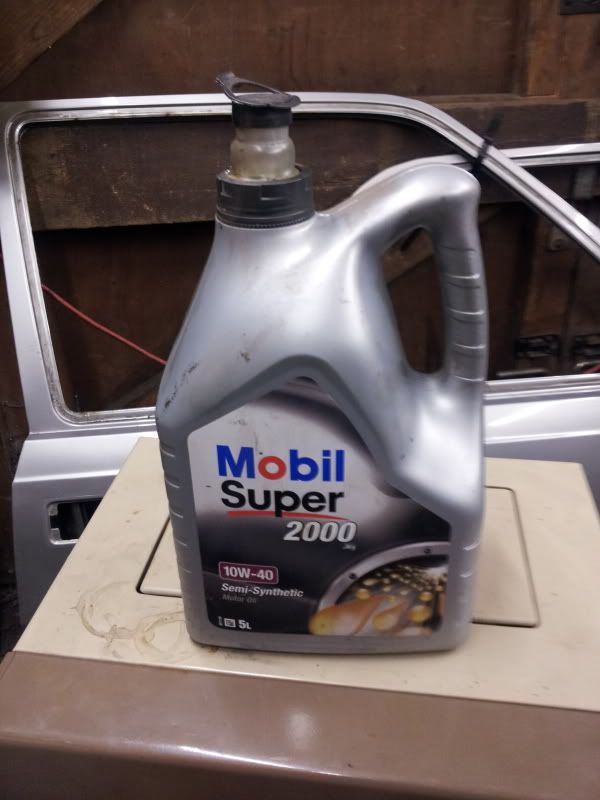
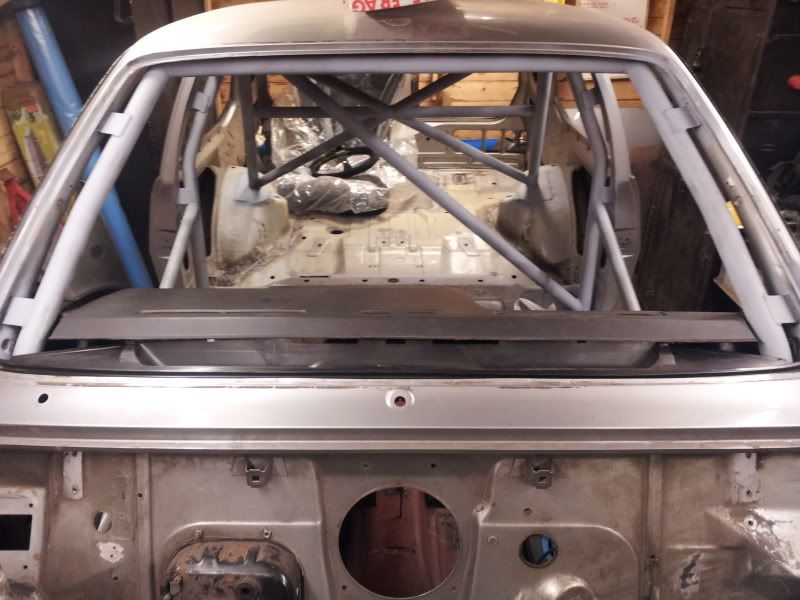
Anyway, decided to paint the cage. Seeing as when I got the shell back, to stop it rusting I had previously covered it in this
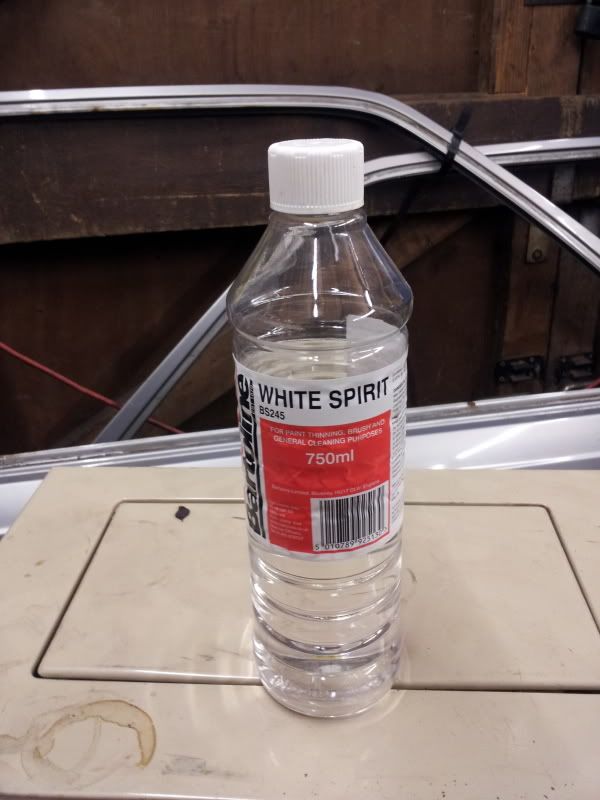
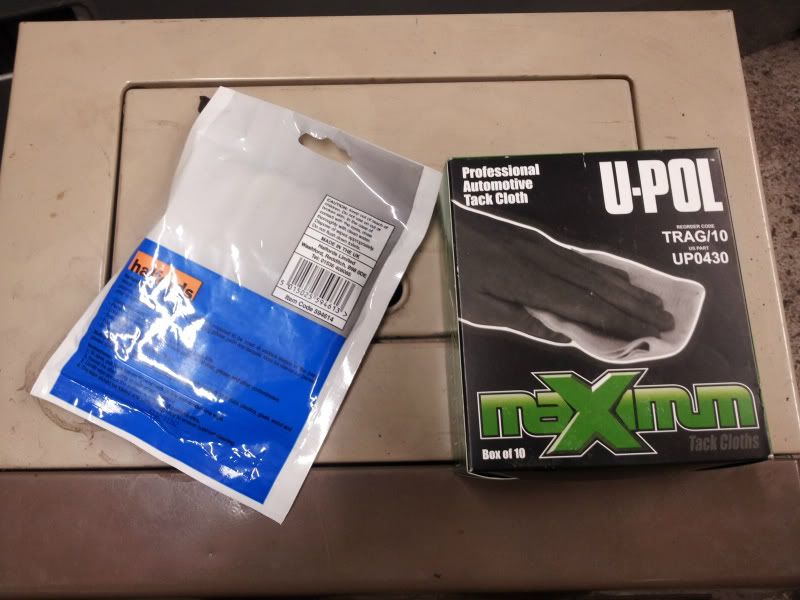
It meant I had to clean it down with this
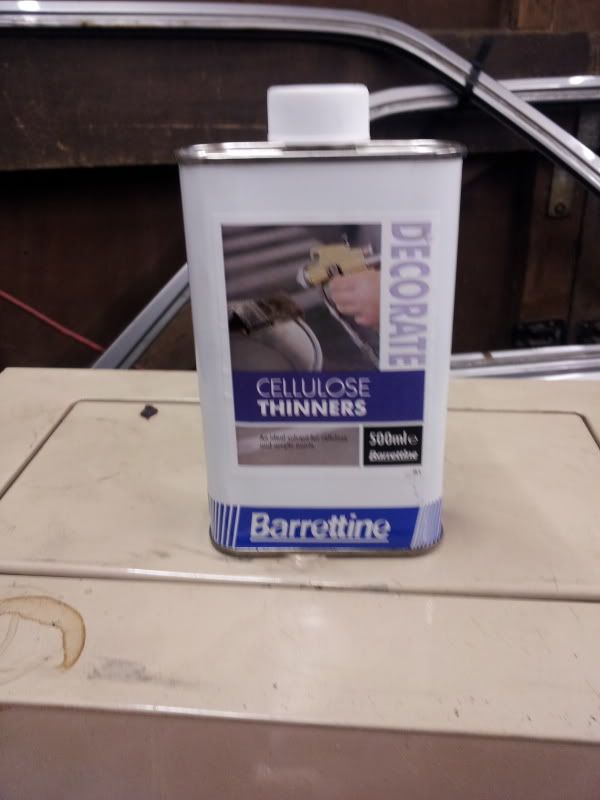
then this
and this and this (it's amazing how much all this rubbish adds up lol)
and finally paint it with this.
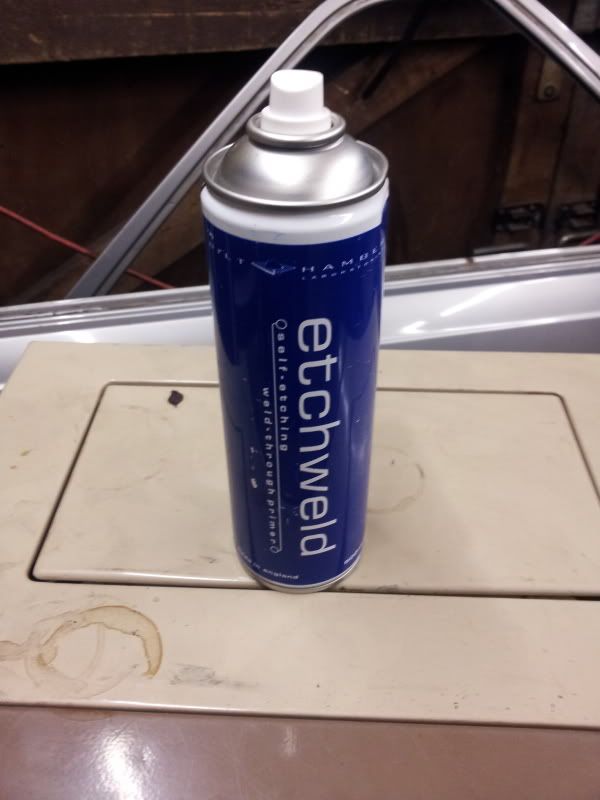
Whilst I am on the subject, I hope this shit protects better than it applies. The can was constantly spitting. they have a crap nozzle. Not best pleased with it tbh.
So, back to how it looked when it returned
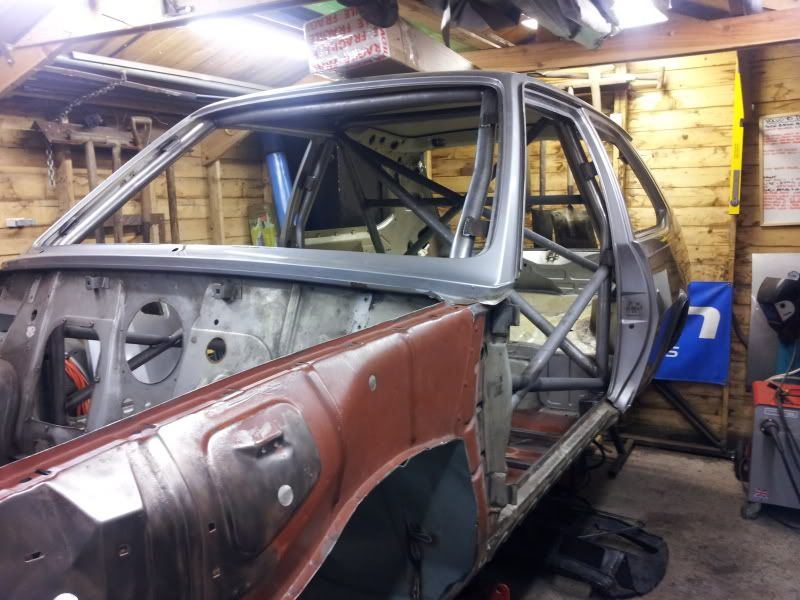
Then finally like this
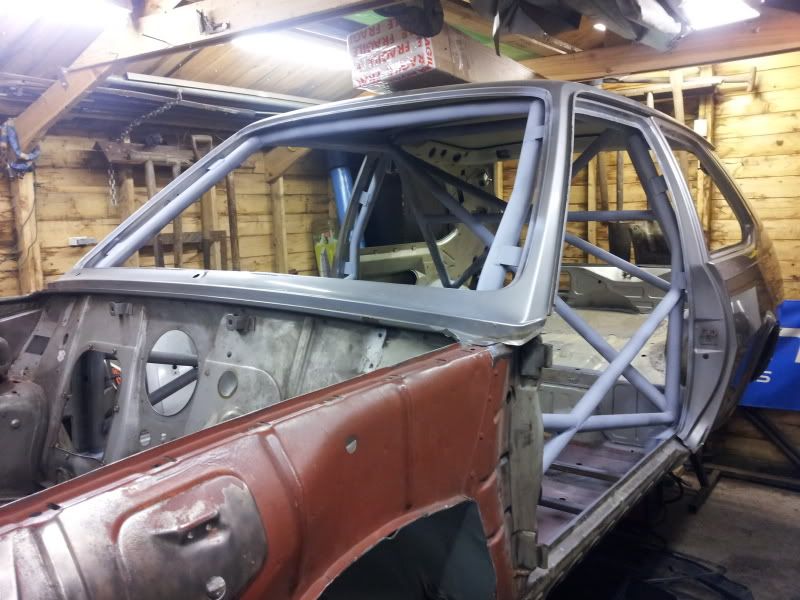
Getting this in paint is important, as when oiled up, it means I can't get inside the car lol
Needs a couple of bits touching up still, but at least it's protected now
Thanks to my dad, my quick release steering boss slug is now welded to the column. It and the column were chamfered, a round bar inserted in the middle and then welded all around whilst centralised in a lathe. It's a great job, and they are definitley not going to part ways.
This style

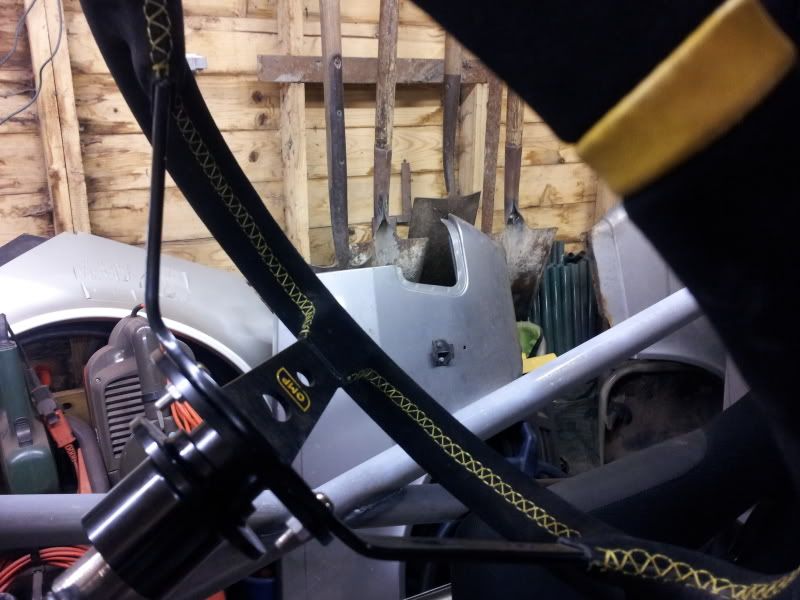
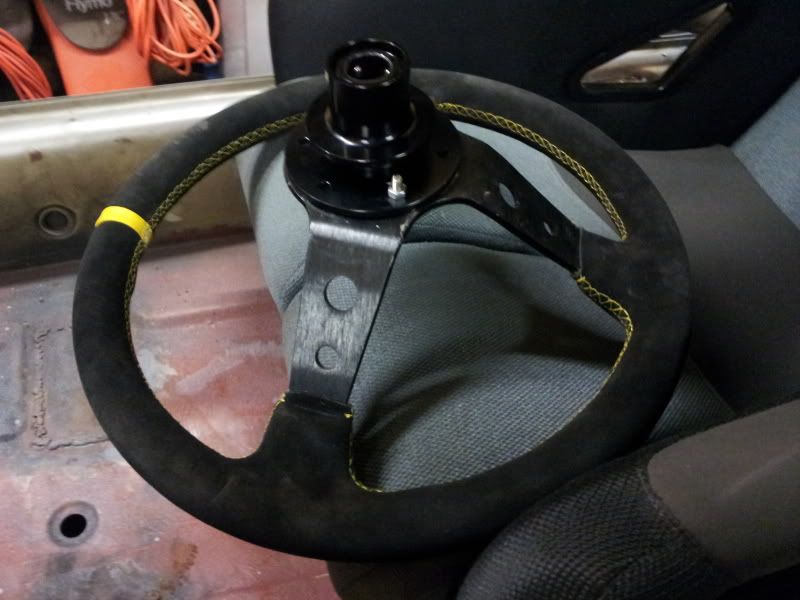
Will give a shit load more access when getting in and out of the car, and I am not ashamed to say, I think they are cool as hell
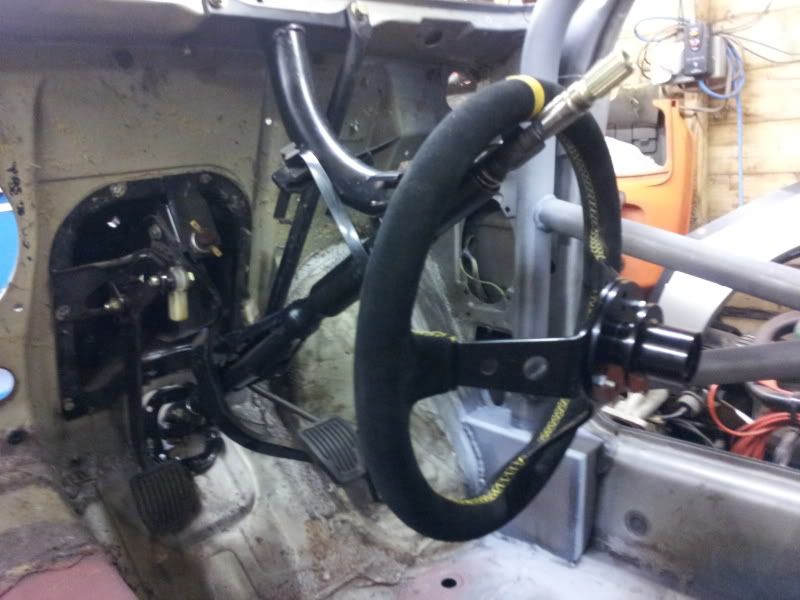
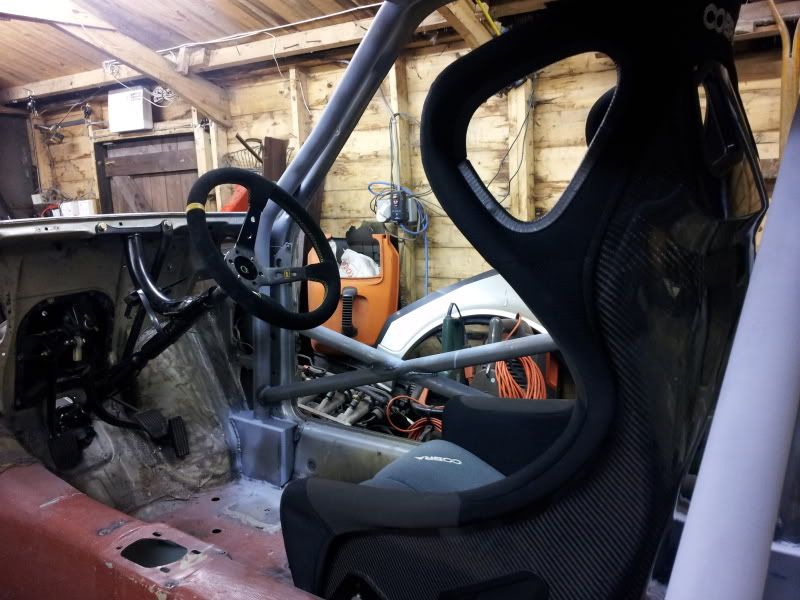
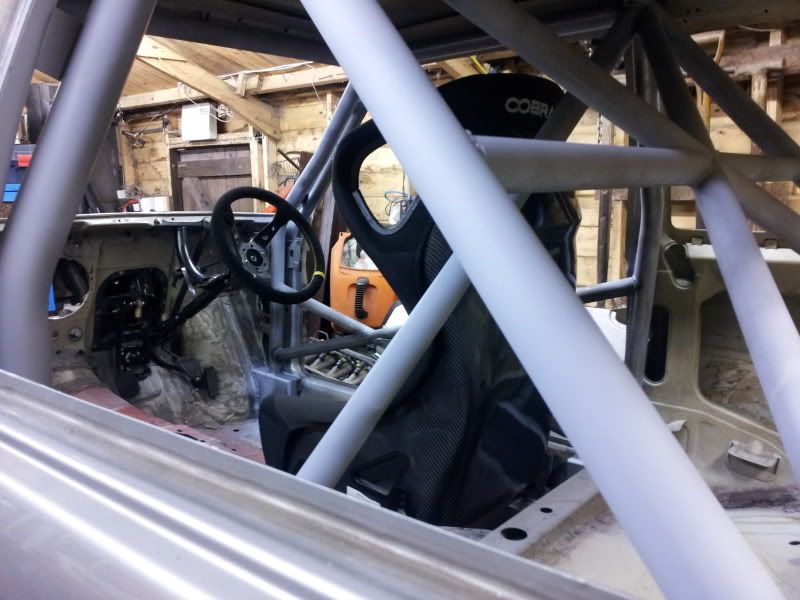
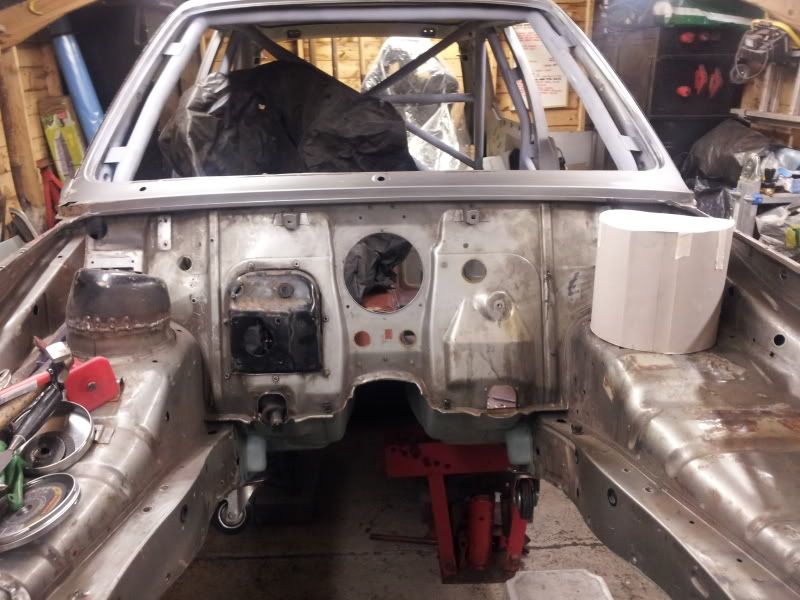
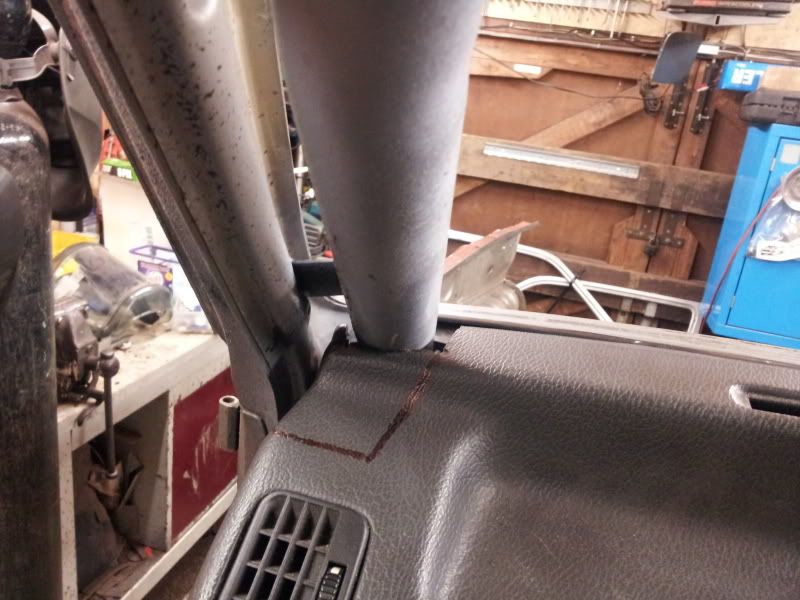
As can be seen, the column isn't fitted correctly, There's three reasons for this, I cannot remember where the brackets go (will check my pics), I currently don't have a way to secure it where the ignition barrel was, and the most important, I want to relocate it to have it as central to the seat as possible.
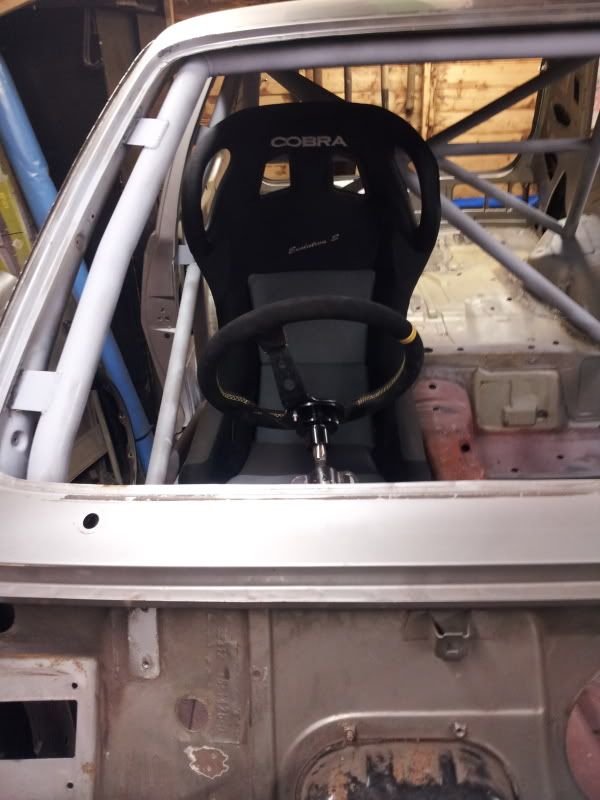
Wonky as hell. Not cool.
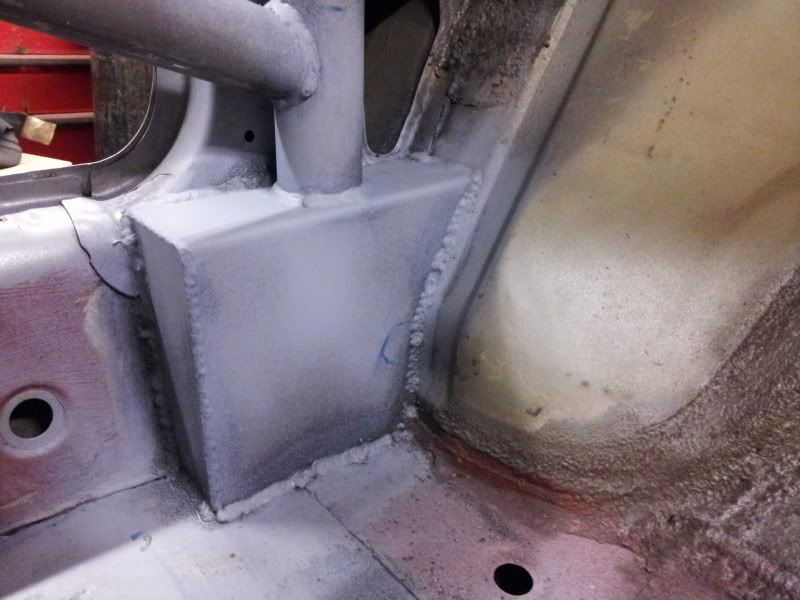
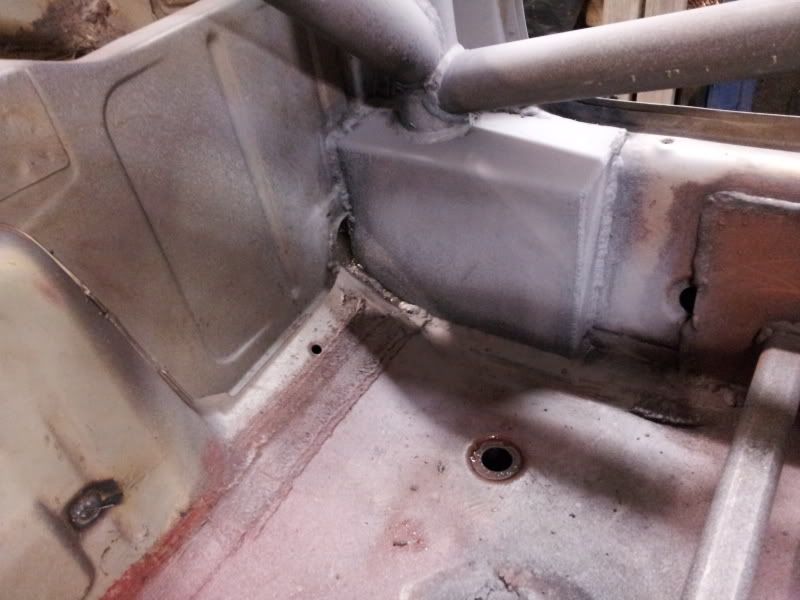
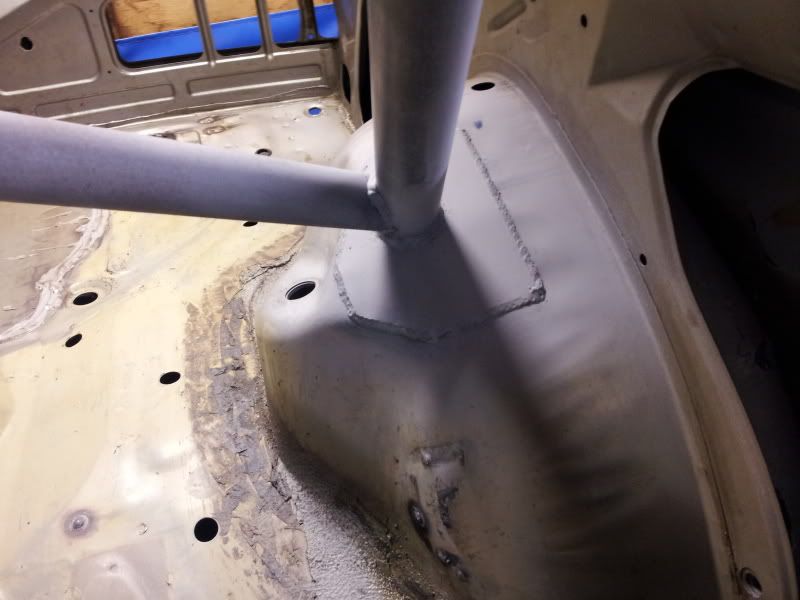
Here's some pics of the cage boxing and rear stay feet. I meant to add them when I took the initial cage pics. Nice job as with the rest, shame I never got pics when they were bare metal.
A pic to cheer me up
I hope to get a decent amount done this week.
Cheers, Liam.
Anyway, decided to paint the cage. Seeing as when I got the shell back, to stop it rusting I had previously covered it in this
It meant I had to clean it down with this
then this
and this and this (it's amazing how much all this rubbish adds up lol)
and finally paint it with this.
Whilst I am on the subject, I hope this shit protects better than it applies. The can was constantly spitting. they have a crap nozzle. Not best pleased with it tbh.
So, back to how it looked when it returned
Then finally like this
Getting this in paint is important, as when oiled up, it means I can't get inside the car lol
Needs a couple of bits touching up still, but at least it's protected now
Thanks to my dad, my quick release steering boss slug is now welded to the column. It and the column were chamfered, a round bar inserted in the middle and then welded all around whilst centralised in a lathe. It's a great job, and they are definitley not going to part ways.
This style
Will give a shit load more access when getting in and out of the car, and I am not ashamed to say, I think they are cool as hell
As can be seen, the column isn't fitted correctly, There's three reasons for this, I cannot remember where the brackets go (will check my pics), I currently don't have a way to secure it where the ignition barrel was, and the most important, I want to relocate it to have it as central to the seat as possible.
Wonky as hell. Not cool.
Here's some pics of the cage boxing and rear stay feet. I meant to add them when I took the initial cage pics. Nice job as with the rest, shame I never got pics when they were bare metal.
A pic to cheer me up
I hope to get a decent amount done this week.
Cheers, Liam.
Last edited by L14MNP on 12 Feb 2012 10:19 pm, edited 1 time in total.
STREETO WITHDRAWL
INTO BURNOUTSsince1982
INTO BURNOUTSsince1982

Re: Turbo 360: Day of waste and fail
Looking good, if it's any consolation all I managed to do all WEEK was ruin some bolts I needed and make a big puddle of gearbox oil It's too cold to think straight
Re: Turbo 360: Day of waste and fail
lol on your 360 mate? Some days just don't go right do they?! 
STREETO WITHDRAWL
INTO BURNOUTSsince1982
INTO BURNOUTSsince1982
-
volvosneverdie
- *** V3M DONOR ***
- Posts: 9143
- Joined: 11 Nov 2008 04:22 pm
- Location: Newcastle Upon Toon
Re: Turbo 360: Day of waste and fail
Summers coming and I want to be driving not building this year!volvosneverdie wrote:Looking awesome as ever mate. Up the mojo, summers comin.
BTW, that boss you're getting me won't fit now, but that's my fault. Will still have it. Cheers mate.
STREETO WITHDRAWL
INTO BURNOUTSsince1982
INTO BURNOUTSsince1982

Re: Turbo 360: Day of waste and fail
Awesome stuff lad. Looking very good. Haven't seen this thread for awhile! I'd love to do this to mine. And like VND said, summer is coming, (at some point). Warmer days, longer days, sunnier (?) days. mmmmm. 
Speedy88 wrote: Leave choke on, idling obnoxiously until neighbours peer out windows at the noisy exhaust
Give neighbours thumbs up
Rev engine to 7K
Exit street sideways
Win at life.
Re: Turbo 360: Day of waste and fail
Cheers Jon. Aye, it would be nice to just be able to brim the tank and go hooning around during some of these long warm days some time soon !
STREETO WITHDRAWL
INTO BURNOUTSsince1982
INTO BURNOUTSsince1982
Re: Turbo 360: Day of waste and fail
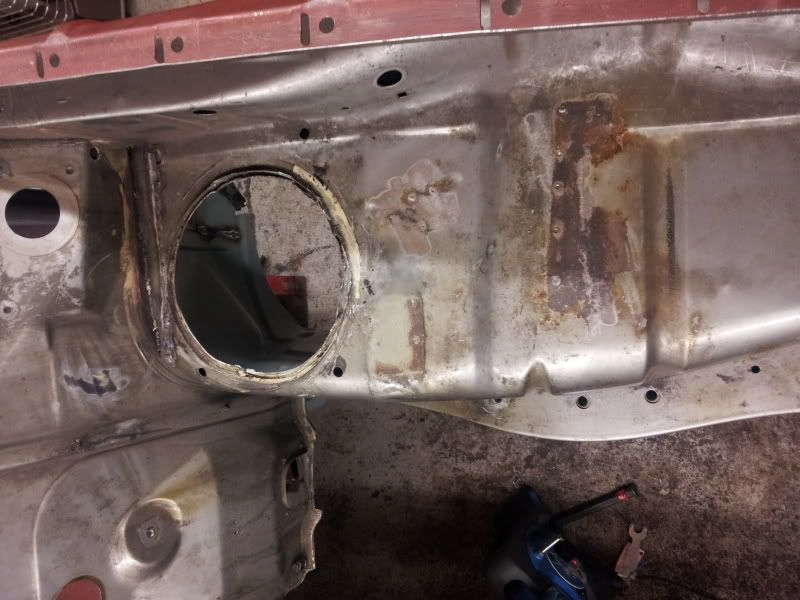
I failed to reassemble the column  (have no clue where the brace bar bolts to either the column or bulkhead! Even after a phone call to FJ... Anyone got a pic?
This meant I still can't allign my seat, or see where I need to move the column.
So I turned my attention back to the riddle of how to remove the turrets.
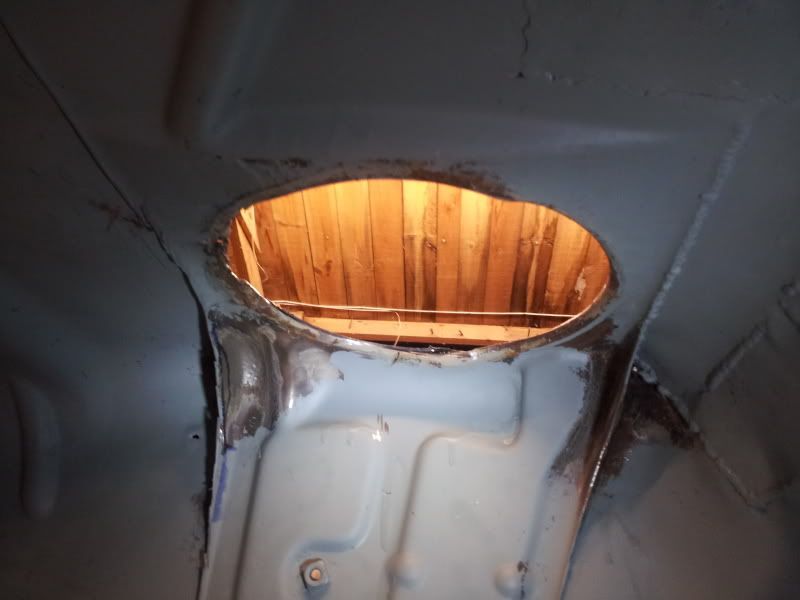
Got the bastard out! It was very strange, a combination of what turned out to be a very tight press fit (see the lip below)
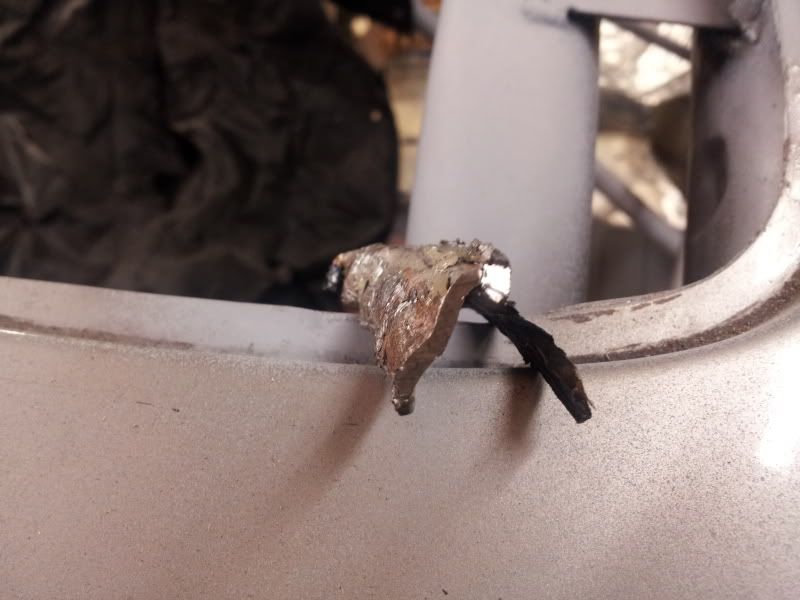
and the rest basically being part of the inner wing, although this seems impossible.
Will be replaced with something a bit like this
(preferably in steel trolol)
I know how to remove them now, but they're still a massive PITA!
I'm also about to PM Nikidev, as it looks like his extended turrets running XYZ 200SX coilovers are flat on the top, not sloped like standard. I assumed this wouldn't matter when running pillow ball top mounts or similar, but it's nice to know.
Anyone clued up?
This meant I still can't allign my seat, or see where I need to move the column.
So I turned my attention back to the riddle of how to remove the turrets.
Got the bastard out! It was very strange, a combination of what turned out to be a very tight press fit (see the lip below)
and the rest basically being part of the inner wing, although this seems impossible.
Will be replaced with something a bit like this
(preferably in steel trolol)
I know how to remove them now, but they're still a massive PITA!
I'm also about to PM Nikidev, as it looks like his extended turrets running XYZ 200SX coilovers are flat on the top, not sloped like standard. I assumed this wouldn't matter when running pillow ball top mounts or similar, but it's nice to know.
Anyone clued up?
STREETO WITHDRAWL
INTO BURNOUTSsince1982
INTO BURNOUTSsince1982
Re: Turbo 360: Turret questions
Almost forgot, spoke to Nev from F1 Moto today and have ordered an awesome modified Escort quick rack setup from him. Gonna 5 link the shell courtesy of F1 Moto too, though that will have to wait a little while.
Time to plough through the plethora of hydraulic handbrakes out there and see if I can find what I want.
Time to plough through the plethora of hydraulic handbrakes out there and see if I can find what I want.
STREETO WITHDRAWL
INTO BURNOUTSsince1982
INTO BURNOUTSsince1982
-
volvosneverdie
- *** V3M DONOR ***
- Posts: 9143
- Joined: 11 Nov 2008 04:22 pm
- Location: Newcastle Upon Toon
Re: Turbo 360: Turret questions
What does 5 link the shell mean man? unless youre talking about rear suspension........... 

-
macplaxton
- Posts: 3283
- Joined: 09 Feb 2008 02:29 am
Re: Turbo 360: Turret questions
He's talking about rear suspension. You need somewhere to bolt the links to. So you weld link attachments to the shell. Probably.
72 DAF 44 Estate 78 Volvo 343DL Black Beauty

82 Volvo 343DL CVT
 88 Volvo 340DL Diesel
82 Volvo 343DL CVT
88 Volvo 340DL DieselRe: Turbo 360: Turret questions
Correct lads.
This kinda thing, this is a 4 link.

As Rich says, you weld the link boxes to the chassis, then bolt it up.
Annoyed! The fucking etch primer is just scraping off whenever anything touches the cage. This is despite me spraying it when it wasn't minus temperatures outside, heating the garage and heating the damn cans in boiling water before use! At first I thought there may still be oil on it (even though I thoroughly cleaned it several times), but it is also scraping off where I have got overspray on the shell. Could only be temperature related I guess?
The upside is, I only used one can. You know the downside - it has to come off again.
In the spirit of not wanting to get too dirty, and continuing the trend of half doing something, tonight I decided to mod the dash to get it to fit again. Mark came over for a little bit, and we hacked it up. After a 'power nap' from me of 2 hours lmao.
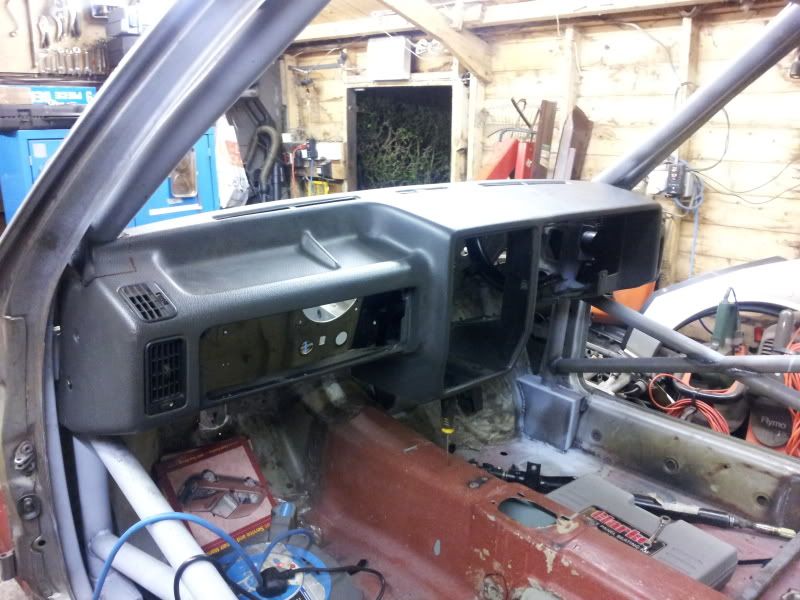
Like I say, half finished (:lol:) it got late. Plus this way, one day I will have loads of finished stuff without feeling like I have done much lol.
I'm hoping to make the dash neater around the legs with expanding foam or similar when I have it sitting where it needs to be, then it is being flocked.
This kinda thing, this is a 4 link.
As Rich says, you weld the link boxes to the chassis, then bolt it up.
Annoyed! The fucking etch primer is just scraping off whenever anything touches the cage. This is despite me spraying it when it wasn't minus temperatures outside, heating the garage and heating the damn cans in boiling water before use! At first I thought there may still be oil on it (even though I thoroughly cleaned it several times), but it is also scraping off where I have got overspray on the shell. Could only be temperature related I guess?
The upside is, I only used one can. You know the downside - it has to come off again.
In the spirit of not wanting to get too dirty, and continuing the trend of half doing something, tonight I decided to mod the dash to get it to fit again. Mark came over for a little bit, and we hacked it up. After a 'power nap' from me of 2 hours lmao.
Like I say, half finished (:lol:) it got late. Plus this way, one day I will have loads of finished stuff without feeling like I have done much lol.
I'm hoping to make the dash neater around the legs with expanding foam or similar when I have it sitting where it needs to be, then it is being flocked.
STREETO WITHDRAWL
INTO BURNOUTSsince1982
INTO BURNOUTSsince1982