It all went HORRIBLY renix !

B14, B172, B19/200, D16 engine, ignition, cooling, fuel & exhaust system, gearbox, variomatic, final drive... | Tuning: engine swaps, welded diff, clutch upgrades...
NO parts requests here, please use our V3M BUY & SELL corner
Post Reply
User avatar
bogbasic
Posts: 1861
Joined: 21 Nov 2004 10:12 pm
Location: New Malden, Surrey.
Contact:

It all went HORRIBLY renix !

Post by bogbasic » 12 Jan 2022 01:53 am

Right, so stuck indoors self-isolating. Plenty of time to tinker with a defunct renix, well, I think its defunct as I deffo tested it several times and it didn't work when others deffo did.

Image

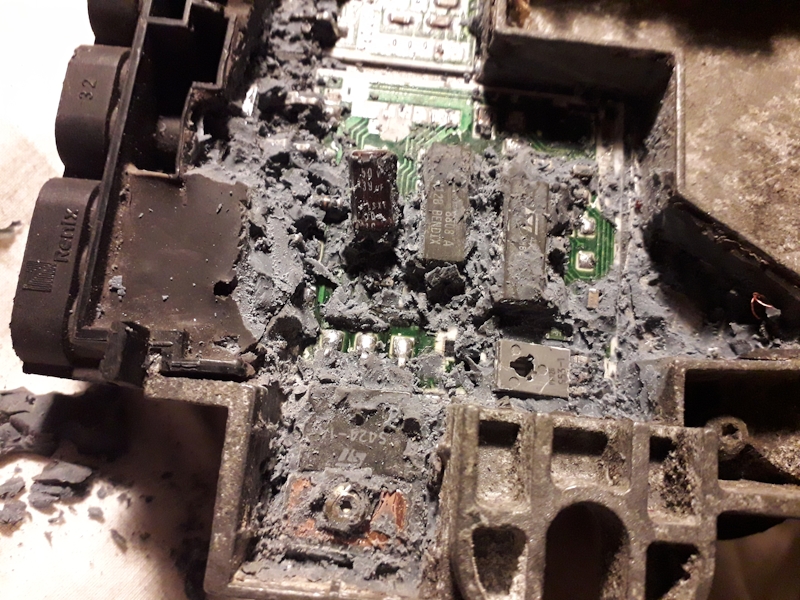
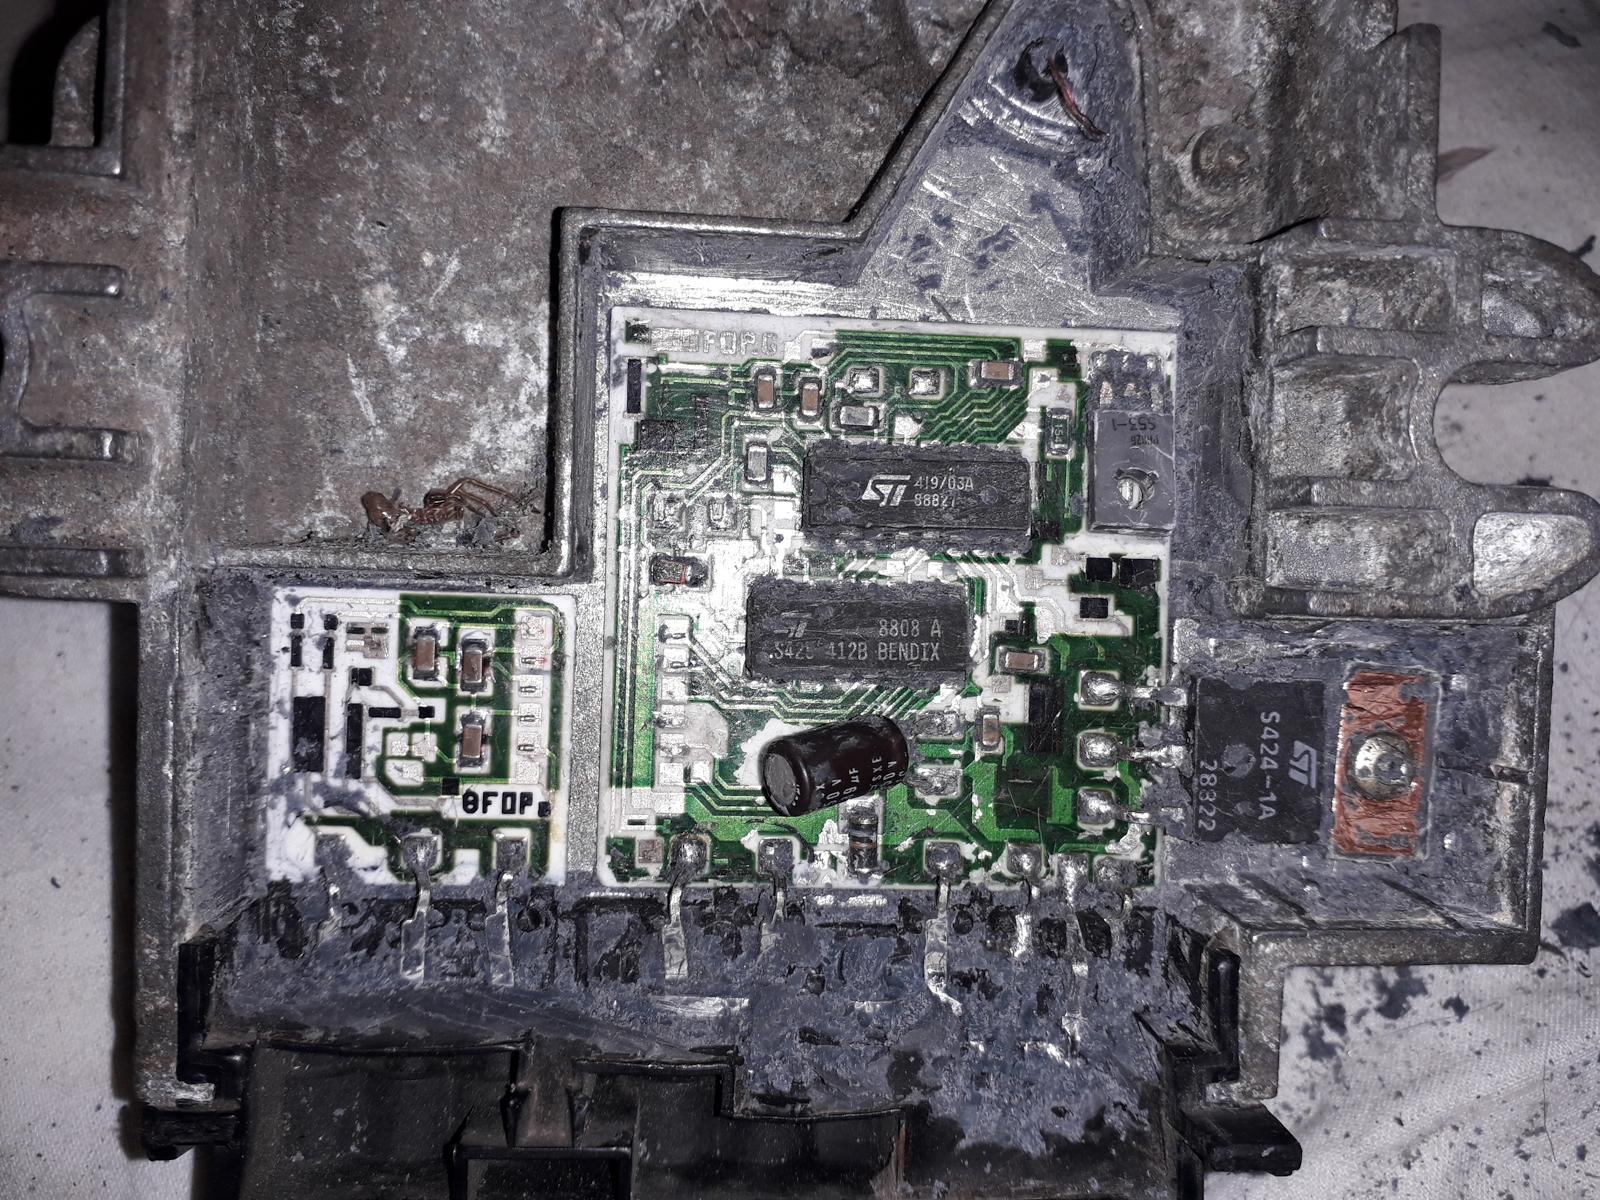
Lets attack the sealant on the back, as carefully as possible, but I probably was not as careful as I should have been ;-(

Image

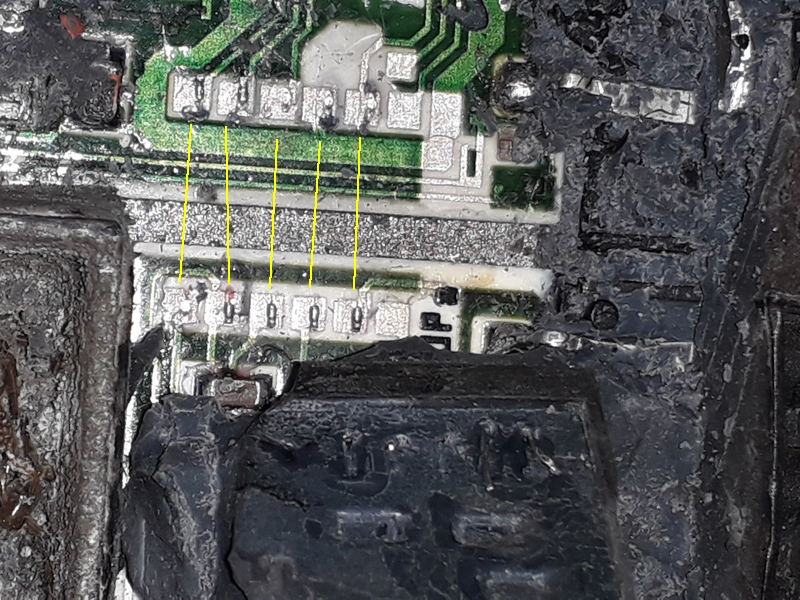
True indeed, the rubber has wires embedded in it and 5 of them broke so the plan is to replace them as shown below.

Image

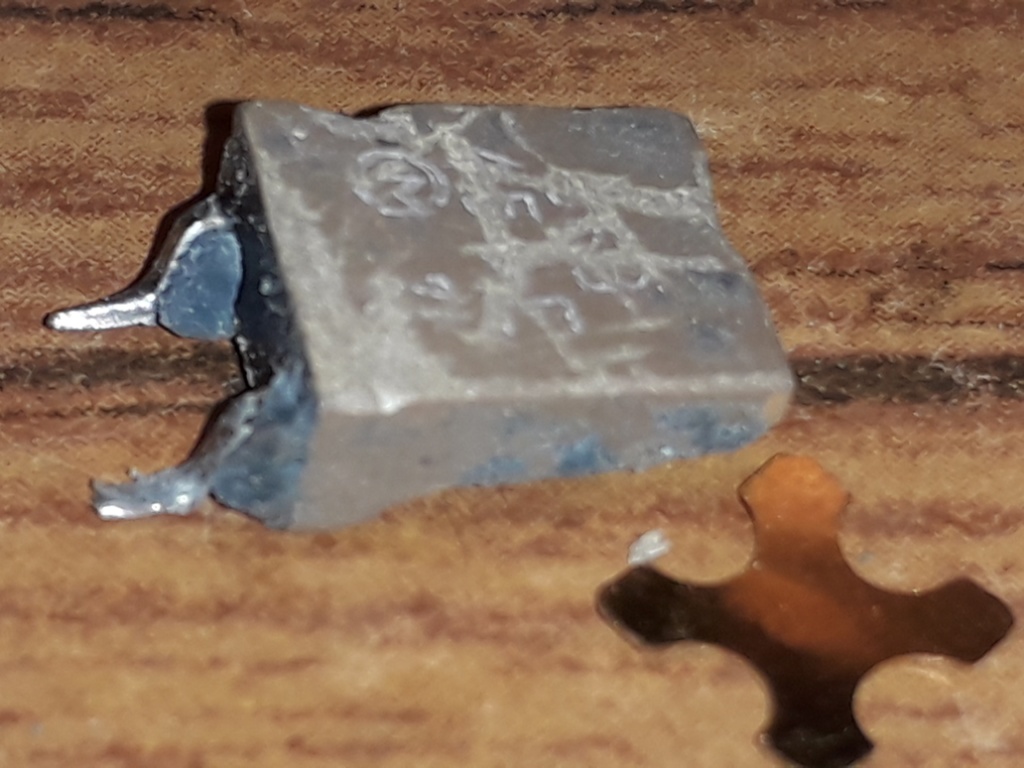
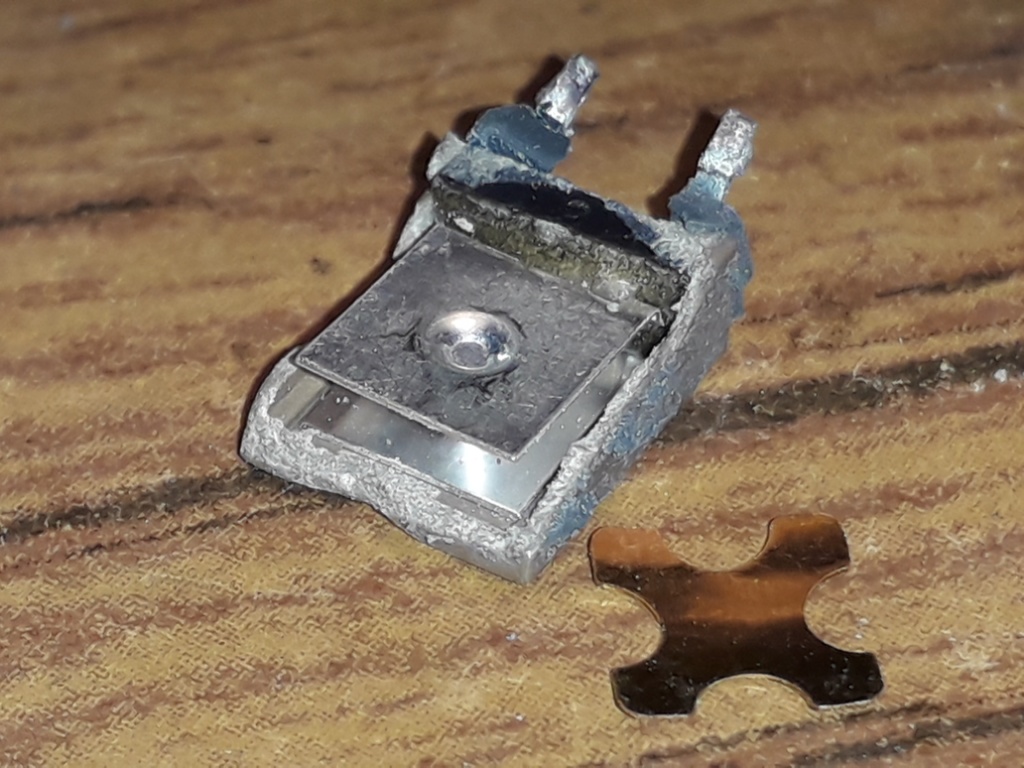
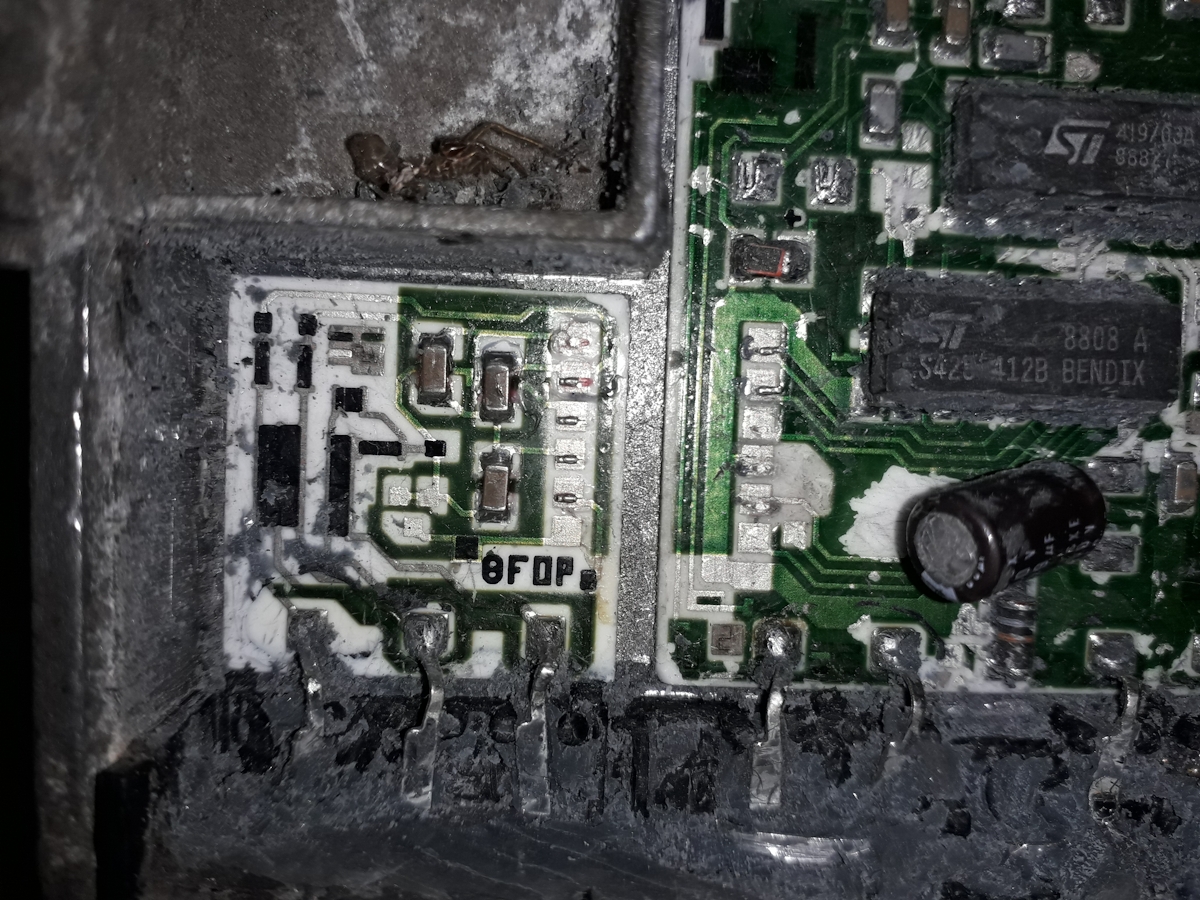
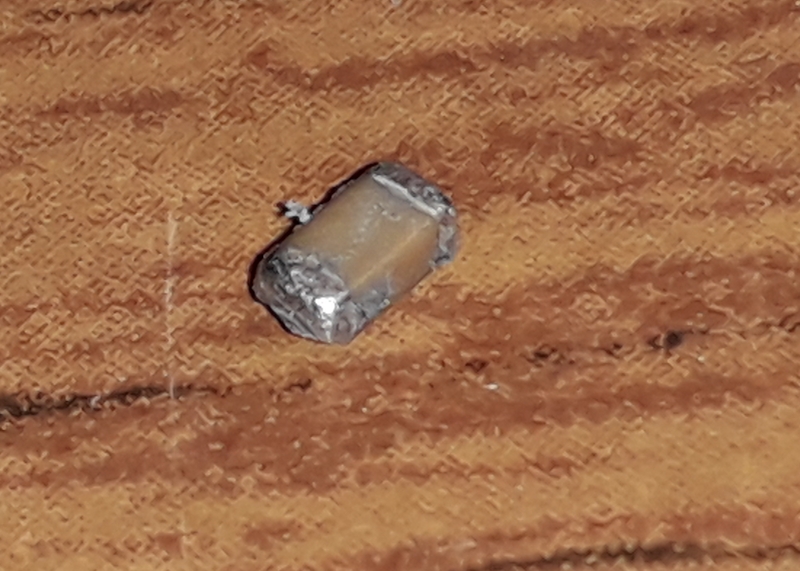
Also, in the picture before last, there is a little brown casing on the left hand side which is the remains of a mystery component that also broke. It had several metal plates in it which are in pictures below including a wierd cross-shaped one that was curved. What is it? Answers on a...

Image
Image
Image

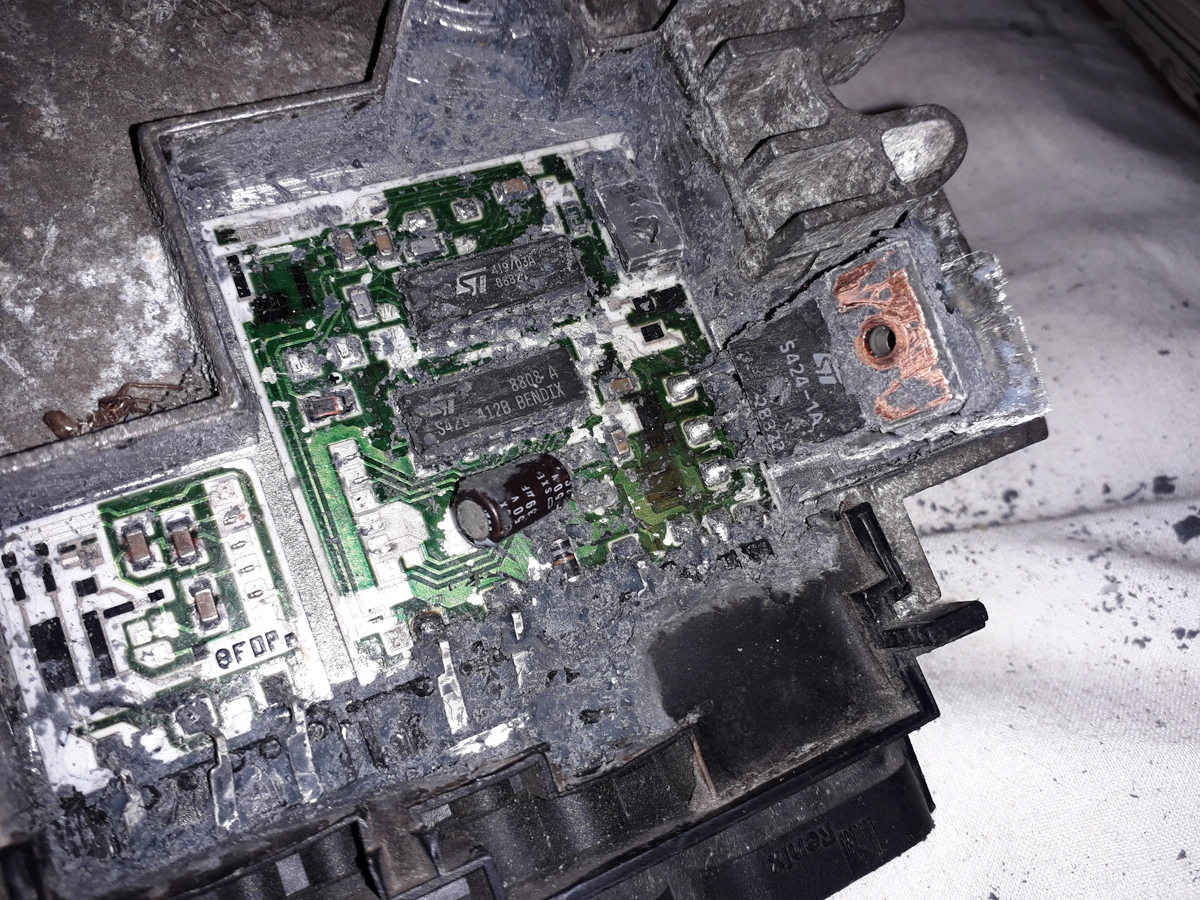
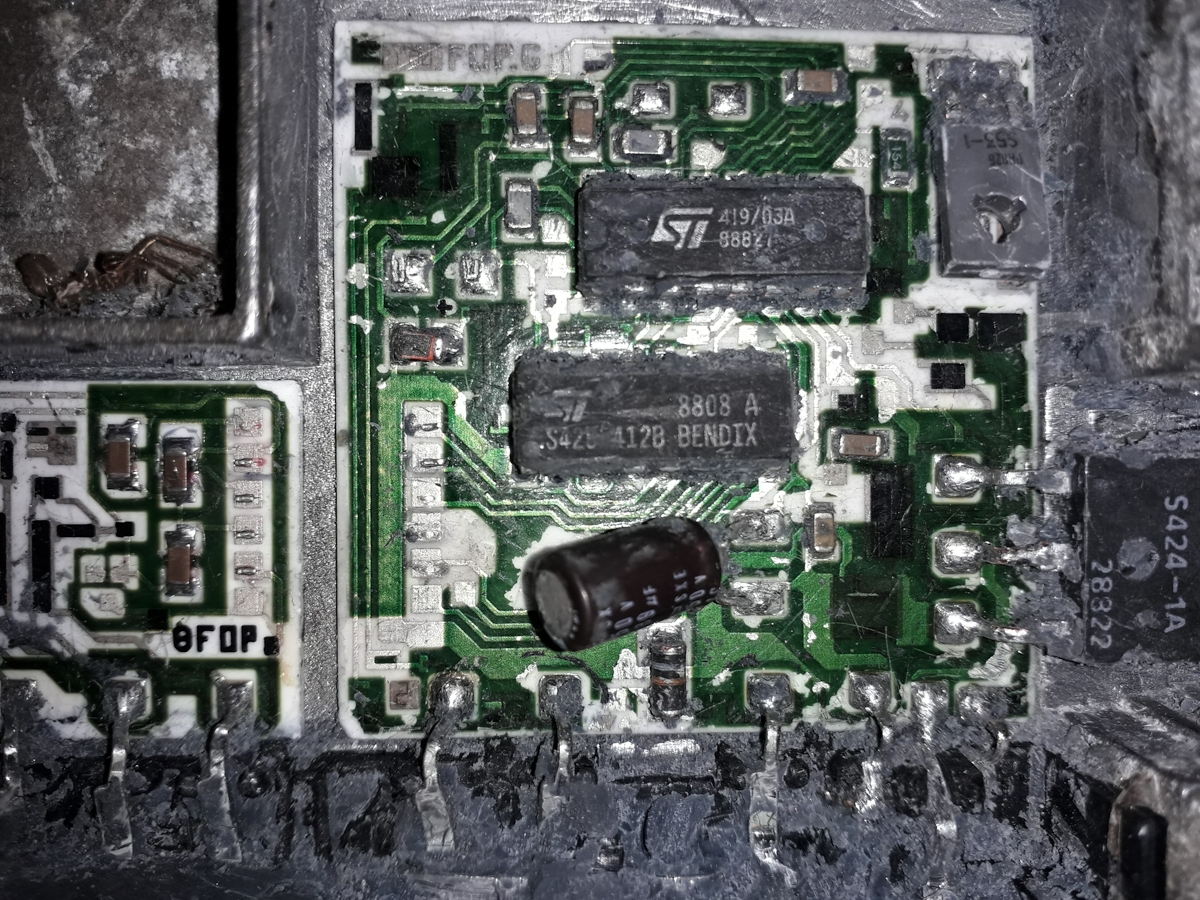
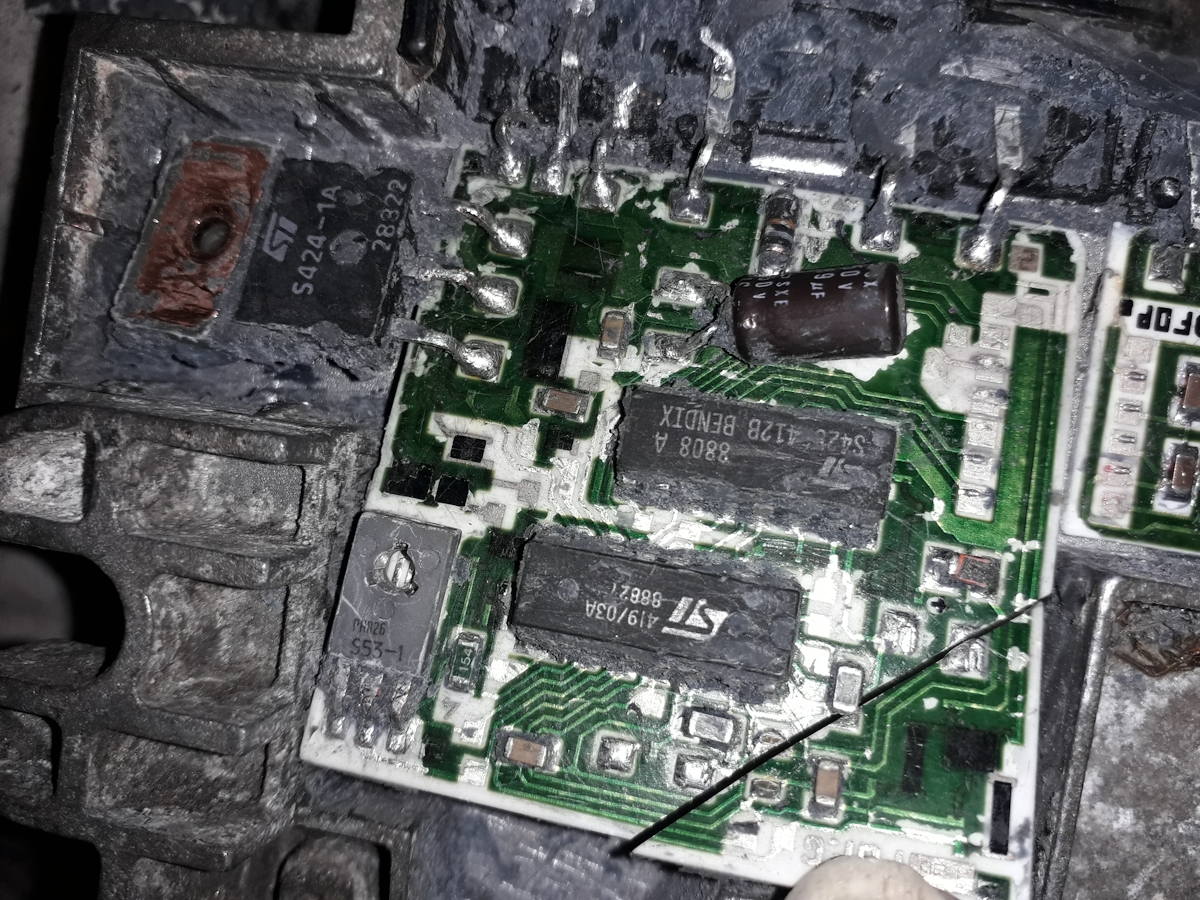
Right, dig a bit more, dig, dig, dig. Now, there's a nice big capacitor. Everyone always says that if it doesn't work it'll always be a capacitor. However, without fail, every time I follow that advice and replace the biggest, most burnt looking capacitor in sight, it never makes any difference, so I am coming round to the view that they are much more reliable than popular legend has it. So we'll leave it firmly in place for the moment. Dig, dig, dig.

Image
Image

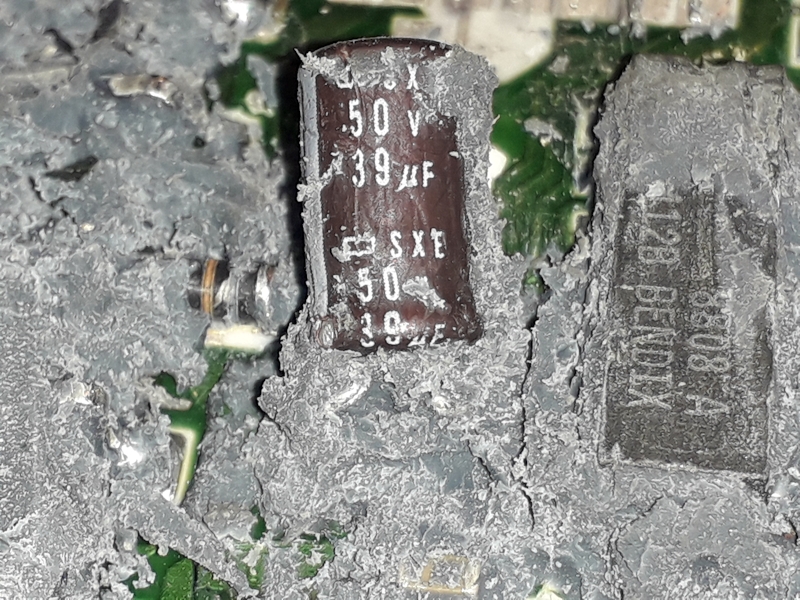
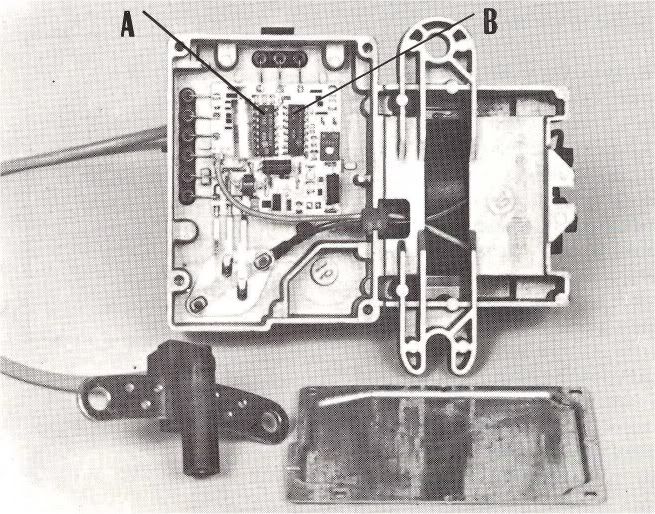
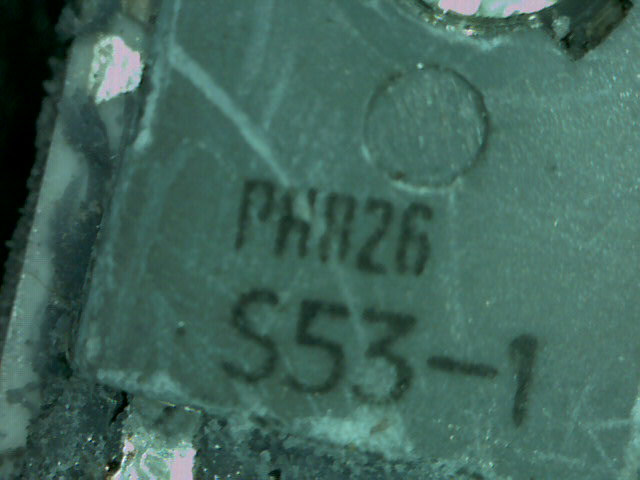
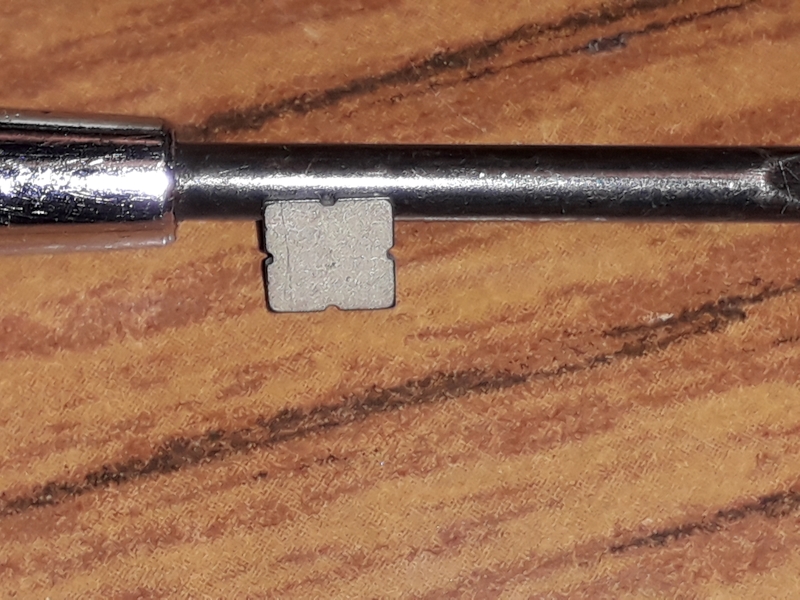
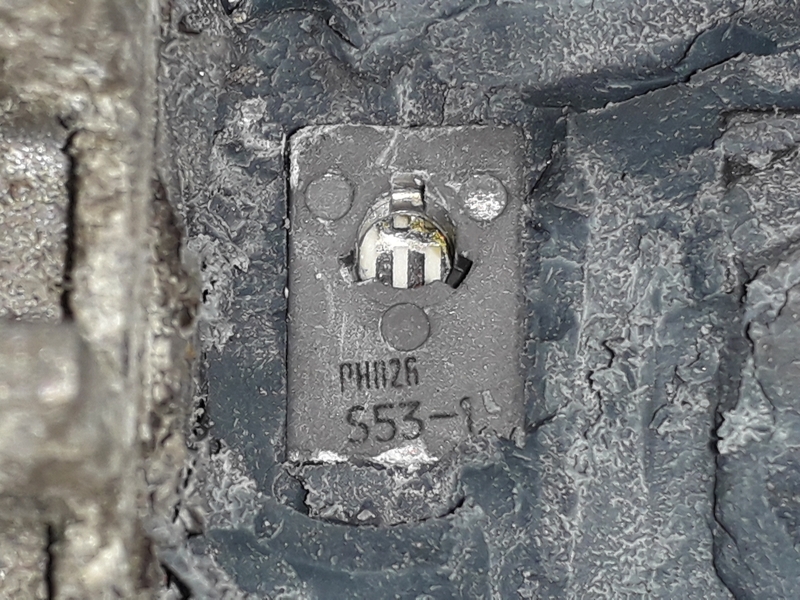
And, what's this? Another mystery component with a designer hole in it shows up.

Image

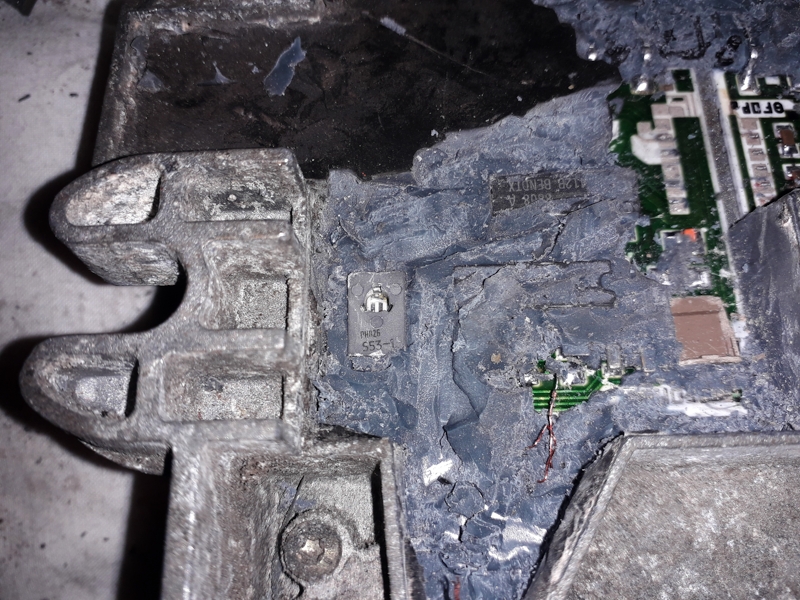
Zooming in, its very weird. Deffo leave that one in place as it doesn't seem to be damaged. Again, what is it? A little coil with a hollow core?? A google search with that part number will probably tell. Note to self - to be done. The above picture also shows another of my disasters. There is a thin copper wire buried in the rubber, that goes between the board and the vacuum sensor, which broke. I think it can be repaired, but I am not sure where it connects to the board, but I think it will be possible to tell from this photo.

Image

OK, so we really are talking about hours of work here and here's how it looks.

Image

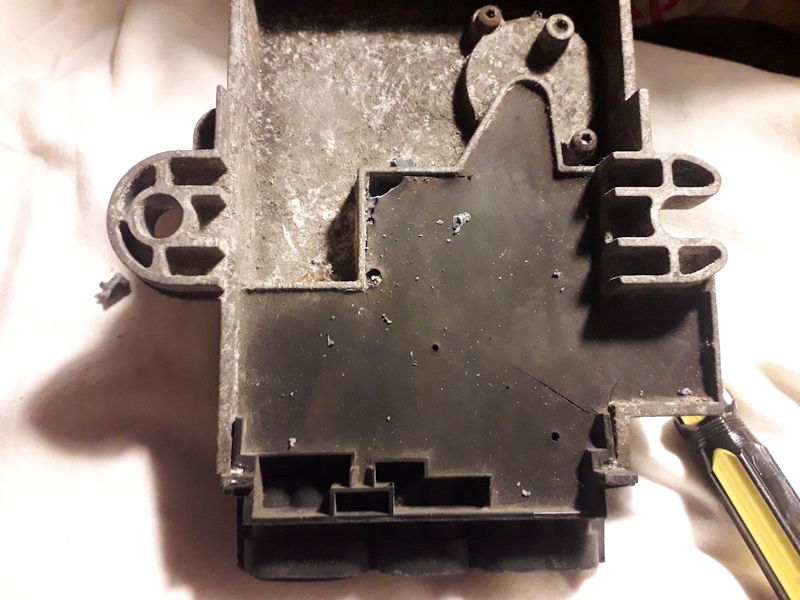
That thing with a big heatsink in the recess on the right unscrews and lifts up quite easily. There is a small sheet of heat resistant insulating material under it. I guess it may be mica, but I have no idea. It seems reasonably intact despite lots of digging marks around the edge.

Image

Right, more pictures, pictures.

Image
Image

Right, a very big right and a curse, because this is where it all went Pete Tong. The plan was to gently, gently lift up the circuit board to see if we can see any signs of heat under any of the components, so here we go, prise in one corner, prise in another corner, prise here, prise there, prise everywhere and... swear... *snap* ! !

Image

Yep, OK, so most of the circuit board did lift up (that's the good news, ever euphemistic, decades of experience making excuses for my incompetence comes in handy here) but one of the corner's didn't want to budge. Bah humbug ;-(

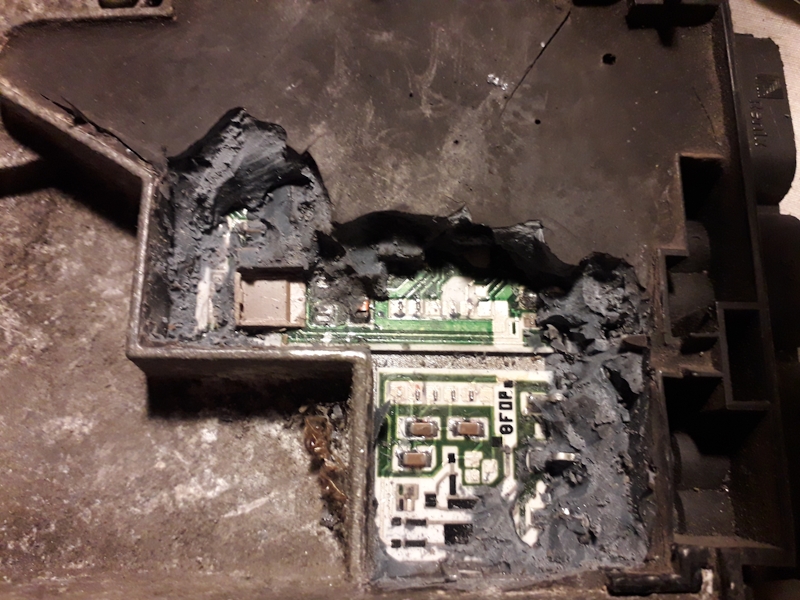
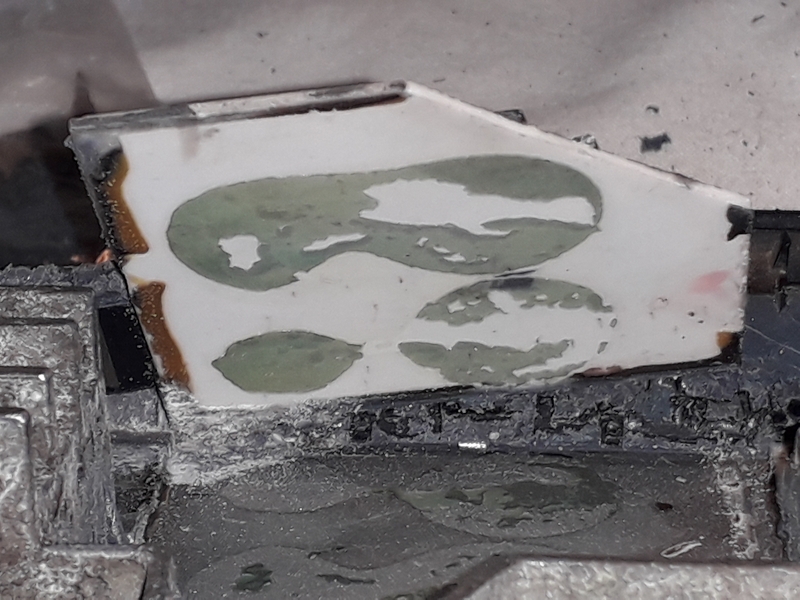
I can kid myself that it might be possible to glue them onto a piece of plastic and then use a fine nib-pen with some conducting paint to join up the borken tracks but there's about 10 of them to repair so I just don't know if its worth it or possible, fffmmfff. Anyway, here is a view under the circuit board which does seem to show a burn mark under the Bendix chip, which suggests it may be a complete write-off anyway, but I just don't know enough about electronics, etc, to judge.

Image

Finally, in the great breakage this tiny little resistor (I think) popped loose but its possible to make out where it should go in the pictures. I will mark them up better in the near future.

Image

What does anyone think? I might try to repair the broken board?? I might give up?? I could probably do it better next time but I don't have any more renix's that are deffo broken. Anyone willing to help on that front?? What do you think?
1988 340 1.4 GL, 218k, 5 door (Grey Bess). Gone to CBA.
1991 340 1.7 GL, 64k, 5 door, petrol blue (Deep Blue).
1988 360 2.0 GLE, 140k, 5 door, ocean blue metallic (Blue Bess).
1989 340 1.7 GL, 108k, 3 door (Red Ness).
More info here!

User avatar
tghs
Posts: 1
Joined: 31 Jul 2021 12:29 am
Location: Lithuania/UK
Contact:

Re: It all went HORRIBLY renix !

Post by tghs » 12 Jan 2022 03:28 am

Thanks for digging into yours and the decent photos. A hot air station really helps with softening that awful rubber potting compound. Really annoying stuff!

Since it was already not working, I'm not sure I'd bother repairing it really. If it was working, I would attempt repair if you've been able to solder a surface mount component before. I wouldn't use conductive pen to join the broken traces though. Soldering wires on to the pads/components they connect would be far more reliable (with a dab of something to help deal with vibration), just like what you'd do with the broken board-to-board interconnect.

That loose cap looks like it's from here on the board split:
20220111222555.jpg
IMO the best use for this unit is sacrificing it for further reverse engineering! :D
Tim Sheridan
- 360 GLT (1987, White)
- 145 (1971, White)

User avatar
bogbasic
Posts: 1861
Joined: 21 Nov 2004 10:12 pm
Location: New Malden, Surrey.
Contact:

Re: It all went HORRIBLY renix !

Post by bogbasic » 12 Jan 2022 04:02 am

Cheers very much for that, oh dear, thanks about the cap and I thought I could recognise components. ;-0

ta jc
1988 340 1.4 GL, 218k, 5 door (Grey Bess). Gone to CBA.
1991 340 1.7 GL, 64k, 5 door, petrol blue (Deep Blue).
1988 360 2.0 GLE, 140k, 5 door, ocean blue metallic (Blue Bess).
1989 340 1.7 GL, 108k, 3 door (Red Ness).
More info here!

User avatar
TasMan
Posts: 203
Joined: 04 Jun 2019 06:09 pm
Location: Ayr, SW Scotland

Re: It all went HORRIBLY renix !

Post by TasMan » 12 Jan 2022 08:35 am

Interesting post, looks like the Renix was never meant to be serviced or repaired with all that filler !
Not sure on that mystery component but will see if I can find out.
I imagine someone might have a copy of the actual Renix internal circuit diagram somewhere which would be handy, I expect it has been looked into before. Plenty of copies of the general ignition system schematic about but nothing of the internal Renix workings...
Certainly good to see the internal workings of the mysterious Renix...!
Cheers
Dave
1987 360 GLT

User avatar
Chris_C
*** V3M DONOR ***
Posts: 9600
Joined: 18 Jun 2004 11:53 pm
Location: South Coast, UK

Re: It all went HORRIBLY renix !

Post by Chris_C » 12 Jan 2022 12:46 pm

It will be interesting to compare the insides to the Type D Mac posted years ago (hopefully that links to Mac's great post on the subject if you click the tiny arrow next to "mac wrote")
mac wrote:
31 May 2006 12:56 pm
Under the resin it will look something like this (this shows a type D unit and Volvo 300's use type F but will be very similar),
Image
The custom Bendix IC will likely be impossible to find (unless there is a surplus shop with a box of 1000 that has been gathering dust for 40 years) but the rest of that doesn't look scary. The device with a hole looks like a TO-126 package to me, used for various things with 3 legs so likely a transistor or FET.
'89(G) 340 GLE B172k
'03 S60 D5 SE, '91 (J) MX5, 1954 Cyclemaster
Ex:
'89(F) 340 GL F7R (ex B172k) - Fake -> SBKV 300 Runner Up 08, 12; '91(H) 340 GL B14.4E - Kar; '88(F) 360 GLT B200E - Jet -> BKV 300 Runner Up 09; '89(G) 360 GLT B200E - Beast

User avatar
bogbasic
Posts: 1861
Joined: 21 Nov 2004 10:12 pm
Location: New Malden, Surrey.
Contact:

Re: It all went HORRIBLY renix !

Post by bogbasic » 12 Jan 2022 10:43 pm

Cheers, yes, TO-126 looks promising for this thing:

Image

https://en.wikipedia.org/wiki/TO-126

Nice one. All the way back from 1968. I was 5! The big S424 thing with the heat sink in a recess on the side comes up on google as a £5 transistor!

I haven't done on-board soldering before, only under-board butter fingers stuff, sorry. The tracks that broke are way too thin and close together for me to repair by hand, I fear. Likewise for sticking on those teeny-tiny caps!! Must watch some videos on how to do that stuff but I fear its for pro's only!

I can't see a vast amount of similarity with the picture in MAC's thread, to be honest. That one doesn't seem to have the board covered in sealant, just a metal cover plate. If only...

I haven't done tons of searching on the web for renix circuit diagrams, etc, but I suspect most of what's there will be from the Renault 5 community rather than Volvos!!??

Anyway, I tested my collection of 4 or 5 renixes a year ago or so and that one definitely didn't work and it was one I had tested before and decided it was a broken!! I am intrigued by the idea of further reverse engineering. What did you have in mind? The custom programmable electronic ignition stuff I found on the web is all in the £500+ region and that's a bit beyond my budget at the moment, as its not something that really grabs me, to be honest!!

Cheers for all the feedback.
1988 340 1.4 GL, 218k, 5 door (Grey Bess). Gone to CBA.
1991 340 1.7 GL, 64k, 5 door, petrol blue (Deep Blue).
1988 360 2.0 GLE, 140k, 5 door, ocean blue metallic (Blue Bess).
1989 340 1.7 GL, 108k, 3 door (Red Ness).
More info here!

Post Reply