A global place for general discussion (Volvo, V3M or non-Volvo related topics).
Please introduce yourself here, your Volvo 300 hobby...
NO technical support, parts requests or car advertisements here
-
valman
- Posts: 663
- Joined: 07 Feb 2010 11:16 pm
- Location: Bedfordshire
Post
by valman » 07 Jun 2010 01:14 pm
hi guys, got a bit of a problem. i've had a search on here but nothing has come up.
basically when i took the side trims off and the "catalyser" badge off the back of the car the sticky stuff left over purple stains or like a coating/outline of the trims/badge i dont have pictures yet but i will have some later. any idea what this is and how i can remove it? i tried pressure washing, sticky stuff removal and no luck. even tried to scrape it off - works but scratches the paint underneath too

tried T-cut that didnt do anything either
all help appreciated
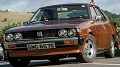
pics of some of the purple stuff:

couldnt get to the sides, too much jeep in the way

Last edited by
valman on 08 Jun 2010 12:25 pm, edited 1 time in total.
-
L14MNP
- Posts: 1340
- Joined: 26 May 2010 09:15 pm
- Location: Sunderland/Durham
Post
by L14MNP » 07 Jun 2010 01:38 pm
Try a caramel wheel that goes in a drill chuck. It's what bodyshops use. Assuming the left over stuff is glue residue or the like.
pics would be good mate.

STREETO WITHDRAWL
INTO BURNOUTSsince1982
-
CBA
- Posts: 1071
- Joined: 24 Mar 2010 02:14 am
Post
by CBA » 07 Jun 2010 01:59 pm
get an abrasive sponge (the type for washing up) Scrub the "contaminant" off the lacquer.
try not to go all the way through the lacquer if you can help it.
If you don't go all the way through the lacquer (you can tell by the colour coming off on your scrubber) you can T-cut the scratched area flat and shiny.
If you do go all the way through then use a bit of new lacquer (small can £3.00 ish) to touch up the "hole" in the lacquer coat, apply a few thin coats till the level is higher than the original lacquer... like a blister around the repair area about a thou thicker than normal paint.
Once dry (3 days is usually ok ESP in the sun) use your scrubber to flatten the lacquer to the right level then use T-cut to properly shine it.
-
volvosneverdie
- *** V3M DONOR ***
- Posts: 9143
- Joined: 11 Nov 2008 04:22 pm
- Location: Newcastle Upon Toon
Post
by volvosneverdie » 07 Jun 2010 02:10 pm
CBA wrote:get an abrasive sponge (the type for washing up) Scrub the "contaminant" off the lacquer.
try not to go all the way through the lacquer if you can help it.
If you don't go all the way through the lacquer (you can tell by the colour coming off on your scrubber) you can T-cut the scratched area flat and shiny.
If you do go all the way through then use a bit of new lacquer (small can £3.00 ish) to touch up the "hole" in the lacquer coat, apply a few thin coats till the level is higher than the original lacquer... like a blister around the repair area about a thou thicker than normal paint.
Once dry (3 days is usually ok ESP in the sun) use your scrubber to flatten the lacquer to the right level then use T-cut to properly shine it.
I did all this by accident after de-badging with a furious credit card, and the eventual finish was very good.


-
Speedy88
- Posts: 4057
- Joined: 04 May 2009 11:52 pm
- Location: Bristol
Post
by Speedy88 » 07 Jun 2010 07:38 pm
oops, my buying finger slipped.
-
valman
- Posts: 663
- Joined: 07 Feb 2010 11:16 pm
- Location: Bedfordshire
Post
by valman » 07 Jun 2010 11:24 pm
WOW thanks for all the great replies, especially CBA
ill get a picture tomorrow as i only just got in from helping a friend pick up another motorbike from miles away
hopefully the sponge method will work

that badge does look good, but its a bit small compared to the hole the old one left i was thinking something atleast 60mm height, ill keep looking
-
340GLT
- *** V3M DONOR ***
- Posts: 3657
- Joined: 31 Mar 2005 09:01 pm
- Location: Shropshire & Swansea, UK
-
Contact:
Post
by 340GLT » 08 Jun 2010 02:57 pm
Being as that is a straight colour and not mettalic it wont be laquered anyway. It will be 2pack topcoat paint. If you can feel it on the surface use a sheet of 2000 grit wet and dry gently with some water then some G3 polishing compound by hand.
Anything more abrasive will mark the paint.
Adam
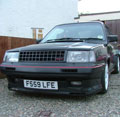
F559 LFE - 340R 2.0 16v
C208 CTR - 340 1.8 16v
D300 LBO - 360 GLT 3 Door Turbo project!! (and restoration)
F706 RBX - 350R in process!!!
-
magnumpi
- Posts: 1289
- Joined: 05 Feb 2008 11:39 pm
- Location: Surrey
Post
by magnumpi » 08 Jun 2010 09:44 pm
340GLT wrote:Being as that is a straight colour and not mettalic it wont be laquered anyway. It will be 2pack topcoat paint. If you can feel it on the surface use a sheet of 2000 grit wet and dry gently with some water then some G3 polishing compound by hand.
Anything more abrasive will mark the paint.
Adam
I did mine in a similar fashion when i changed my Volvo badge on the right of the boot. That left a thick foam type sticky mess, which i scrapped back as far as possible with my nail lol, then used a small bit of white spirit on a cloth.
As Adam has suggested i then used a bit of G4 on a damp cloth and it buffed up that area. Once i had finished thats the only part of the boot with no orange peel, so it looks like they could have made a better job at the factory
89 3dr 340DL in Battleship grey with Ultralights and Williams power
Whats the matter with the car i'm driving can't you tell that it's out of style?
-
CBA
- Posts: 1071
- Joined: 24 Mar 2010 02:14 am
Post
by CBA » 08 Jun 2010 10:22 pm
sandpaper is too fast, i'd be far happier with a scouring pad instead of emery - in fact, I would T-cut it for about 5 minutes seeing it's not too bad should clean it right up. hard coat wax on top afterwards... dont skimp on wax.