Turbo 360: More potential shell ruining lol

Re: Turbo 360 - underside resto
I have neither and almost buy cars every week 
-
volvosneverdie
- *** V3M DONOR ***
- Posts: 9143
- Joined: 11 Nov 2008 04:22 pm
- Location: Newcastle Upon Toon
Re: Turbo 360 - underside resto
Speedy88 wrote:I have neither and almost buy cars every week
So do I, but then I sell them at a loss.Matthew Corbett and Sooty wrote:THATS THE WAY TO DO IT!

Re: Turbo 360 - underside resto
looking good mate, i'd love to give mine such good treatment but apart from the time and money, i can't bring myself to stop driving mine daily, even for a week lol
'88 360 +T LSD - sold
'87 760 TDI (D24TIC) - sold
'04 V40 D sport (F9Q, decat, Remapped, launch control)
'89 740 SE (b230ft, 12psi, V-cam, headwork, 'remapped', banded steels)
'86 340 DL 1.4
'87 760 TDI (D24TIC) - sold
'04 V40 D sport (F9Q, decat, Remapped, launch control)
'89 740 SE (b230ft, 12psi, V-cam, headwork, 'remapped', banded steels)
'86 340 DL 1.4
-
foggyjames

- *** V3M DONOR ***
- Posts: 9361
- Joined: 29 Jan 2004 04:20 am
- Location: Nottingham, UK
Re: Project B230FT - Blown B230 in my bay :]
Just spotted this...might be useful for future reference. All B200/230s mated to an M4x (M45, M46, M47) gearbox use the same spigot bearing as a 360...the part number is the same. It's one of relatively few 300 series parts you can still get...because it's not really a 300 series part!pyro wrote:1) the spigot bearing didnt need to be changed on my engine when i did the swap, was the same size as the 360 one, still not hard though, ITs the clutch shaft/input shaft support bearing, nothing fancy, easy swap, and the one from the 360 engine is as direct replacement. the 940 vs 360 spigot bearing must have a different internal diameter hence the swap, straight swap though.
Ones mated to a M90 use a different arrangement (it's a non-contact "guide" to guard against extreme movements causing gearbox input shaft bearing damage...so the shaft doesn't normally contact it. It's a solid piece of nylon (NA) or metal (Turbo) and not a bearing, so if it made contact, the clutch wouldn't work), so these will need changing.
cheers
James
VOC 300-series Register Keeper
'89 740 Turbo Intercooler
'88 360 Turbo Intercooler
'85 360 GLT
'81 343 GLS R-Sport
'79 343 DL
'70 164
...and some modern FWD nonsense to get me to work...
'89 740 Turbo Intercooler
'88 360 Turbo Intercooler
'85 360 GLT
'81 343 GLS R-Sport
'79 343 DL
'70 164
...and some modern FWD nonsense to get me to work...

Re: Turbo 360 - underside resto
I'll keep this brief. Even though I have not been updating this thread, I have still been on with the car when time allows. Not much seems to change though, so pointless mentioning it.
Anyway, finally got myself a decent job so I are dedicating more funds (and ironically hours) on the the old bus, still aint goin mad though! However, the build will be a little less ghetto now.
To bring this up to speed (I think)...
Sick of lying on my back, so I bought one (or is that two?) of these fantastic creations;


Welded together by FJ and myself. If I was a religious man I would term it a God send. As I am not, I will just say that it is fucking great!
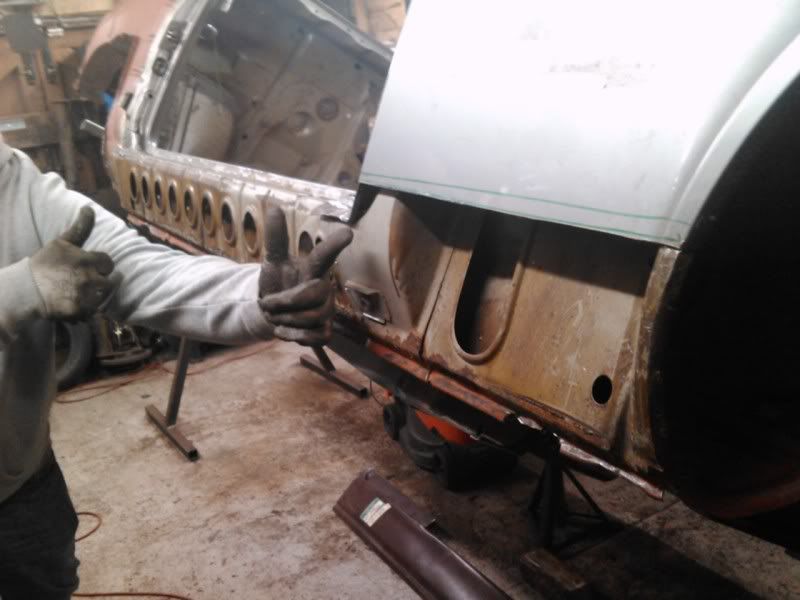
As can be seen, I sacked off the front panel. No need to repair that rusty valance any longer since I found this;
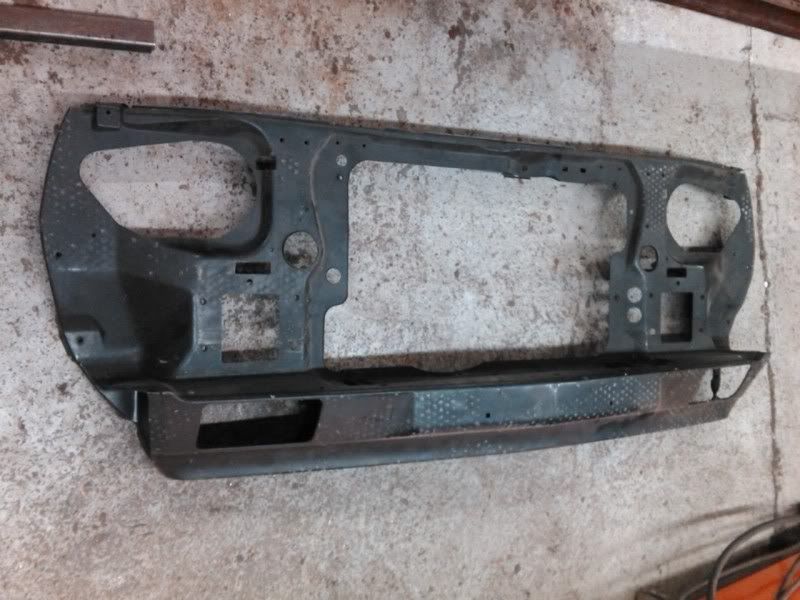
N.O.S Volvo win. Shame it's mk3 though! Ah well, I have a plan for that.
I also finally put my hand in my pocket (read: found cheap) and bought some acid etch primer. So off with the red oxide!
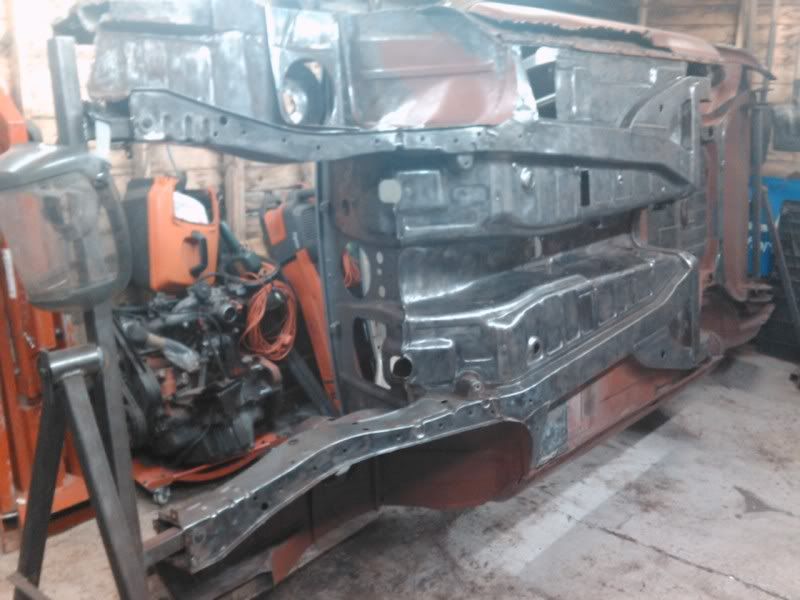
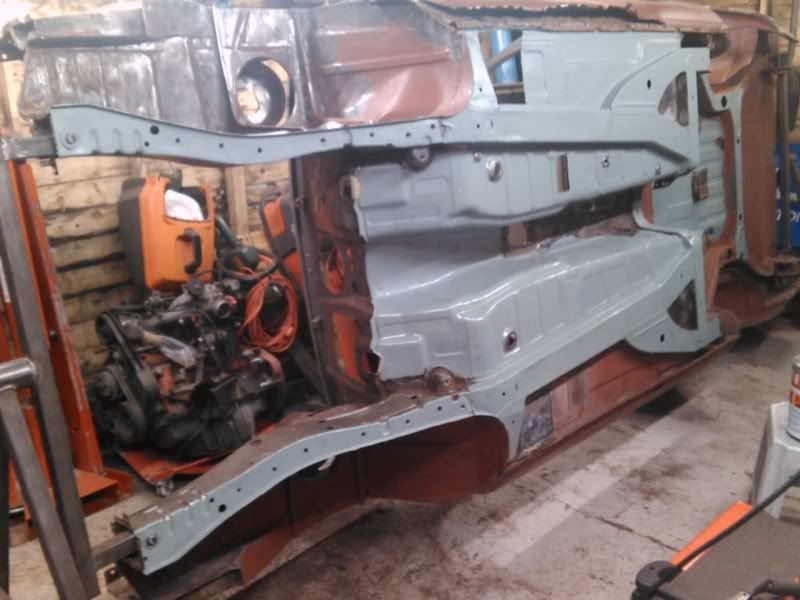
Plenty more to go. That took ages though, believe it or not!
You may have noticed that I like to have a few jobs going at one time. It stops me getting bored when I work between them.
Here's another;
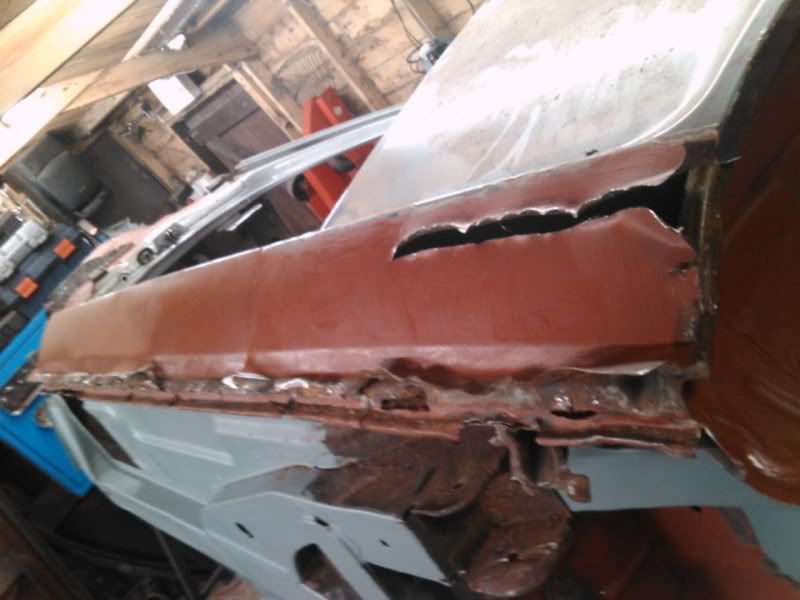
Choppy choppy
So pleased this car was waxoyled everywhere!
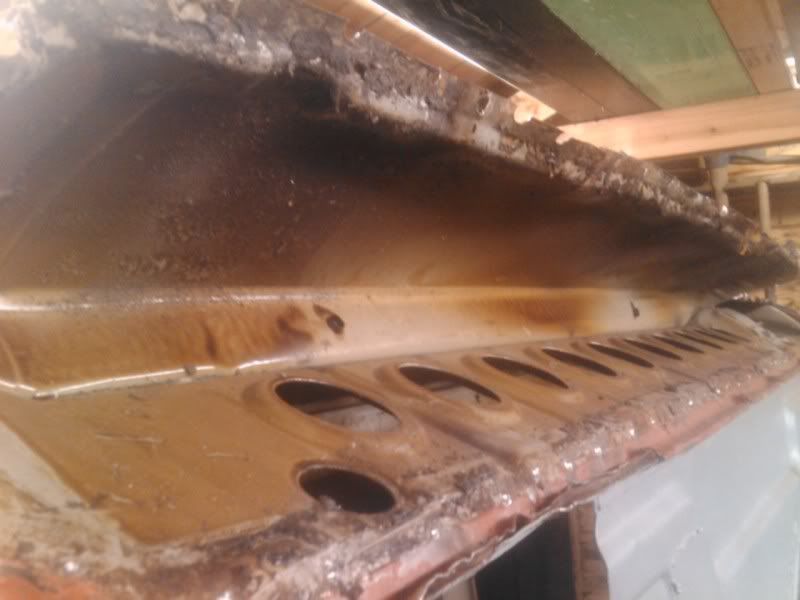
Just a couple of areas like this where it has gone, which I already knew about. With the sill off it's piss easy to fix. Plus it's nice to know that it's in good order behind there. Well that side is, let's see what is hiding behind door number 2.
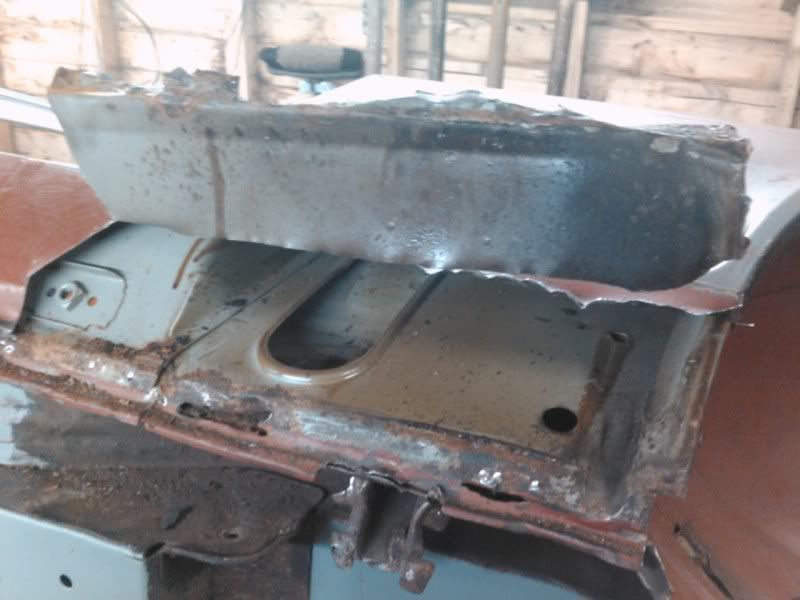
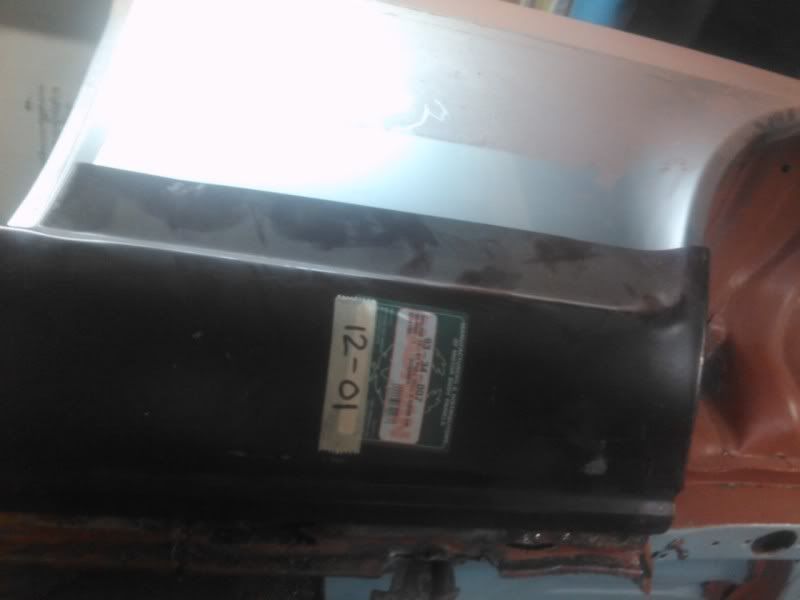
LMAO @ what appears to be the manufacture date on these sills;
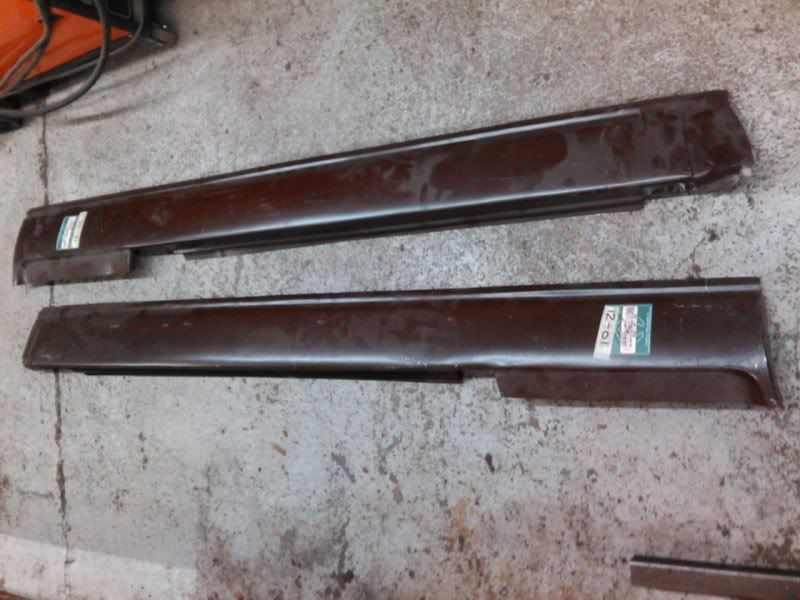
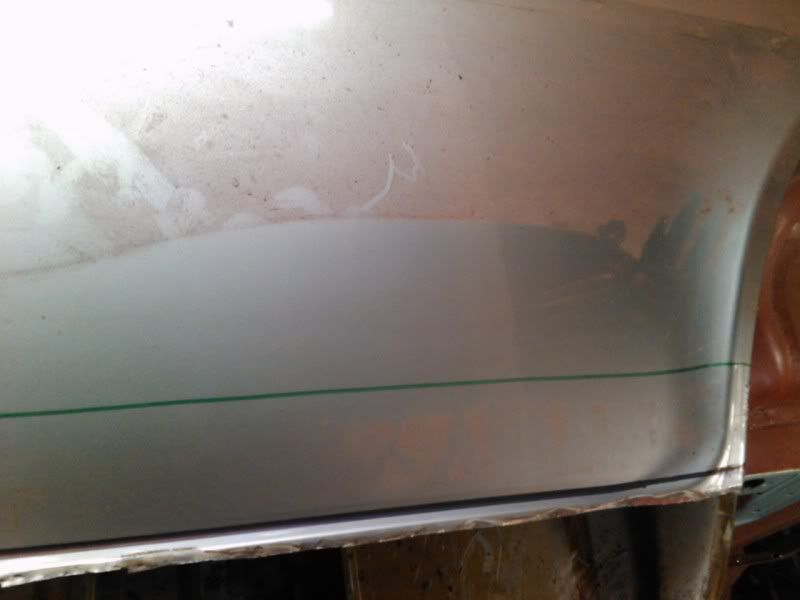
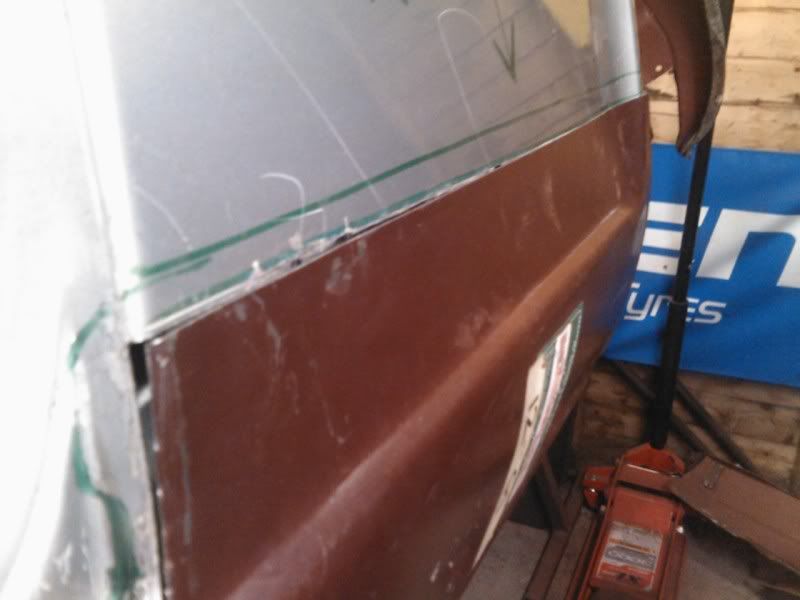
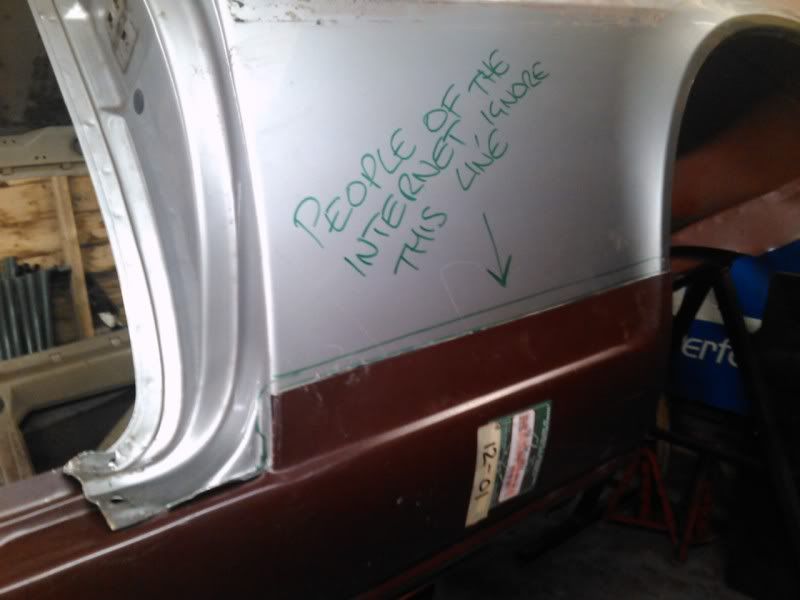
On the subject of sills, what is the best way to fit them? i was initially thinking of cutting the quarter on the swage line. Black line in the below pic. After a think though, I reckon I will fit the whole thing (green line in pic). As the swage line may be lost after welding and filler?
What's the pro's say? I have never done this before.
it will be nice when it looks like this;
Sorry for the lack of action on here. Things shall be different from now on though. My free time is a lot more valuable to me now - so I waste it all in the garage.
LIam.
Anyway, finally got myself a decent job so I are dedicating more funds (and ironically hours) on the the old bus, still aint goin mad though! However, the build will be a little less ghetto now.
To bring this up to speed (I think)...
Sick of lying on my back, so I bought one (or is that two?) of these fantastic creations;
Welded together by FJ and myself. If I was a religious man I would term it a God send. As I am not, I will just say that it is fucking great!
As can be seen, I sacked off the front panel. No need to repair that rusty valance any longer since I found this;
N.O.S Volvo win. Shame it's mk3 though! Ah well, I have a plan for that.
I also finally put my hand in my pocket (read: found cheap) and bought some acid etch primer. So off with the red oxide!
Plenty more to go. That took ages though, believe it or not!
You may have noticed that I like to have a few jobs going at one time. It stops me getting bored when I work between them.
Here's another;
Choppy choppy
So pleased this car was waxoyled everywhere!
Just a couple of areas like this where it has gone, which I already knew about. With the sill off it's piss easy to fix. Plus it's nice to know that it's in good order behind there. Well that side is, let's see what is hiding behind door number 2.
LMAO @ what appears to be the manufacture date on these sills;
On the subject of sills, what is the best way to fit them? i was initially thinking of cutting the quarter on the swage line. Black line in the below pic. After a think though, I reckon I will fit the whole thing (green line in pic). As the swage line may be lost after welding and filler?
What's the pro's say? I have never done this before.
it will be nice when it looks like this;
Sorry for the lack of action on here. Things shall be different from now on though. My free time is a lot more valuable to me now - so I waste it all in the garage.
LIam.
STREETO WITHDRAWL
INTO BURNOUTSsince1982
INTO BURNOUTSsince1982
Re: Turbo 360: Doin' it right.
looking good mate!
Re: sills, i'd fit the lot (green line) but i'm no pro
nice work, keep us posted
Re: sills, i'd fit the lot (green line) but i'm no pro
nice work, keep us posted
'88 360 +T LSD - sold
'87 760 TDI (D24TIC) - sold
'04 V40 D sport (F9Q, decat, Remapped, launch control)
'89 740 SE (b230ft, 12psi, V-cam, headwork, 'remapped', banded steels)
'86 340 DL 1.4
'87 760 TDI (D24TIC) - sold
'04 V40 D sport (F9Q, decat, Remapped, launch control)
'89 740 SE (b230ft, 12psi, V-cam, headwork, 'remapped', banded steels)
'86 340 DL 1.4
Re: Turbo 360: Doin' it right.
Cheers Matt.
Reckon I will fit the lot, but see what those in the know recommend first. One thing is probably bracing the shell...
Sick of the holes in the bloody thing too! I have found them all now though, and made a canny few more. So much for a clean car!
Reckon I will fit the lot, but see what those in the know recommend first. One thing is probably bracing the shell...
Sick of the holes in the bloody thing too! I have found them all now though, and made a canny few more. So much for a clean car!
STREETO WITHDRAWL
INTO BURNOUTSsince1982
INTO BURNOUTSsince1982
Re: Turbo 360: Doin' it right.
Looking good, wish I'd had a body turner thing.
tips;
-Wire brush off underseal to find spot welds and use hole cutter spot weld cutters with 3mm drill for pilot hole. You might want to do that for the top spots.
-Fit the door for alignment checking, but appreciate that is annoying with the pins etc. maybe without pins would be enough assuming door latch well adjusted before.
-If you have panel holders that would be good, and handy with the 3mm holes you might have drilled earlier.
-If you have the 2 inner layers and no engine I would say it should be strong enough, but support the middle with a little pressure to be sure (maybe worse on 3 door) if horizontal. Or maybe turn fully sideways, will stop sagging.
-Grind off the resin primer from the mating spot weld areas, and paint car and panel with Zinc, i use 1 coat Zinga. Drill the panel first (+deburr), then clear off the zinga from the holes then plug weld (slowly pulse, otherwise the zinc will blowout the steel).
-Don't try and step the joint except where its flat against the stepper, otherwise you will straighten out the curves near the wheel arch. For my wheel arch section I welded on a few squares material behind the panel to overlap inside, drilled and used panel holders and butt welded. That might be similar to your rear quarter panel.
-And of course weld very slowly on the quarter panel.
-Use a good welding rated breathing filter mask, will keep out the smoke from the cavity wax between layers 1 and 2.
1980 345 DL_______1987 360 GLE (project car restored to GLT spec and B230FT'd)
1984 360 GLT______1987 360 GLT
1983 360 GLS______1989 360 GLE
1985 340 GL_______1986 340 1.4
1985 360 GLS______1995 940 SE 2.3 Turbo Estate (daily)
1987 340 GL 1.7
1984 360 GLT______1987 360 GLT
1983 360 GLS______1989 360 GLE
1985 340 GL_______1986 340 1.4
1985 360 GLS______1995 940 SE 2.3 Turbo Estate (daily)
1987 340 GL 1.7
-
macplaxton
- Posts: 3283
- Joined: 09 Feb 2008 02:29 am
Re: Turbo 360: Doin' it right.
Just cut out what needs cutting out, no need to use whole panel, so green line is fine. Ditto with the door step bit, no need to hack that off the car if it's sound, just off the replacement.
It's always awkward with 2 door cars as the original outer dips behind the rear quarter section and up round the door frame, so you can chose to hack the panel in half to try and recreate the original layout, or keep the once piece panel and do something else with the bottom of the B-post.
It's always awkward with 2 door cars as the original outer dips behind the rear quarter section and up round the door frame, so you can chose to hack the panel in half to try and recreate the original layout, or keep the once piece panel and do something else with the bottom of the B-post.
72 DAF 44 Estate 78 Volvo 343DL Black Beauty

82 Volvo 343DL CVT
 88 Volvo 340DL Diesel
82 Volvo 343DL CVT
88 Volvo 340DL DieselRe: Turbo 360: Doin' it right.
Hell no! We have discussed this before, and I find them crap.Ride_on wrote: use hole cutter spot weld cutters with 3mm drill for pilot hole.
Will weld slowly etc, good advice on the door fitting etc. Cheers mate.
Mac, the green line represents the whole new sill, the black is where I was initially considering to cut, but the swage line will end up distorted imo.
The reason I mentioned fittign the whole thing is because even some of the 'good' metal on the original sills is very thin in places.
Cheers fellas, Liam.
STREETO WITHDRAWL
INTO BURNOUTSsince1982
INTO BURNOUTSsince1982
Re: Turbo 360: Doin' it right.
ive not been on here in a while, didnt notice you had gone this far into restoreing the car lol, good work
Re: Turbo 360: Doin' it right.
The only difference between now and when I last posted is that it's on the rollover spit, and I removed the engine/servo/steering column mate. En was only in on two mounts.
STREETO WITHDRAWL
INTO BURNOUTSsince1982
INTO BURNOUTSsince1982
-
foggyjames
- *** V3M DONOR ***
- Posts: 9361
- Joined: 29 Jan 2004 04:20 am
- Location: Nottingham, UK
Re: Turbo 360: Doin' it right.
I have a home-made rotisserie I bought from a mate, comprising of two engine stands (adjusted to be upright), and a set of mounts for a 140 (which I'm assuming will also fit the 164).
Here it is: http://forums.turbobricks.com/showthread.php?t=112583
I particularly enjoyed the "centre of gravity issues" pics. So Turbobricks.
cheers
James
Here it is: http://forums.turbobricks.com/showthread.php?t=112583
I particularly enjoyed the "centre of gravity issues" pics. So Turbobricks.
cheers
James
VOC 300-series Register Keeper
'89 740 Turbo Intercooler
'88 360 Turbo Intercooler
'85 360 GLT
'81 343 GLS R-Sport
'79 343 DL
'70 164
...and some modern FWD nonsense to get me to work...
'89 740 Turbo Intercooler
'88 360 Turbo Intercooler
'85 360 GLT
'81 343 GLS R-Sport
'79 343 DL
'70 164
...and some modern FWD nonsense to get me to work...

Re: Turbo 360: Doin' it right.
Very nice work!
About the sills, I'd cut where the "bad" metal ends. Mine was done like this some years ago.


About the sills, I'd cut where the "bad" metal ends. Mine was done like this some years ago.
Volvo R-Sport - Equipment for the car enthusiast.
“Buy land, they're not making it anymore” - Mark Twain
"There are only three sports: bullfighting, motor racing, and mountaineering; all the rest are merely games." -Ernest Hemingway
“Buy land, they're not making it anymore” - Mark Twain
"There are only three sports: bullfighting, motor racing, and mountaineering; all the rest are merely games." -Ernest Hemingway
Re: Turbo 360: Doin' it right.
Cheers Fuse! Thanks for the pics too, yours looks a good job  . I have done it slightly different though. As for cutting it to where the rust ends, tbh my sills weren't that bad. A couple of platable sized holes, a few pin holes etc. The way I see it is I needed to get behind them to repair the inner section, so I may as well replace them given that they are almost 30 years old.
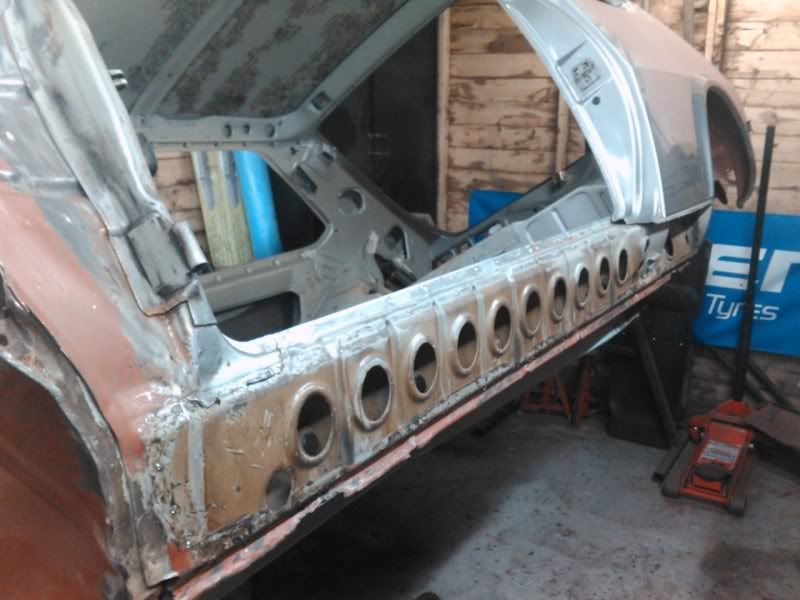
Rideon, just noticed that I never showed a pic of the shell with the full sill removed (thought I had). Explains why you told me how to remove them etc.
Guess I don't have one.
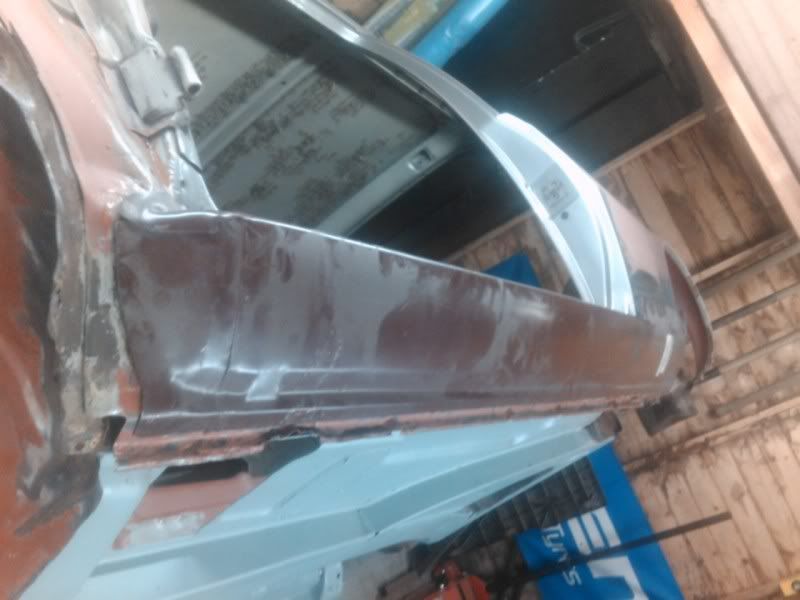
Had a few spare hours tonight so back to the sill;
Scribed (over green mark) and plunge taken with grinder.
Good fit! (IMO)
The highest green line is where the sill appeared to come to when sitting on the old one. Shows how far out 'over sills' would be then.
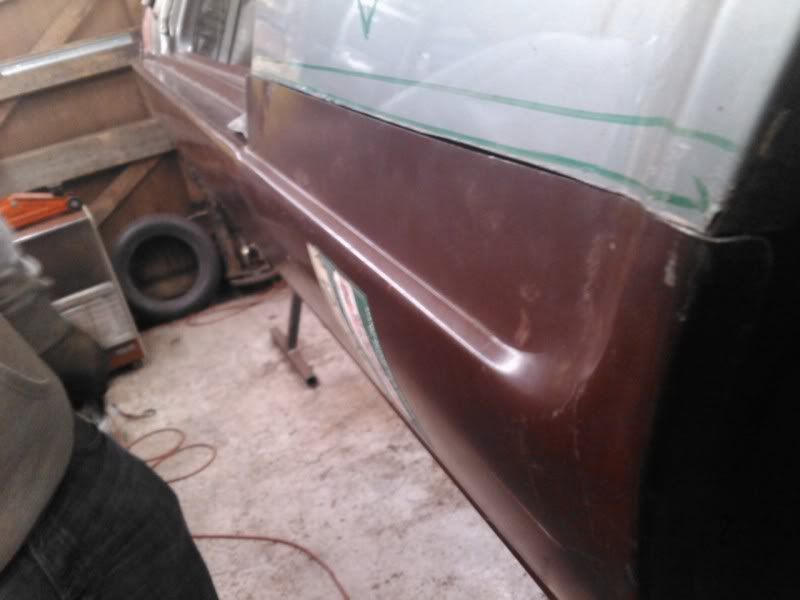
That'll do me. it may be hard to see in the pics, but I have cut the bottom of the quarter off in line with the top of the new sill. Just needs the doorstep B pillar section tidying up a bit obviously welding to the sill. The swage and arch lines are bang on. I'm happy with this, it wasn't anywhere near as difficult as I first imagined.
I will weld it on shortly, need to repair the small rust holes on the lower part of the inner sill first.
Also whipped out the battery tray;
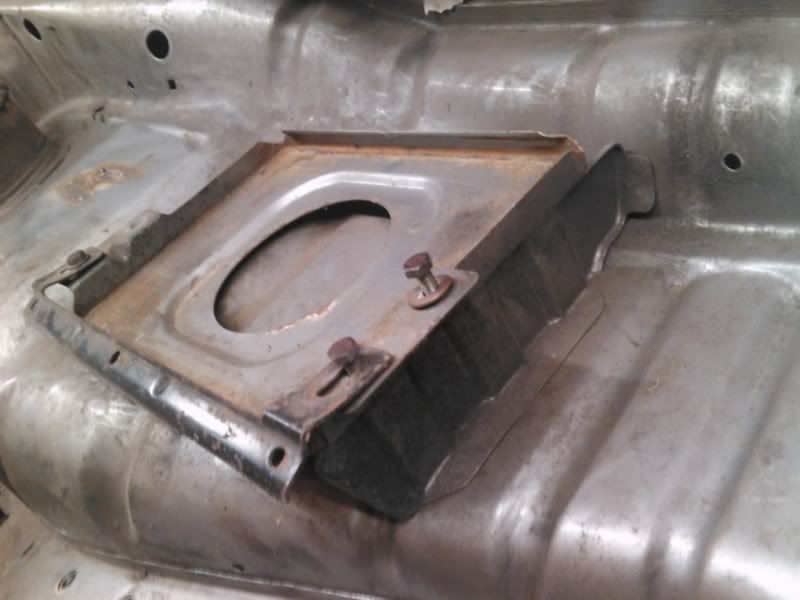
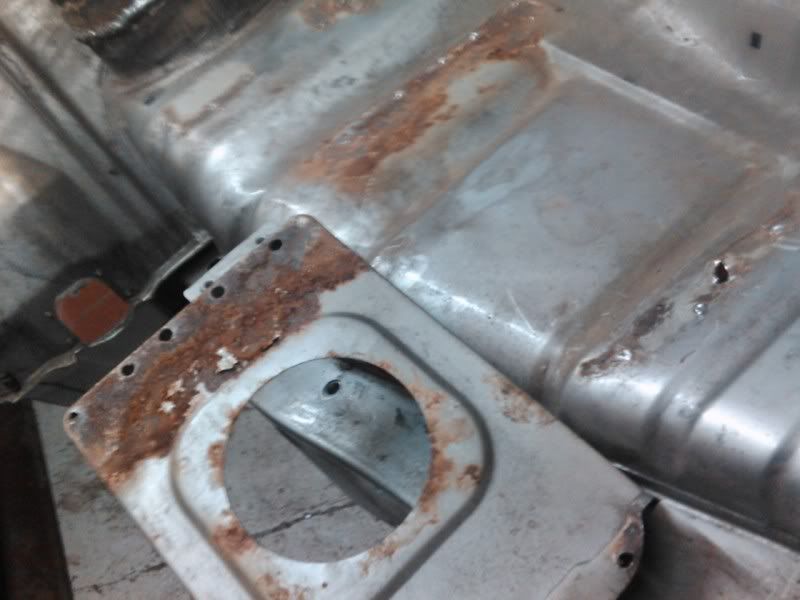
Gotta love the rust festering between panels!
On Friday I called into AAS to price up a 6 point weld in cage and an exhaust system. I'm more than happy with the prices he quoted me, and will definitley be saving up and delivering him a car shortly. Anyone that has ever heard of them will know how amazing their work is. He says he needs the car to be a bare shell - I think I can accomodate that.
Rideon, just noticed that I never showed a pic of the shell with the full sill removed (thought I had). Explains why you told me how to remove them etc.
Guess I don't have one.
Had a few spare hours tonight so back to the sill;
Scribed (over green mark) and plunge taken with grinder.
Good fit! (IMO)
The highest green line is where the sill appeared to come to when sitting on the old one. Shows how far out 'over sills' would be then.
That'll do me. it may be hard to see in the pics, but I have cut the bottom of the quarter off in line with the top of the new sill. Just needs the doorstep B pillar section tidying up a bit obviously welding to the sill. The swage and arch lines are bang on. I'm happy with this, it wasn't anywhere near as difficult as I first imagined.
I will weld it on shortly, need to repair the small rust holes on the lower part of the inner sill first.
Also whipped out the battery tray;
Gotta love the rust festering between panels!
On Friday I called into AAS to price up a 6 point weld in cage and an exhaust system. I'm more than happy with the prices he quoted me, and will definitley be saving up and delivering him a car shortly. Anyone that has ever heard of them will know how amazing their work is. He says he needs the car to be a bare shell - I think I can accomodate that.
Last edited by L14MNP on 21 Nov 2011 01:11 am, edited 3 times in total.
STREETO WITHDRAWL
INTO BURNOUTSsince1982
INTO BURNOUTSsince1982