
One of the insignificant but annoying faults which affects the 300 series is the two mileage counters failing. Here's my brief guide to fixing it...
The fix goes as follows. Remove the instrument cluster (see Haynes, swear at Haynes, work it out for yourself), and remove the speedo from the cluster (4x 5.5mm hex-headed screws). While the cluster is out, take this opportunity to run some light oil (3 in 1, perhaps?) down the middle of the speedo cable to help prevent 'needle waggle'.
Next, locate the hole in the rear of the speedo housing, and shove some blu-tack in there. Raise the needle to exactly 60mph (or another chosen number), and push the blu-tack in, fixing the needle in place. Now you can safely remove the needle (either by hand, or some like to use a fork) without messing up the calibration - although of course you need to put it back on right! We're doing this because there is 'preload' on the needle, so pulling the needle straight off, then sticking it back on at 0mph won't give the right result. At this point, you can remove the two screws which hold the facia on, and you have access to the mechanism.
Blu-tack Pictar!

At this point in time, if you can be bothered, you can roll the mileage on simply by pushing the numbers around - starting at the 'lowest value' end. It's is usually easiest to turn the trip meter, as this is coupled to the mileometer, but is still rigidly mounted. See below...

Now down to the 'meat' of the situation...
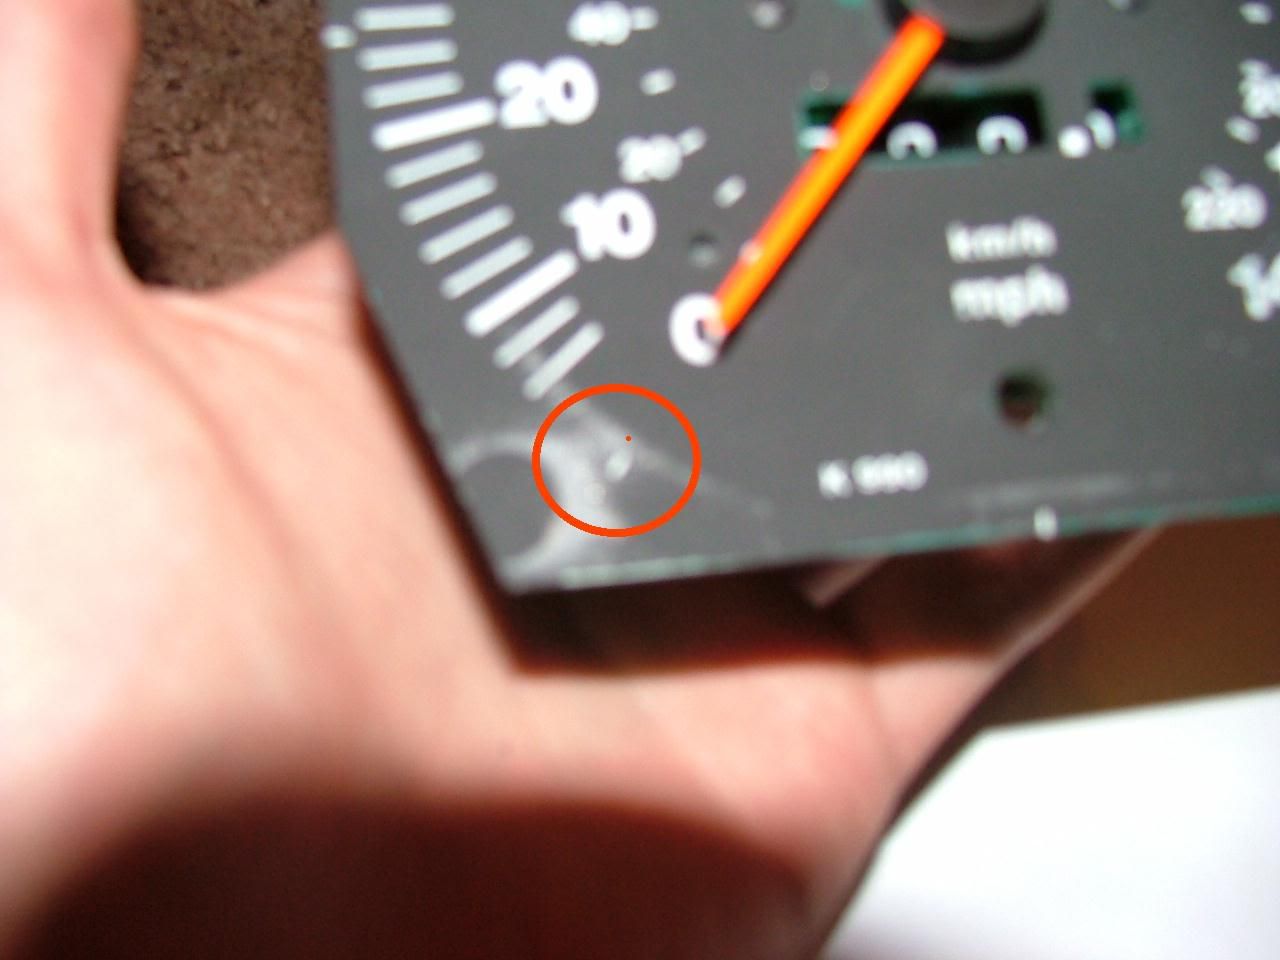
The problem is caused by the plastic housing of the speedo becoming worn (Figure A), and allowing the spindle which the main mileometer is attached to work loose and move. Eventually, it will work its way sideways, and the gear will be pulled clear of the worm-gear (Figure B), meaning the shaft no longer turns, and the mileometer stops advancing.
Figure A - Where the housing wears

Figure B - Where the gear no longer meshes with the worm-gear

Figure C - How it should mesh

Once you're happy with the mileage, you just need to line the shaft up with the hole (ooh err) as in Figure A and push on the gear end to re-mesh with the worm gear, and start the mileometer turning again. Re-assemble, and you're done....Hurrah!
-----------------------------------------------------------------------------------
....Not quite....
Thing is, that housing for the shaft is worn, right? So it'll just pull straight out again. We need to secure it somehow. Andy's method is to add a blob of solder to the end of the shaft (the end shown in Figure A), but that seems a bit too much like Ninja soldering to me, so I'm going to try an easier method.
I cracked out the drill and pop-riveter (I guess I have an unfair advantage there...), and got to work on the casework. Essentially, I riveted in place a small bar which prevents the gear from moving out of mesh with the worm gear. A picture tells a thousand words...


Then it's a case of putting it all back together, and going for a test drive
Hopefully that has been of some use...
cheers
James