Page 2 of 7
Re: 360 turbo saloon tidy up
Posted: 29 Apr 2015 06:44 pm
by Joris
A-cam comes standard in the 360 b200e and is considered a good upgrade over the t-cam.
Re: 360 turbo saloon tidy up
Posted: 29 Apr 2015 11:14 pm
by Ride_on
Yeah I have one of those, from a low compression glt. That's for laters.
Re: 360 turbo saloon tidy up
Posted: 30 Apr 2015 08:58 am
by SteveP
That's what Id've suggested too

Unless you're keeping the 940 cam mounted distributor, then I'd just get a 'V' cam out of an N/A 2/7/9 series, very similar to the 'A'.
Re: 360 turbo saloon tidy up
Posted: 01 May 2015 01:15 am
by Ride_on
No cam disti's are the devils work. Will be DIS from the first turn... It may not work on the first turn but that's the plan!
Re: 360 turbo saloon tidy up
Posted: 01 May 2015 11:17 am
by SteveP
Don't blame you, silly idea having the distributor mounted there - especially in a 360! The 'A' cam will be a good match I think.
Re: 360 turbo saloon tidy up
Posted: 20 Jun 2015 03:10 am
by Ride_on
Still working away slowlyish on this, keeping getting blocked with missing bit of pipe or clips or something but getting there.
Think I've got the wiring loom sorted now with the RFID immobiliser included and intend to include the chip in the 360 key. The aerial fits nicely over the 360 lock. Wasted spark mode also done with a nice coil pack mount in the old 360 disti position and utilising all 3 of the 960 3 channel ignition amps to keep a rpm drive. Just have to move it to the car now and sort power and grounds.

- Coil pack
- IMG_20150602_184436s.JPG (126.26 KiB) Viewed 10971 times
Have also been sorting the fuel pipes, filters and mounts. Needed anout 2.5-3m of pressure pipe and lots of expensive stainless clamps.
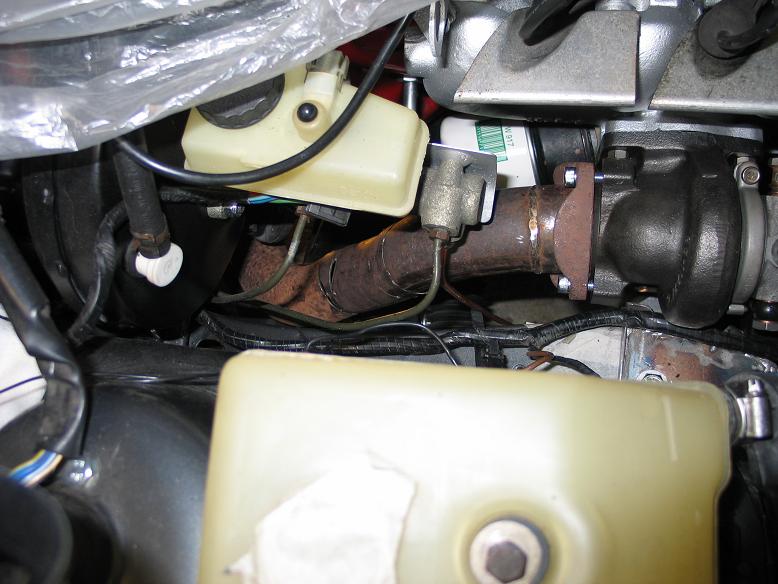
Heater pipes sorted, keeping the 940 oil cooler pipe. Clutch, handbrake also hooked up, with a P clip stopping the clutch cable rubbing on the nice valve colver

- Heater sorted with 940 oil cooler water pipe
- IMG_1974s.JPG (99.88 KiB) Viewed 10971 times
My 360 earth cable was done, but the complete 940 one is a good fit.
Re: 360 turbo saloon tidy up
Posted: 21 Jun 2015 09:30 pm
by SteveP
Very nice work

Re: 360 turbo saloon tidy up
Posted: 03 Jul 2015 12:17 am
by tralla44
Nice mate.
I have some quastions.
Crank sensor is from old 360 Engine ?
And how much wires on crank sensor are there?
Re: 360 turbo saloon tidy up
Posted: 03 Jul 2015 03:49 am
by Ride_on
The 300 crank sensor is 2 wire, and I'm trying to use it. 940 is 3 wire but 3rd wire is just a shield. I shall find out soon if it works with the 940 management, I would think it it should.
Re: 360 turbo saloon tidy up
Posted: 09 Jul 2015 02:22 am
by Ride_on
Well after much head scratching, it is finally alive. Had a long list of mistakes and problems to contend with.
On the first turn of the key it seemed apparent that the immobiliser was working (disarming with a quiet click) but not much else. After removing the starter and finding nothing I looked at the 940 and realised I had the solenoid trigger on the wrong tab, then further realisation about wiring the pump the wrong way round, missing a couple of power wires in the loom and probably some otherstuff like actually putting fuses in the new fuse box.
So we are turning over but no sparks(using wasted spark modification). Probing confirmed we were getting only 1V at the logic outputs. Seems its not a good idea to use more than one channel of the 3 channel coil driver amp at the same time. After removing the rev counter drive (original coil signal) from the amp, the voltage goes up to 3V and looks like we are getting sparks but no life (I'm expecting 5V but spark testers are lighting so lets go with it). I can hear the injectors and there is fuel pressure. It occasionally farts and I can make the cylinders go bang by grounding the coil inputs.
So after some further removal of starter moter and squeezing in the massive 360 starter (orginal seemed a bit slow), rechecking the cam timing I was about to start checking the flywheel when I decided to just swap the coil trigger wires and she burst into life.
I'm using the hot glued 940 CPS at the moment but it seems to give the same electrical results (when turning over) as the 360 one so I am still assuming the 360 one will work, going to order a jetronic connector for it. A good bracket for the 940 CPS can be made fairly easily, but hot glue won't hold for normal running.
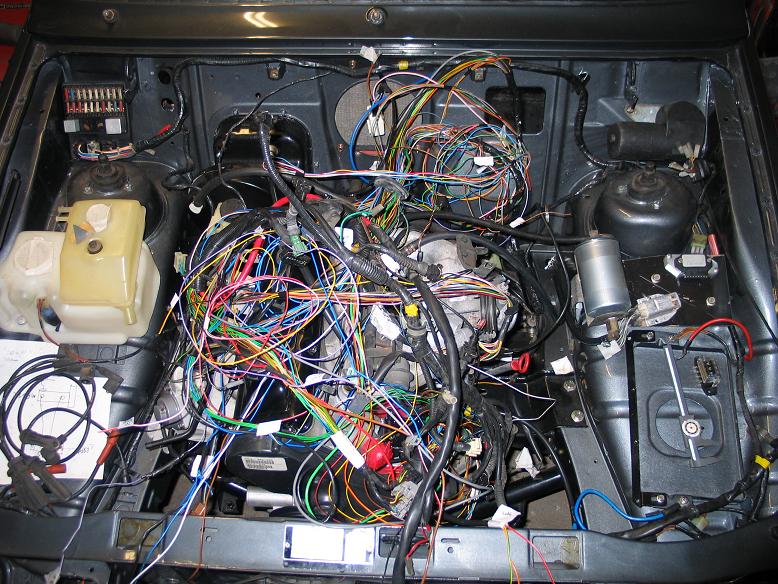
- If I just shake it will it sort itself out?
- wiring.JPG (134.57 KiB) Viewed 10904 times
 Viewed 10904 times")
- Making a jig to make a bracket for the 940 CPS.

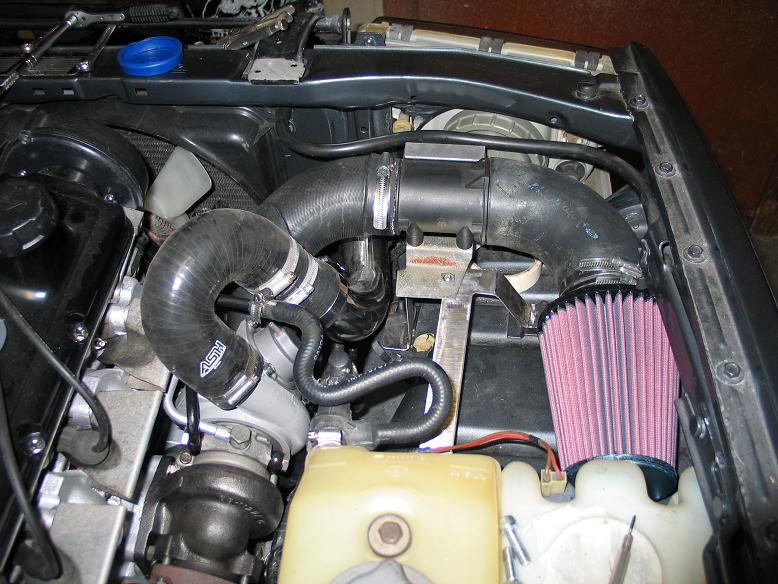
- They seem to have made the later 940 airfilter to just fill all the spare space in the 940.
- air filter.JPG (116.22 KiB) Viewed 10904 times
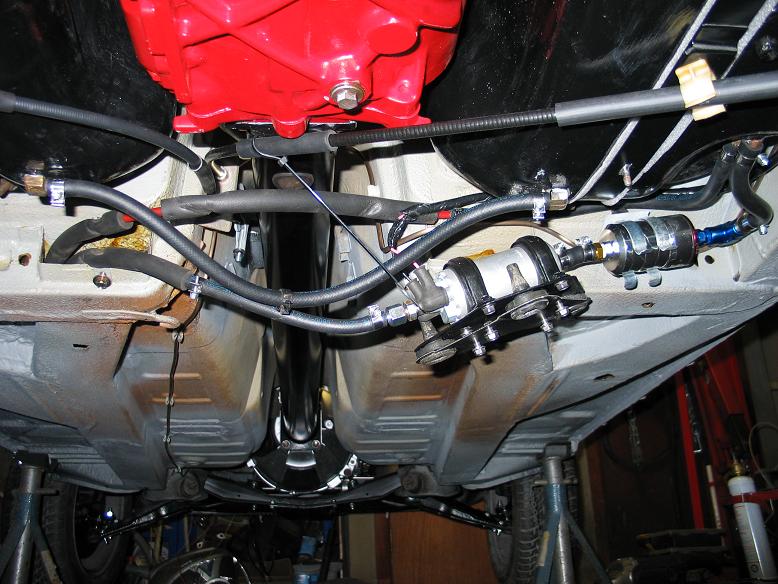
- Fuel pump and pre-filter with new mount rubbers. Big thanks to Mac for the handbrake clips.
- fuel pump.JPG (95.01 KiB) Viewed 10904 times
Re: 360 turbo saloon tidy up
Posted: 09 Jul 2015 10:32 am
by MCHUDD
Hi mate.
Looks like your doing a fantastic job with that motor.
Cheers Mark.

Re: 360 turbo saloon tidy up
Posted: 09 Jul 2015 10:52 am
by macplaxton
Ride_on wrote:
Hope you've only been using that book as a leaning pad.

Re: 360 turbo saloon tidy up
Posted: 09 Jul 2015 10:33 pm
by Ride_on
Ermm, yes of course and protect paint from tools!
To be honest it had been a while since it was disassembled and there are many new bits but the bits I need are not in the manual.
Re: 360 turbo saloon tidy up
Posted: 08 Aug 2015 01:51 am
by Ride_on
Latest progress ;
-Temporary Downpipe completed down to and behind cross member, chopped up the 940 down pipe and used stainless in the mig, could be a permanent job. Extended the angle bracket at the bell houseing-torque tube to take a 63mm u-bolt. Just waiting on a custom bend to finish it and join it to the original exhaust.
-Original Radiator back in a piped up with the 940 bottom pipe and expansion tank with a bit of cutting and shutting. Turbo water top feed, bent up the 10mm metal pipe to fit nicely between the U bend. The pipe was very stiff and I broke a new pair of benders that said they were suitable for the task, still, got a refund and use the dies with a hammer to finish it
-Inlet system complete and mounted intercooler and AMM
2.5" intercooler (toyo IC5059)
3x 63-57 right angle silicone reducer
51mm 180 degree silicone bend
57-51 silicone reducer
51mm Ali joiner
57mm polished SS right angle bend (cut some of one end and welded on at angle on the other end)
Mounted the intercooler onto the top rad brackets and bumper mounts
Made a bracket to use the GLT air filter mounts to mount the AMM and cone filter
Chopped up the 940 Ali throttle side pipe (AC type)
- Downpipe tacked
- IMG_1999s.JPG (72.3 KiB) Viewed 10864 times

- Headlight wiper motor just fits after cutting away a little plastic on the light body
- IMG_2015s.JPG (94.65 KiB) Viewed 10864 times
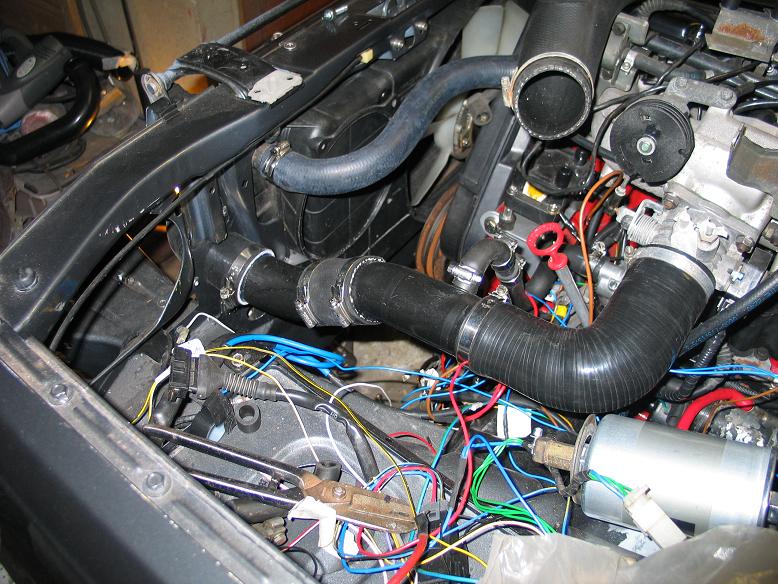
- Inlet pipe work and mountings
- IMG_2027s.JPG (94.76 KiB) Viewed 10864 times
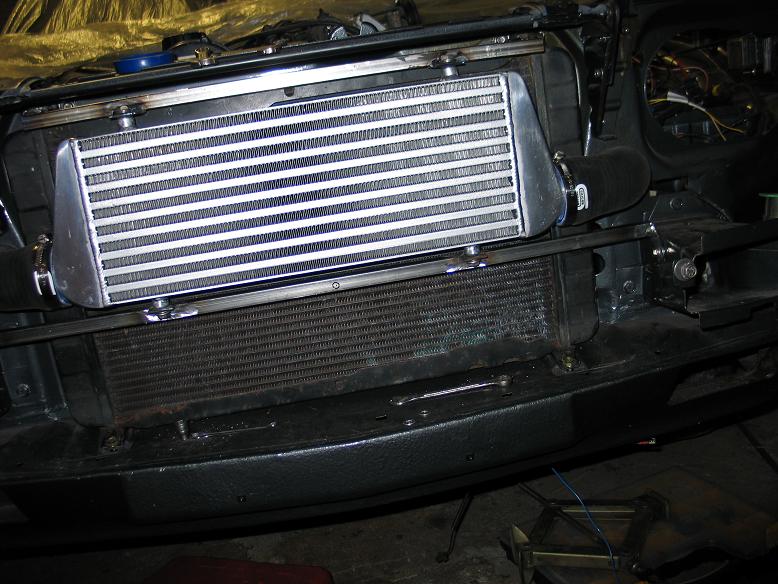
- Intercooler mounts
- IMG_2028s.JPG (95.32 KiB) Viewed 10864 times
- Throttle side pipe work
- IMG_2019s.JPG (116.52 KiB) Viewed 10864 times
Re: 360 turbo saloon tidy up
Posted: 12 Aug 2015 02:44 am
by zack360
Marvelous job man...