Page 17 of 27

Re: Turbo 360 - underside resto

Posted: 28 Feb 2011 11:42 pm
by Nimminz
looking good mate!

Re: Turbo 360 - underside resto

Posted: 01 Mar 2011 12:28 pm
by Chris_C
The effort shown is pretty damn awesome, hugely impressed.

Re: Turbo 360 - underside resto

Posted: 01 Mar 2011 12:44 pm
by volvosneverdie
Q: What are you doing about the front splitter man?
Is that going on the delipped vallance? or are you doing away with it alltogether?

Re: Turbo 360 - underside resto

Posted: 01 Mar 2011 01:58 pm
by foggyjames
We need a "like" (or similar) button...because I do, definitely, "like" this...

cheers

James

Re: Turbo 360 - underside resto

Posted: 08 Mar 2011 04:51 pm
by L14MNP
Thanks all. Need to get a clear run at this, but life keeps getting in the way!

Such as, Saturday I went down to Torquay with a mate to get an MR2 Turbo, and on Monday I was window shopping - not the kind you are thinking! Two little scrotes decided to put out the passenger side glass on my daily/beater/shitter/Fiat on Sunday night whilst I was in the garage working on the 360. Could have done without that!

Once I had taped black bags over the car I decided to cheer myself up by mocking up its soon to be new look. I have a few parts stashed/in the making. Here's four of them/ (Eight if you count the wheels) deeper, lower ET ML's than the previous ones).

Image
Image
Image
Image
Image

I like these profile tyres, they will cushion the ride a little, don't seem to make the wheel look less dished, and will allow me to lower it an inch further than previously. I will run these all round.


Fitted to the axle. Shouldn't need very large spacers.

Image
Image

Previous fronts, complete with rubber bands
Image
Previous rears, complete with part-worn balloons!
Image


These pics have provided me with a sufficient enough vehicular mojo boost. Game on. Just wish that chill in the air would fuck off!


Cheers folks. :)

Re: Turbo 360 - underside resto

Posted: 08 Mar 2011 05:36 pm
by volvosneverdie
Those arches look super J man.

Awesome.

Re: Turbo 360 - underside resto

Posted: 08 Mar 2011 05:47 pm
by Speedy88
That is gonna look amazing. Top work :D

Re: Turbo 360 - underside resto

Posted: 09 Mar 2011 12:34 am
by SteveP
Wow them arches look like they'll be such a great fit

Re: Turbo 360 - underside resto

Posted: 09 Mar 2011 02:47 pm
by jon-ovlov
Weird. I looked at those arches awhile ago too. Did a photoshop with them on, on my car. Good to see them on in the flesh though! They the ones of the chap at retro rides? They look like a really neat fit! Cars coming along well. :D

Couldn't agree more bout the chill. the sun is teasing me!

Re: Turbo 360 - underside resto

Posted: 09 Mar 2011 07:44 pm
by samueljon
the archs look the bees!!
what width rim are you using?

Re: Turbo 360 - underside resto

Posted: 13 Mar 2011 02:35 am
by valman
awesome progress dude 8) loving the use of bolt on arches - i always wanted to fit a set to mine to cover up/get rid of some holes :lol: can't wait to start doing this kind of resto work on my one in the summer

Re: Turbo 360 - underside resto

Posted: 13 Mar 2011 03:48 pm
by Nikdev
Nice progress! Cant wait to see more
Are those the type 1 or type 2? arches from the Retrorides forum? Looks great!

Re: Turbo 360 - underside resto

Posted: 22 Mar 2011 06:20 pm
by Evoman
looking sweet, Love it man! :D

Re: Turbo 360 - underside resto

Posted: 08 May 2011 11:49 am
by L14MNP
Just FYI. This is still happening. There has been quite a lot of work done it since I last updated here. Most of it looks like I have spent barely any time on it, but trust me I have - although not as much as I could. Pics don't show a great deal. This really is awkwardly shaped in places!

I am being quite pedantic about underseal/rust removal. Not much left now, but I don't like leaving the bits I can't access. Time to buy a blow torch. Or another* heatgun. I am hoping to have it in seam sealer/stonechip/painted underneath and in the arches etc in around a month.

Then the cleaning up/reassembly of the running gear can commence. I have collected pretty much everything I need for that, and I am REALLY looking forward to not having to lie on my back 90% of the time I want to do anything to the car! :lol:


I've been through 3 over the years. :roll: :lol:

Re: Turbo 360 - underside resto

Posted: 20 Aug 2011 07:37 pm
by L14MNP
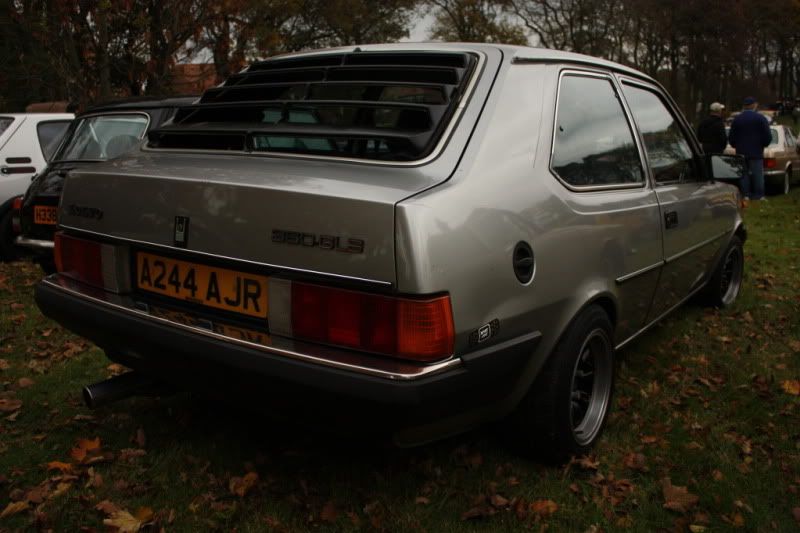
Oh yeah, I almost forgot I own one of these things. It's got an awesome 'barn find' level of dust on it now. :roll: :lol:

Well the above post never happened lol.

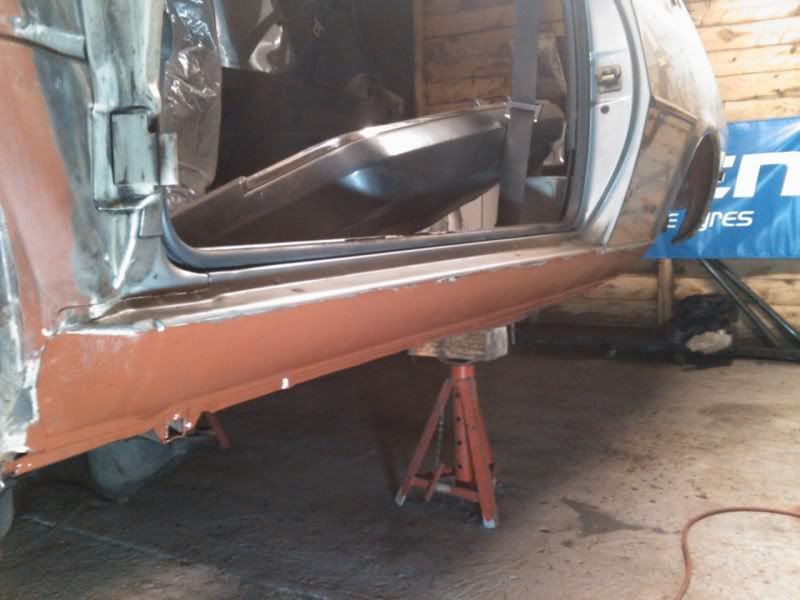
I have barely touched the car since my last post on this thread. When I do feel like doing car stuff, it seems there's always someone elses mode of transport that needs to be repaired or modified etc. Consequently I push the Volvo to the back of the queue. The reasons are two-fold, for one I am sick to fucking death of lying on my back with the grinder vibrating in my hands [insert VND quip here], the second is that I do not want to cut corners and bodge this car and seeing as there are areas I cannot access (see below) I find myself doing nothing, rather than a poor job. When I do work on the car, I bare metal everywhere. Once I have the back wheels smoking and any further work it needs means it's clean and easy to strip down know it will have been worthwhile.

Yes this is taking a while, but I am removing and repairing anything suspect as I go. I hate the idea of just painting over areas of OE protection when more often than not there is diseased metal lurking below.

These cars really are a twat to clean up in this way. Such a crazy shape underneath!

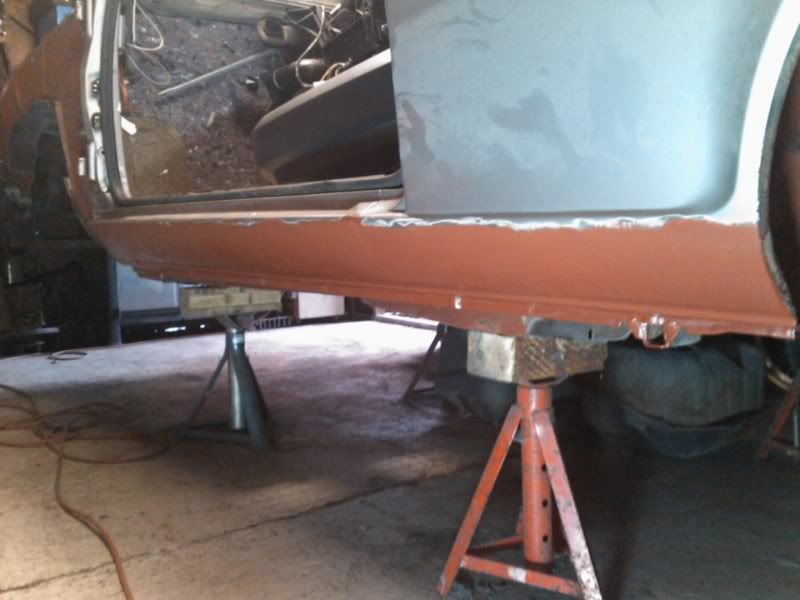
Anyway, there isn't much left to do on the underside of the car, then it's seam sealer, Gravitex and a brush on colour coat and after that the cleaning up and restoration/modification of the running gear. Thankfully I have most of the parts for this, and believe me, it will be a joy to be able to do things standing up! :lol:


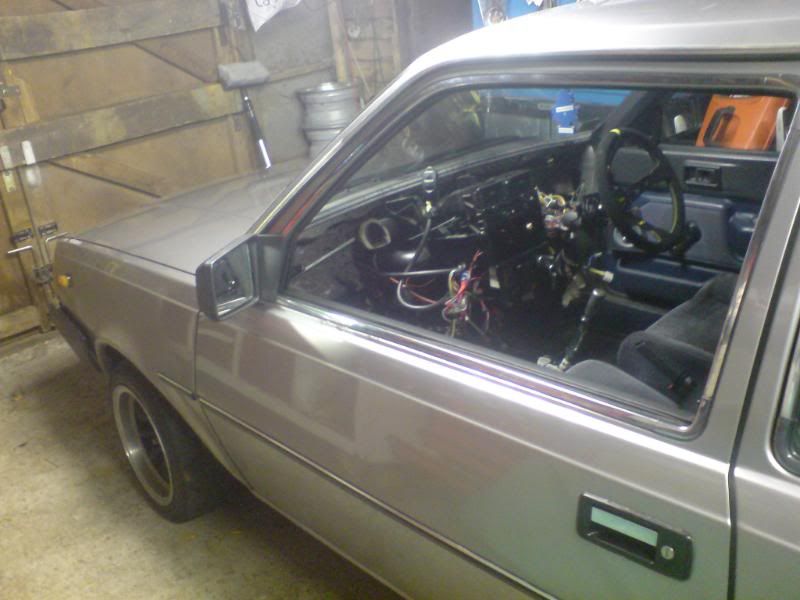
So I had a couple hours on it today, and here's where we are now

Image
Image
Image
Image

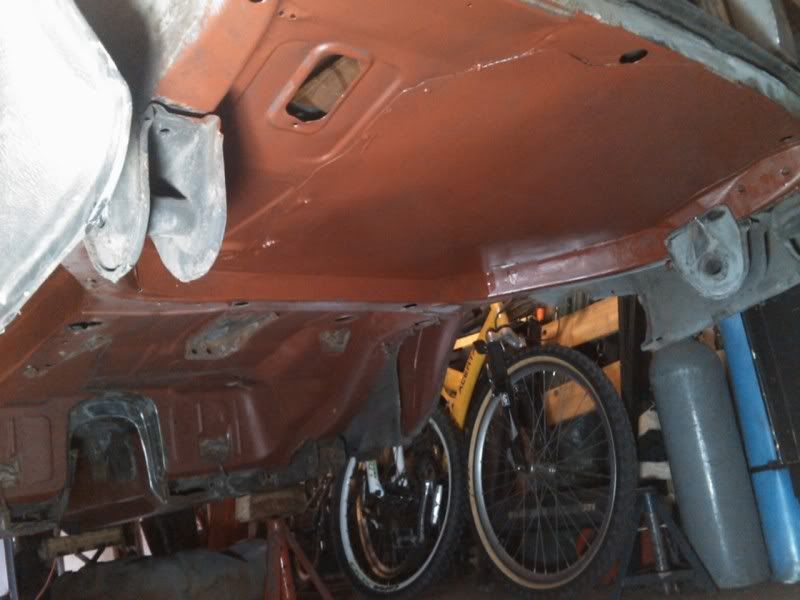
Not a lot to see really. The spare wheel blank is from the roof of my old Nissan. A part of it shall live on!

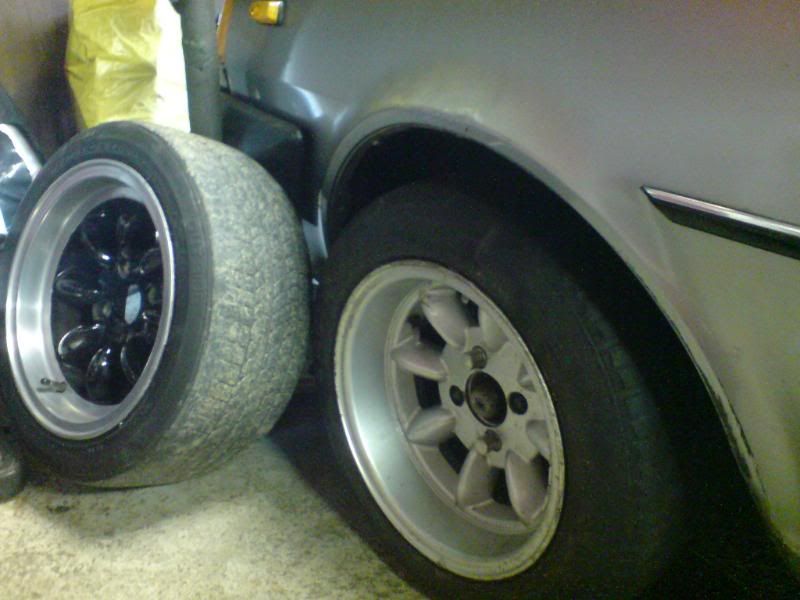
I also bought it some new shoes the other week.

Image

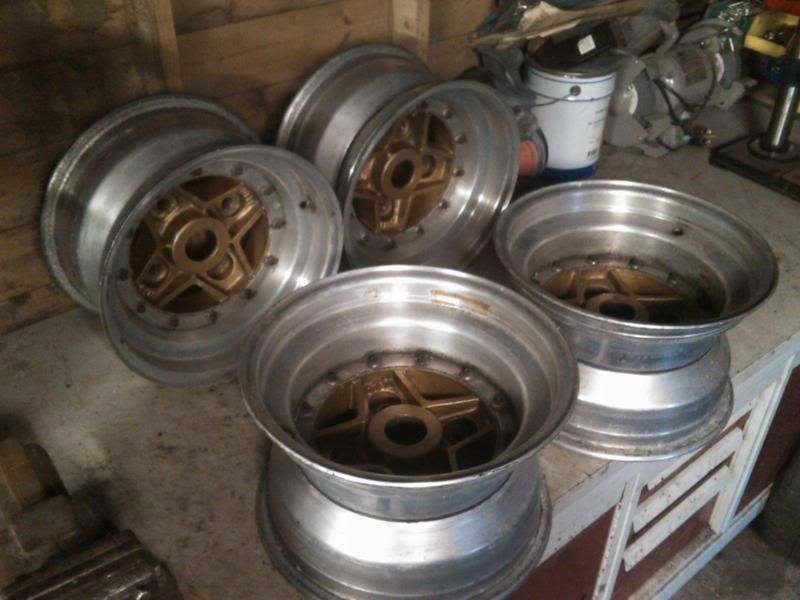
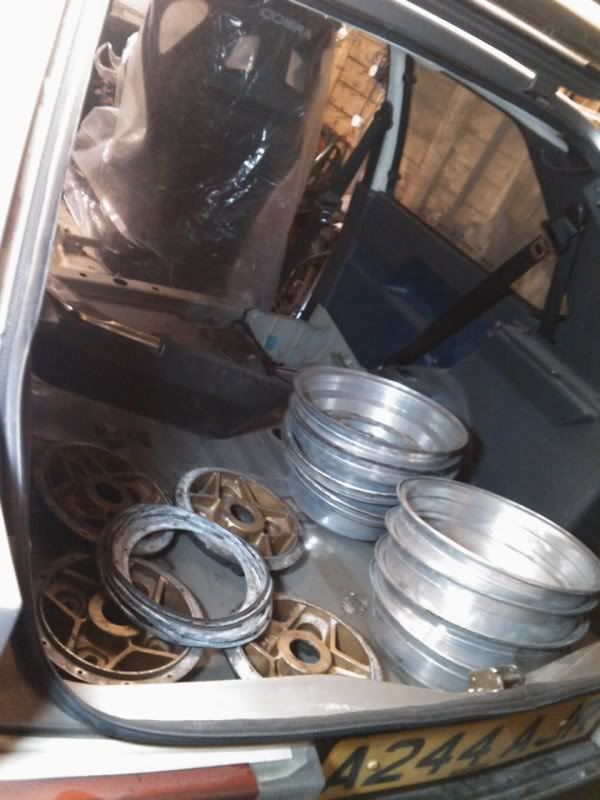
I have them currently split, have started to refurb them and am awaiting new bolts. The original bolts weren't in a hurry to come out, and I had to remove the turbo-caked on brake dust from the barrels with a scotch wheel in a drill lol.

Image
Image

They're 3 piece Gotti 073A's in 13x7 and 13x8 flavour. Right up my street lookswise, if possibly a little small. We shall see.
I feel like I am committing some form of crime in having staggered rims on a RWD car. What would the FWD VAG boys say eh! :roll:

They're 4x140 PCD, but my mate says he can magic me up some adaptors no bother. So score. 8)
What's the general consensus then, we like?


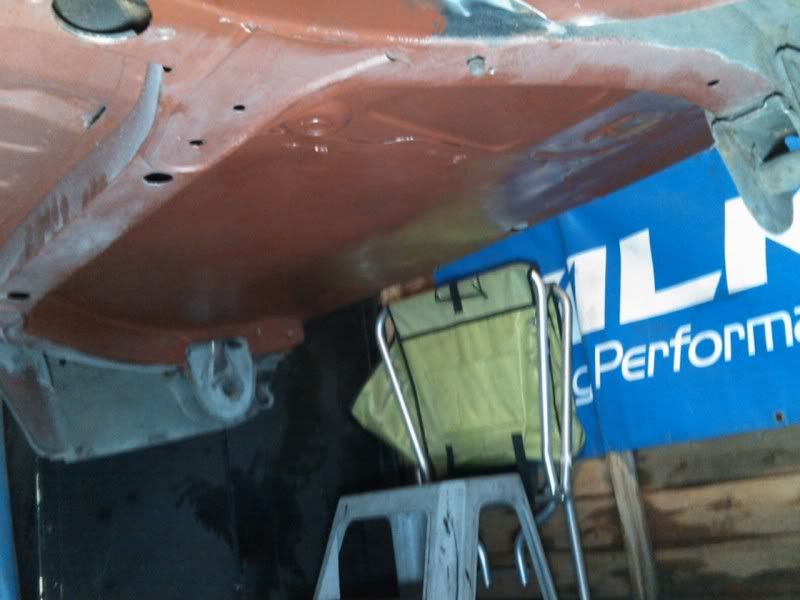
My question as promised. I am finding it hard to access certain areas of the underside of this shell. I have gone as far as I can with the grinder and drill, but there's areas I just can't reach. See pics.

Image
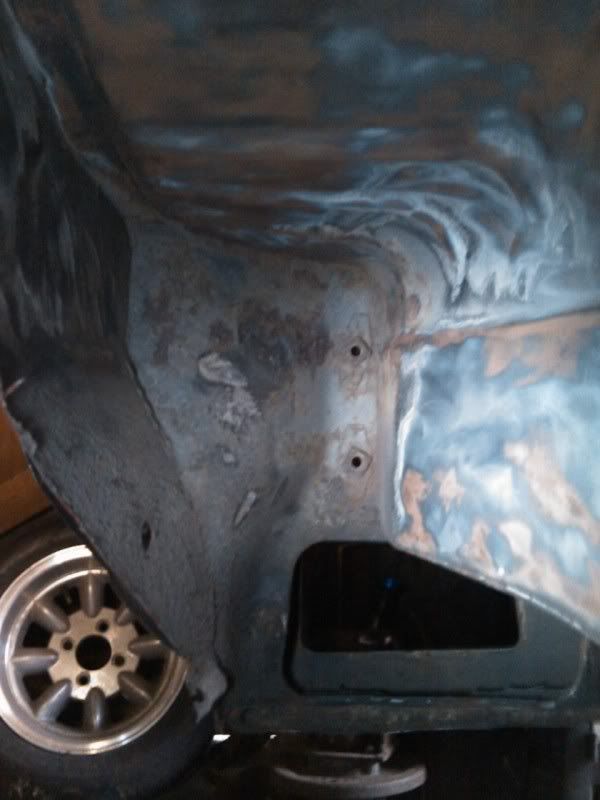
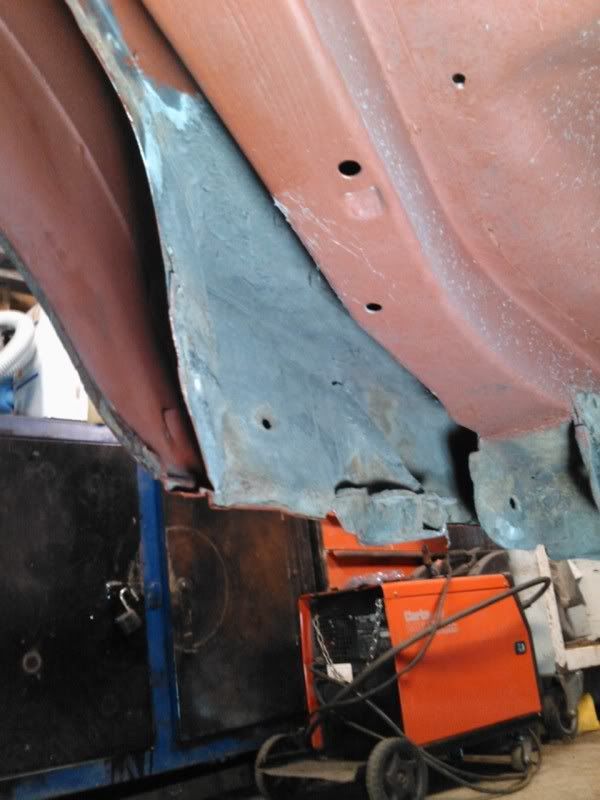
Front inner arch/rear of front panel
Image
Inside of lower rear quarter panel
Image
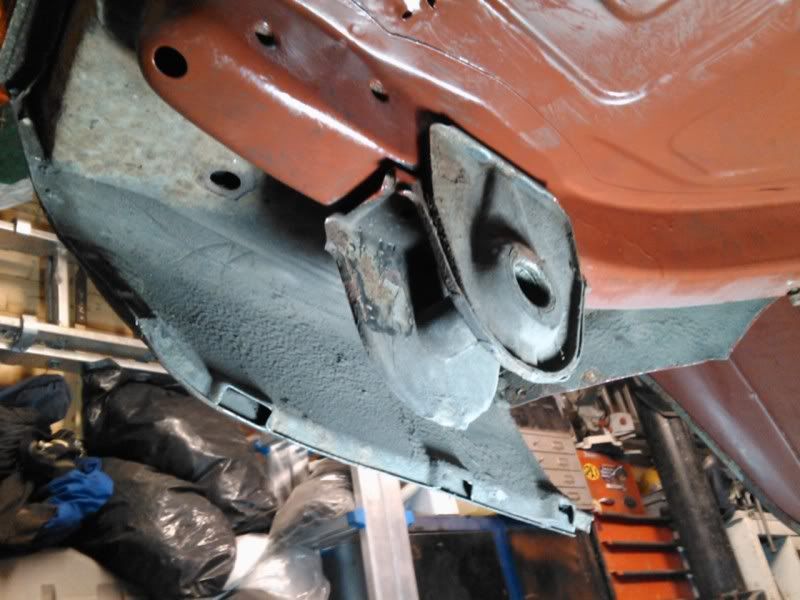
Rear jacking point/spring hanger

What do people use in these areas? They look fine for the most part, but a quick wire brush and then lashing paint over the top isn't an option. I am going to get my compressor back from a mate, then lend another from another mate (same comp), link them together and attempt to use my spot blast gun. Although it was crap when I tried it on a rear beam in the past! I also forget I have some Bitlhamber Deox gel there. I guess that will help quite a bit.

Any ideas?