Page 3 of 7
Re: 360 turbo saloon tidy up
Posted: 24 Aug 2015 07:23 pm
by tralla44
Hey mate..
You have done a very good job.
But i have some quastion.. flywheel stock? Or you something rebuild? What cluch? Audi or what? I can,t understand.
You have been started a engine? Your cluch iz working?
I decided for my volvo
B21ET block and yesterday i was bought B23ft and head will be from this..
I think i need B21 flywheel or i need b23flywheel
Re: 360 turbo saloon tidy up
Posted: 25 Aug 2015 07:21 pm
by Ride_on
Details of the clutch and flywheel are on the first page of the thread.
The flywheel is early 940 solid type, basically the same as the 360 flywheel but with bosch EZK ignition pattern (sometimes called LH2.4). You can use a 360 friction plate but the Audi one uses the full contact area, it should also work in a 360 (edit to add the audi plate slips, need Vauxhall one). I also used the sachs race cover plate, which is a bit tight in the 360 bell housing. The clutch pedal works but I haven't transmitted any power yet. Just doing some engine mount and exhaust adjustments at the moment.
Also I've been adding parts to an eBay collection.
http://www.ebay.co.uk/cln/tonys9168/vol ... 3344403015
Re: 360 turbo saloon tidy up
Posted: 02 Nov 2015 04:10 am
by Ride_on
Update for the start of November:
Had a few setbacks after adding fluids. Got radiator recore just to be sure and some nice waterless coolant only to discover the head gasket was leaking. Sorted that with a skim and new bolts (used a multipoint socket instead of a 6 sided and rounded some of the heads), refilled again and found the heater control valve leaking. Added to that most of the new brake union were also leaking, but just needed tightened (alot).
Anyway, while waiting for parts I've got the interior mostly in, carpets and wiring, dashboard, steering wheel, doors built up, adjusted and all the glass in except for the rear window. I plan to MOT it without the proper back window. just some plastic taped on incase it rains, so that I can take it to the trimmers to sort the rear headlining.
Had fun with locks too.
Also just added the uprated anti-roll bar only to find the tubes missing from the link kit.
Mainly waitng for the bonnet and bumpers from the sprayers, they've had them probably a year now.
Waiting for heater valve, and ARB link tubes to start driving it around under its own steam.
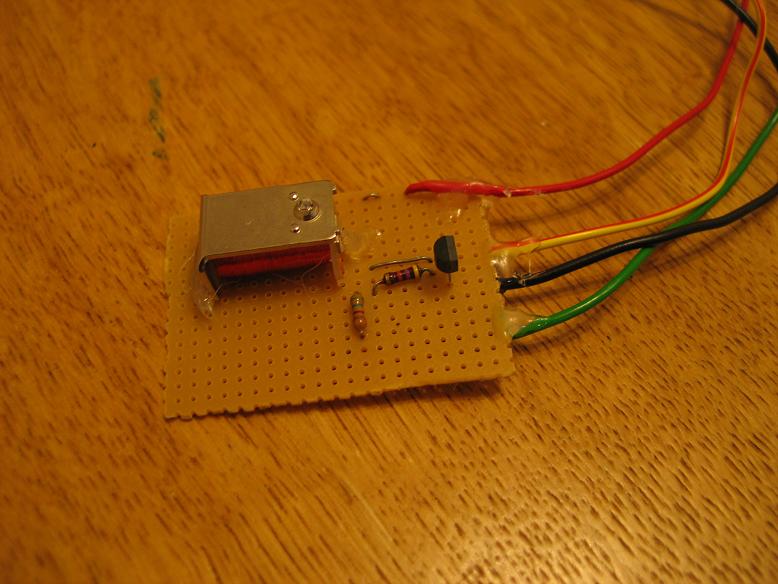
- Convert 5V rpm to high voltage input for the rev counter, as there is no amp and coil attached to this.
- IMG_2071s.JPG (66.12 KiB) Viewed 17067 times

- Exhaust downpipe to be welded to 360 exhaust
- IMG_2034s.JPG (55.29 KiB) Viewed 17067 times
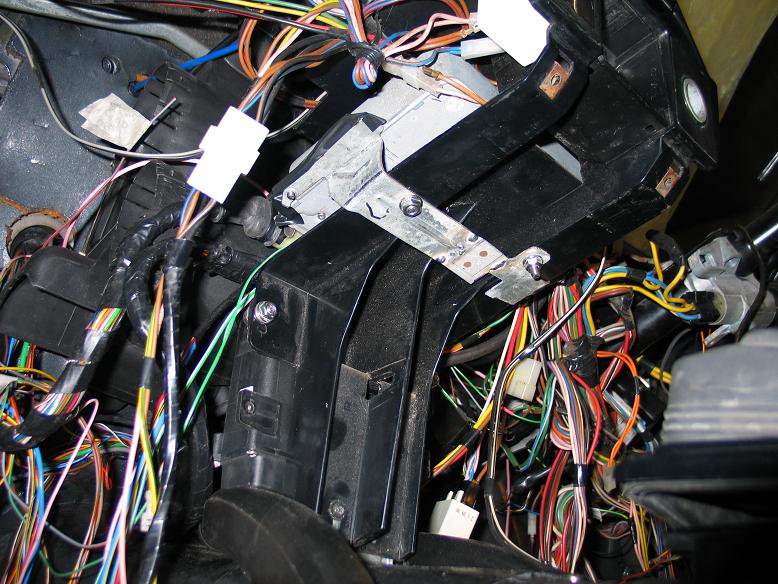
- ECU mounting with modified 940 bracket. Needs V-short bolt and small nut.
- IMG_2075s.JPG (111.66 KiB) Viewed 17067 times
- Engage stealth mode!
- IMG_2072s.JPG (120.86 KiB) Viewed 17067 times
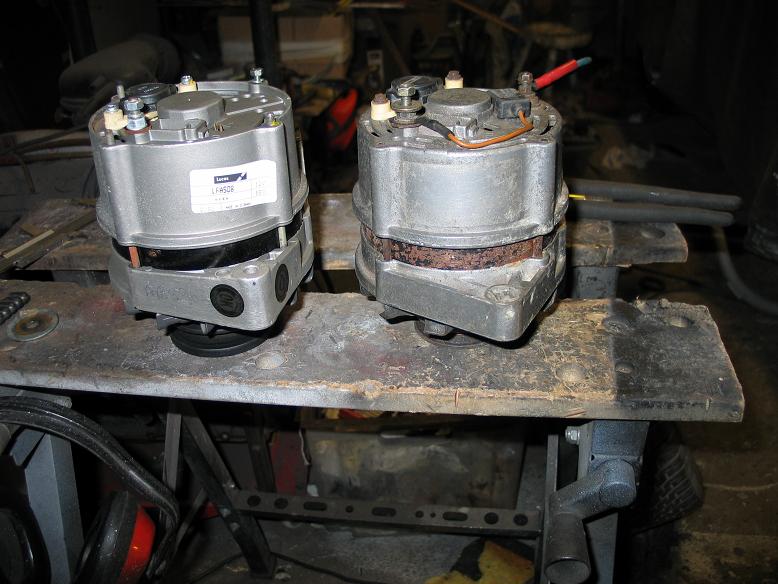
- 55A alternator has a wider adjustment boss, reduces adjustment range, but ok with the larger belts.
- IMG_2051s.JPG (76.97 KiB) Viewed 17067 times
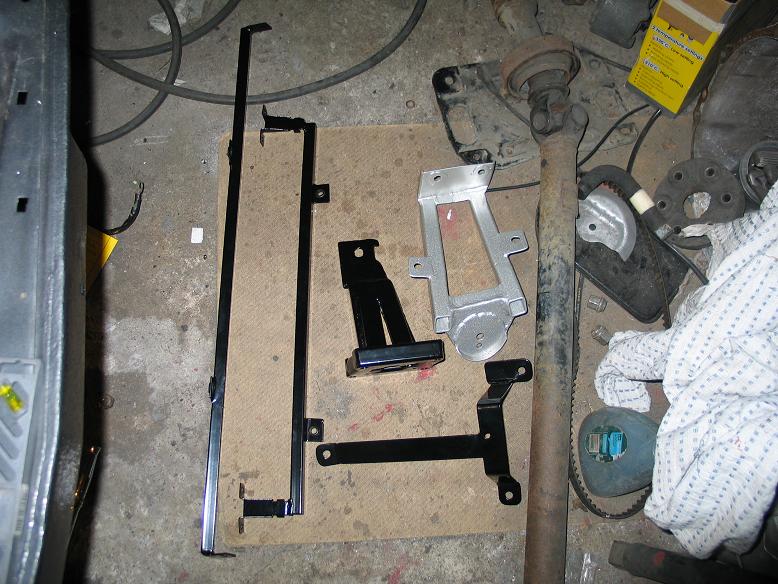
- Some brackets powdercoated all nice
- IMG_2050s.JPG (98.98 KiB) Viewed 17067 times
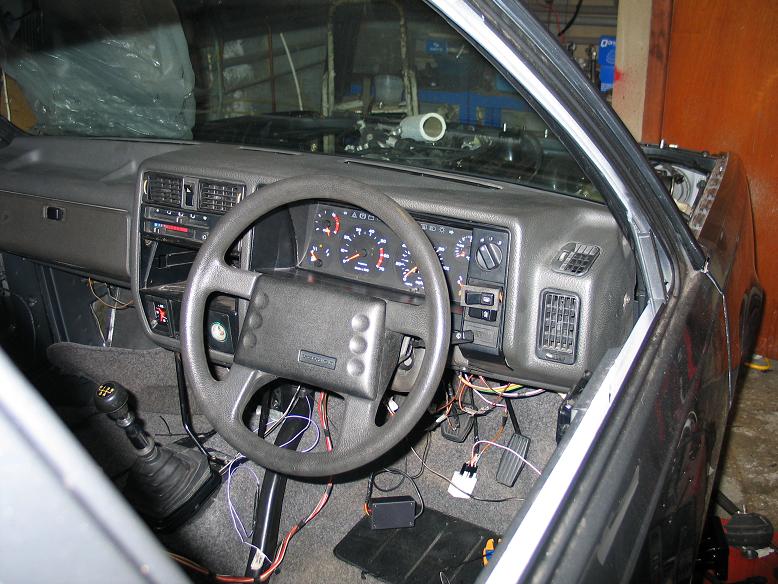
- Starting to look like a car again
- IMG_2097s.JPG (96.97 KiB) Viewed 17067 times
Re: 360 turbo saloon tidy up
Posted: 04 Nov 2015 12:00 am
by SteveP
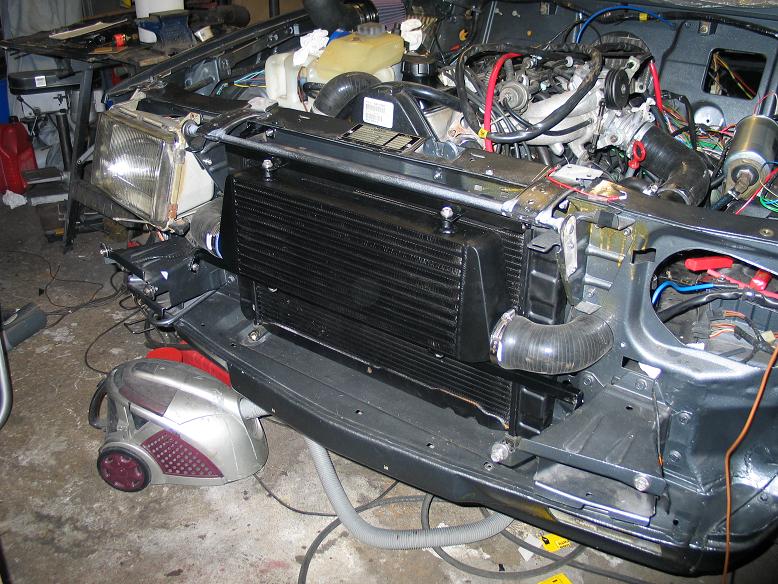
Looking great, that intercooler setup!
Re: 360 turbo saloon tidy up
Posted: 04 Nov 2015 09:33 pm
by Ride_on
Going for the black on black look, although this was mainly for the sleeper concept.
I got black window trim, black grill surround on a dark grey body, thinking of a black head lining too

Re: 360 turbo saloon tidy up
Posted: 04 Nov 2015 09:37 pm
by 360beast
Looking good
Do you want to do the wiring for my 360

Re: 360 turbo saloon tidy up
Posted: 07 Nov 2015 01:41 pm
by SteveP
Could you ever get a black headlining on saloons? My old GLT saloon had a white headlining and to be honest it made the interior seem a fair bit more roomy, but the black does look good!
Re: 360 turbo saloon tidy up
Posted: 09 Nov 2015 09:54 pm
by tralla44
What engine mounts do you use?
Uh already sea you use a costume mounts..
I have the same original.
Re: 360 turbo saloon tidy up
Posted: 10 Nov 2015 03:05 am
by Ride_on
I used the 940 bush for the RHS mount and made custom brackets. More details on the first page. They are also in the pictures above powder coated silver and black.
Its possible to use the original brackets if you reroute the oil return but its still tight and I didnt want any rattles.
Re: 360 turbo saloon tidy up
Posted: 10 Nov 2015 08:44 am
by trabitom99
Excellent work, hugely impressive stuff ... You must be itching to give it a blast.
That's a good idea!
Cheers
Tom
Re: 360 turbo saloon tidy up
Posted: 11 Nov 2015 11:04 am
by MCHUDD
Re: 360 turbo saloon tidy up
Posted: 11 Nov 2015 04:23 pm
by SteveP
[quote="MCHUDD"Are you missing a dash dimmer switch below the fog switch?[/quote]
It's a rotary dial on the later cars - looks like it's in place
Re: 360 turbo saloon tidy up
Posted: 11 Nov 2015 10:30 pm
by Ride_on
Yeah its in there, lost in the compression it seems, damn jpegs.
Re: 360 turbo saloon tidy up
Posted: 12 Nov 2015 12:23 am
by Ride_on
trabitom99 wrote:Excellent work, hugely impressive stuff ... You must be itching to give it a blast.
God yes, LSD Turbo hmmm... but stuck without a heater valve and mainly ARB link tubes missing from Dai's 23mm ARB, and relying on Dia to post them out and no date yet. Not sure I can bring myself to pollute the car with old rust original ARB. Heater valve could do something either with wrong valve or connector. Robbert is on holiday until 17th.
Still a few bits to do though.
Re: 360 turbo saloon tidy up
Posted: 04 Jan 2016 02:53 am
by Ride_on
First update for 2016, hope everyone had a good holiday.
I've mostly been revisiting somethings, but progress has been made.
Bumpers finally sprayed and collected, they missed a bit!
Coolant and heater valve sorted thanks to Robbert (NOS supplied) and Richard (finance facilitator)
Wheels and tyres
Sorted front spring heights (chopped out 2" from rally springs)
Investigated idle problems - open load signals for auto box and AC, grounded
Fitted bumpers and headlight wipers
Put seats in--DROVE IT!!! (moved it just)
Faffed about with mirror on ebay (everyone selling broken ones!)
Made a heat shield for the turbo
Sorted some electrical probs with wiper switch and usual light connections
Just a few bits to do for MOT now
Driver door mirror (lined up a goodish one on ebay hopefully)
Wiper arm cosmetic refurb (not totally necessary for mot)
Rear axle adjustment
Fill up and test squirties
Fit rear number plate (can you use the holes in the panel somehow?)
Insurance! yikes
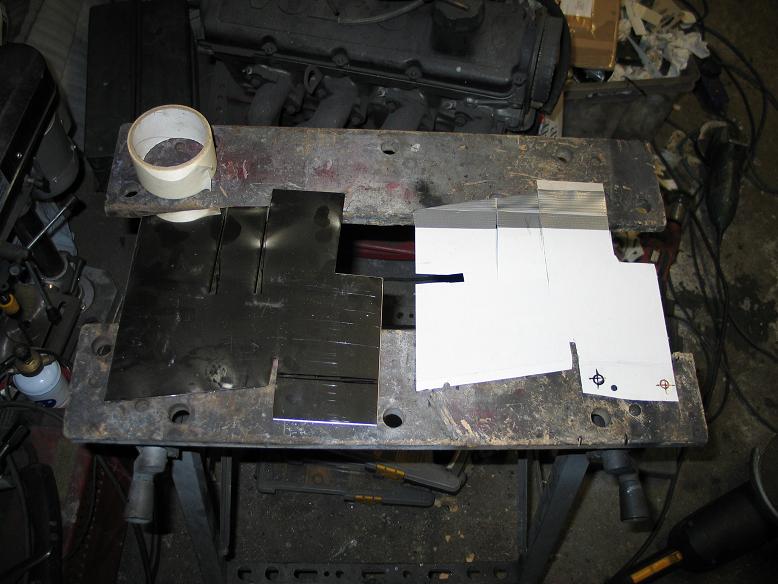
- Template method for heat shield
- IMG_2151s.JPG (67.02 KiB) Viewed 16889 times

- Shield installed
- IMG_2152s.JPG (112.48 KiB) Viewed 16889 times
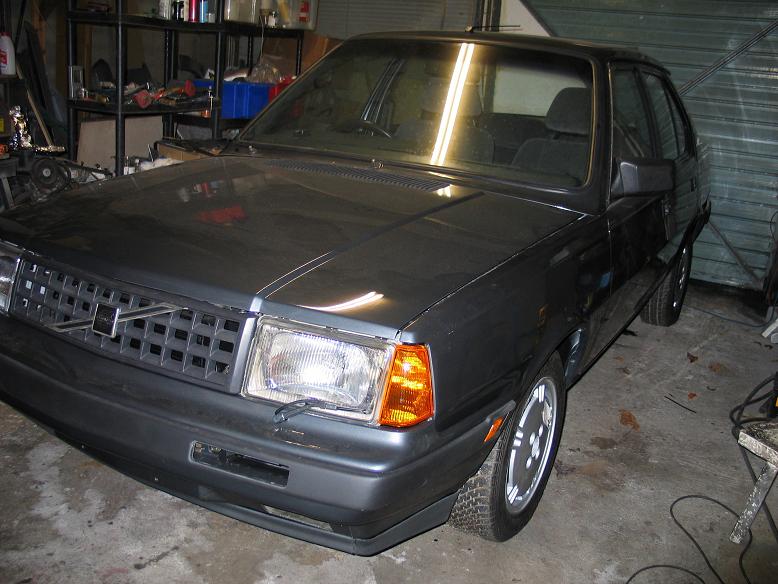
- Nearly there
- IMG_2157s.JPG (77.99 KiB) Viewed 16889 times